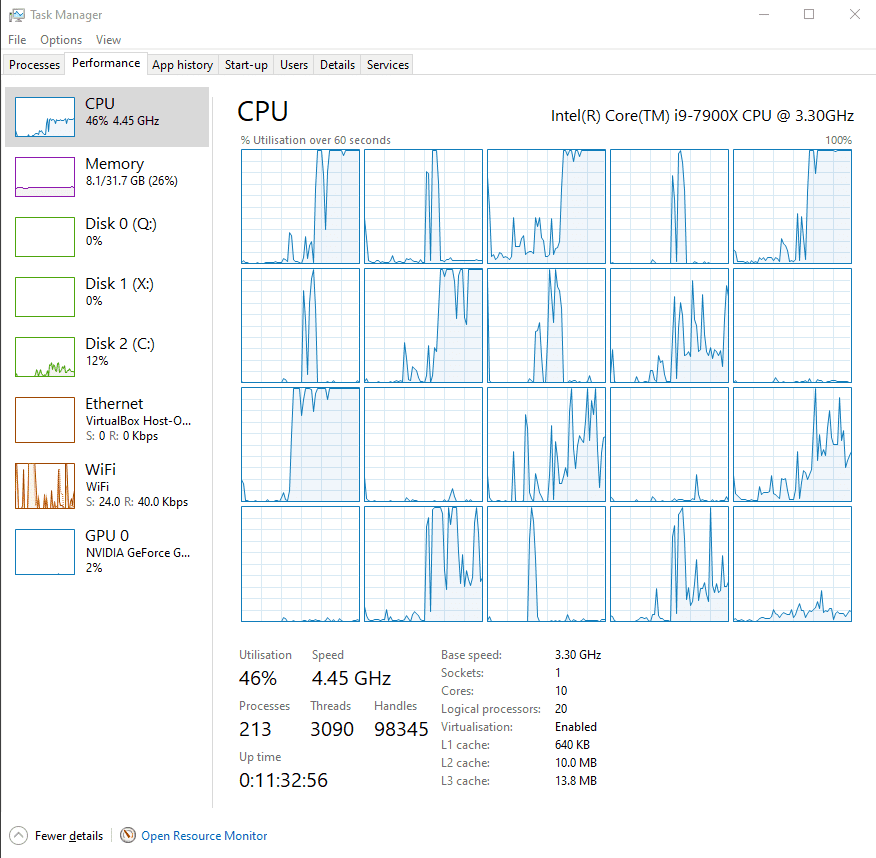
Task Manager in Windows has a helpful graph in the performance tab that shows how much of your CPU processing power is being used but this graph doesn’t tell the full story. Modern CPUs have multiple processing cores and you may find that many applications can’t take full advantage of multiple processor cores. You can change the CPU usage graph to show the usage of each of your computer’s processor cores.
Firstly, you’ll need to open Task Manager, you can do this by pressing Control, Shift, and Escape at the same time. Next, you need to move to the “Performance” tab.
Tip: If you can’t see the performance tab you may be in the streamlined view. Click the “More details” arrow in the bottom-left corner to open the full Task Manager view.
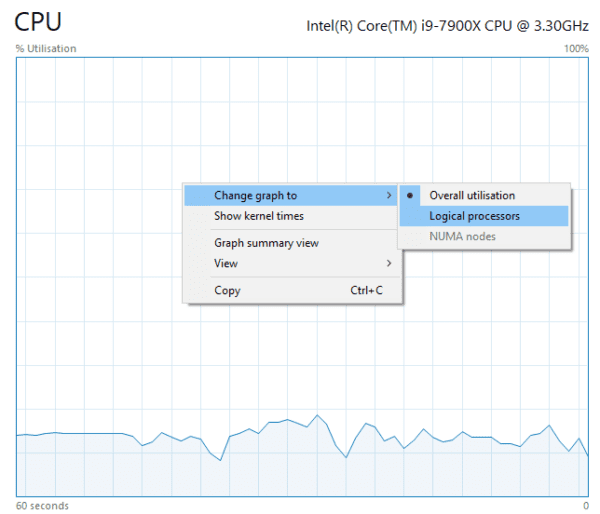
Once in the performance tab you’ll see the standard CPU usage graph, this shows the overall usage of your CPU. You can change this to show the usage of individual processing cores by right-clicking on the graph, selecting “Change graph to” and then clicking on “Logical processors” in the sub-menu.
The logical processor graphs will show the individual usage of each core of your CPU. In CPUs with hyperthreading enabled the extra logical processors will be shown and will be indistinguishable from physical processor cores.
When using this view, you may find that some processes are better than others at using all of your available processors. For example, some apps don’t like using the hyperthreaded core on each physical processor core while others can only ever use one processor core at a time.

Tip: Unfortunately, even if you can see that an app isn’t using all of your processor cores there’s no way to force it to do so. The app has to be designed to support multiple processor cores. If you want this to change your best bet is to contact the provider of the software and ask them to add multithreading support.