Do you keep getting error 0xc1900101 whenever you try to update your Windows 11? Learn how to fix error code 0xc1900101 on Windows 11 to get rid of this annoying problem forever.
Updating your Windows computer should be as easy as a walk in the park. All you need to do is check for updates and let Windows take care of the rest. Well, that’s easier said than done due to all those annoying errors codes that may pop up during the update process.
One such error is error 0xc1900101, which can pop up on your computer screen at any time during the update process. In this article, let’s take a closer look at error code 0xc1900101 and how you can fix it. Let’s jump right in, shall we?
Contents
- 1 What Is Error 0xC1900101 in Windows 11?
- 2 Reasons for Error 0xc1900101
- 3 How to Fix Error 0xC1900101 When Upgrading to Windows 11
- 3.1 1. Make Space in the Internal Storage
- 3.2 2. Disable or Uninstall Antivirus Apps
- 3.3 3. Disable Unused Hardware Drivers
- 3.4 4. Run the Update Troubleshooter
- 3.5 5. Reset the Update Components
- 3.6 6. Update All Device Drivers
- 3.7 7. Run the SFC Scan
- 3.8 8. Run the DISM Command
- 3.9 9. Install the Latest .NET Framework
- 3.10 10. Clean Boot Into Windows
- 3.11 11. Manually Download the Updates
- 3.12 12. Fix for ASRock Motherboards
- 3.13 13. Clean Installation of Windows 11 From USB Disk
- 4 Error 0xC1900101: Final Words
What Is Error 0xC1900101 in Windows 11?
You might be curious to know what’s the error all about. So, I’ll touch upon the error 0xC1900101. This error code usually appears when you’re trying to upgrade your Windows 10 to Windows 11. It can also pop up when you’re performing regular Windows 11 updates.
This error code can appear anytime when the upgrade is taking place. After all, the code 0xC1900101 is a generic rollback code and indicates that the system has a driver which isn’t supported by the upgraded version.
Reasons for Error 0xc1900101
A number of reasons could be responsible for the error 0xC1900101, which is why a lot of people experience this during the Windows 11 upgrade or update process. Here are the most common reasons why you get the error code.
- Outdated Drivers
If your computer has system drivers that aren’t compatible with the updated version, the update will stop, and you’ll get the error 0xC1900101. - System Hardware Issues
Missing system files, problematic hardware components, and insufficient storage space are other major reasons for this error. - Problematic Installation Media
If the use improper installation media or damaged installation files, you have a high chance of getting this error code. - Unused Drivers and Devices
If your system is connected with a number of unused SATA devices and drivers, it could also cause trouble during an OS upgrade which will give rise to this error. - Antivirus Software
Though it’s not a common reason, at times, antivirus software could stop the Windows update and make the error 0xc1900101 appear on your computer.
How to Fix Error 0xC1900101 When Upgrading to Windows 11
1. Make Space in the Internal Storage
To fix this error 0xc1900101, the first thing to do is to make sure you have sufficient space in your storage disk where your Windows 11 upgrade or update will be stored. Usually, the OS is stored in the C drive of your Windows computer. If yours isn’t, confirm the location of your OS for this remedial method.
Once you know which drive stores the operating system, check if that drive has sufficient storage or not. By opening This PC, you can see all the drives along with the available space in each of the drives. For Windows updates, that drive should have at least 40 GB of empty space.
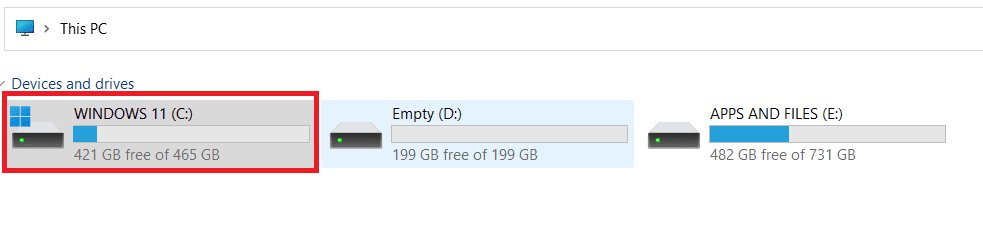
If that drive has any less space than that, you need to make more room on it by deleting unnecessary files or moving some files to other drives that aren’t used for Windows installation or upgrade.
2. Disable or Uninstall Antivirus Apps
If you have any third-party antivirus or anti-malware app installed on your computer, it might be the reason why you’re getting this error 0xC1900101. Hence, you need to uninstall these antivirus software and see if the error appears or not.
If you’re not willing to uninstall the application, you can disable it temporarily during the Windows update. This should stop the error code from appearing, and the update will be completed smoothly.
Also Read: Best Free Antivirus for Windows 11
3. Disable Unused Hardware Drivers
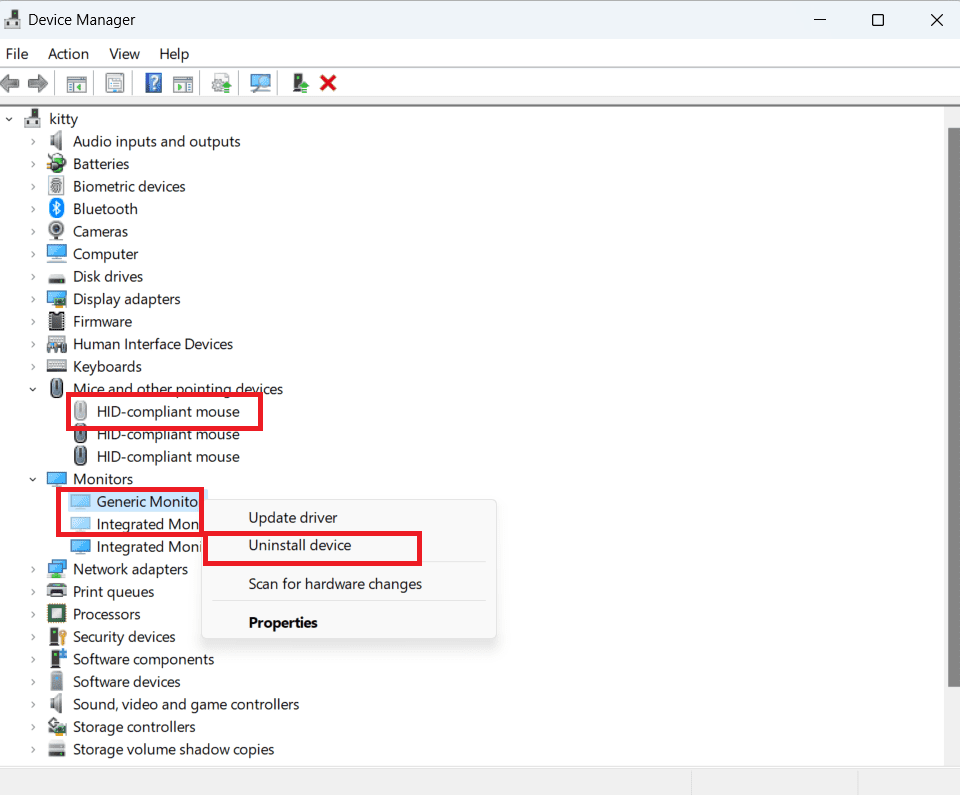
If your computer has hardware drivers that you don’t use any longer, you need to uninstall those for the seamless Windows 11 upgrade. Just follow these steps below, and you can remove those drives easily:
- Type Device Manager in the Search bar and click on the best match.
- When the Device Manager window opens, click on View and select Show hidden devices.
- Double-click on each device entry to expand that.
- From the list of drivers, find out the gray ones.

Uninstall the grayed-out drivers to fix error 0xc1900101 - Right-click on those grayed-out drivers and click on Uninstall device.
- Follow the prompts to uninstall the unused drivers.
- Do this for all the grayed drivers, but before that, make sure you don’t need to use those.
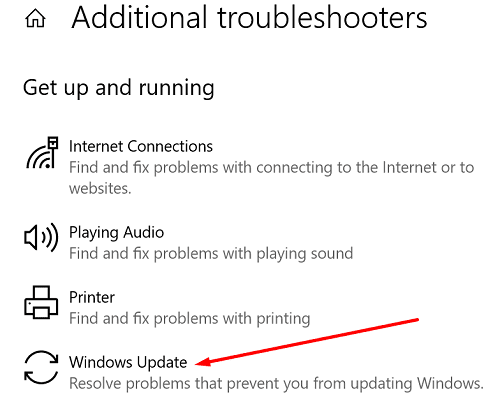
4. Run the Update Troubleshooter
Run Windows 11’s built-in update troubleshooter to identify what’s blocking the update.
- Go to Settings, and select Update and Security.
- Then click on Windows Update.
- Select Additional troubleshooters and run the Update Troubleshooter.

- Go back to Windows Update and check for updates again.
Additionally, make sure to unplug extra hardware. Unplug your external hard drive, keyboard, and all the other peripherals connected to your computer.
5. Reset the Update Components
If the troubleshooter says all is fine, try resetting the Update components to get rid of this annoying Windows 11 error.
- Press the Windows and X keys, and select Command Prompt (admin).
- Run the commands below, hitting Enter after each line:
net stop wuauservnet stop cryptSvcnet stop bitsnet stop msiserverRen C:\Windows\SoftwareDistribution SoftwareDistribution.oldRen C:\Windows\System32\catroot2 Catroot2.oldnet start wuauservnet start cryptSvcnet start bitsnet start msiserver
- Check for updates again.
6. Update All Device Drivers
As mentioned earlier, outdated drivers could be the reason you’re getting this error 0xC1900101. So, you need to make sure all drivers are updated and then try to reinstall the updates.
- Press Windows + I to open the Settings section.
- From the left panel, select Windows Update.
- Expand Advanced options from the right.
- Click on Optional updates.
- Expand the Driver updates and select all the available updates for your system drivers.
- Click on Download & install button at the bottom.
- Windows will update these drivers automatically.
- When done, it’ll prompt you to restart your computer.
7. Run the SFC Scan
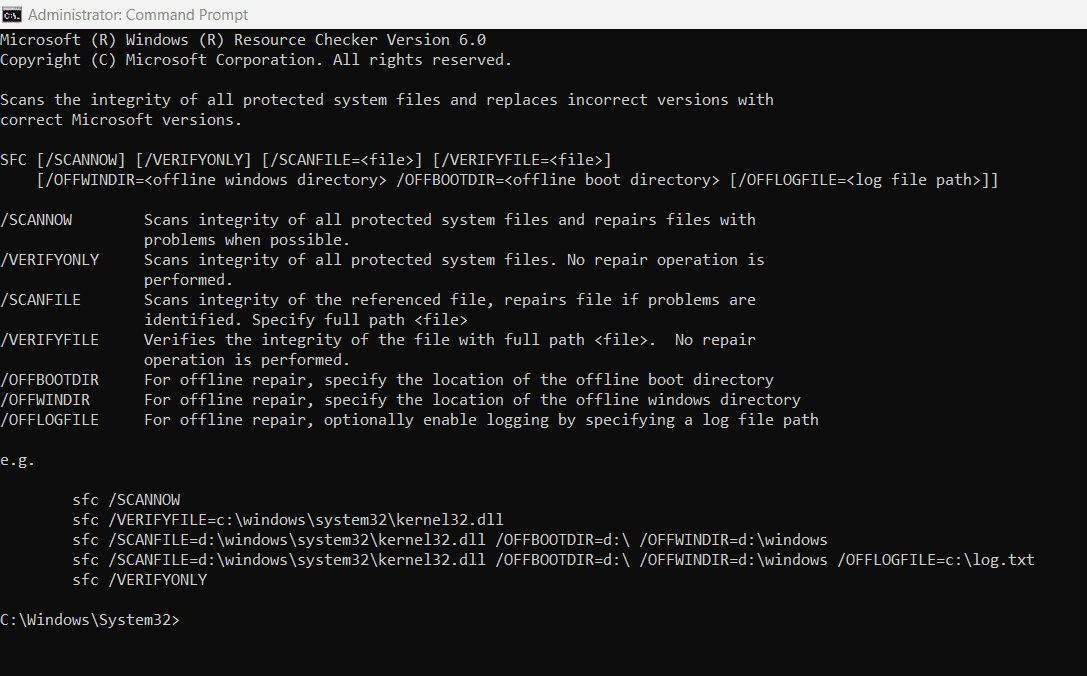
Is any corrupt or missing system file responsible for this error 0xc1900101? Even if there is, you could find out and fix that using the in-built system file checker or SFC scan. To perform this scan on your computer, follow these steps:
- Type cmd in the search bar.
- When the Command Prompt option appears, click on Run as administrator from the right.
- In the Command Prompt window, type: sfc /scannow and hit Enter.

Perform SFC scan through Command Prompt to find any system issues - You need to wait for time as this tool will scan the system. If there are any discrepancies, it’ll fix those.
8. Run the DISM Command
DISM is another command-line tool that can be used to get rid of the error code 0xc1900101. Its execution process is much similar to the SFC scan mentioned in the previous method.
- In the search bar, type cmd.
- Click on Run as administrator from the right panel for Command Prompt.
- When the command window opens, type the following command and hit Enter:
DISM.exe /Online /Cleanup-image /Restorehealt
- The scanning process will take some time to be completed.
- Then, you need to restart your system and see if the error still appears when you try to install the update.
9. Install the Latest .NET Framework
You might be getting error code 0xc1900101 because of the outdated .NET framework of your computer. To install the latest version of this framework, follow these steps:
- Open the Run box by pressing Windows + R keys.
- Now, type appwiz.cpl in that box and hit Enter key.
- The existing .NET Framework will appear in a list.
- Whether you have single or multiple versions, you need to uninstall them all.
- Now, visit the official website of NET Framework.
- Go to the Supported versions segment.
- You need to click on the link that says recommended.

Download the latest .NET Framework Runtime version for your OS to fix error 0xC1900101 - When taken to the next page, download the runtime version of the .NET Framework for non-developers.
- As this is the latest version, there won’t be any errors due to the old .NET Framework version.

10. Clean Boot Into Windows
Applying this method, you can create a clean boot environment on your Windows computer where all the third-party services will stay disabled temporarily. Here are the steps you need to follow:
- Press Windows + R keys to open Run box.
- There, type msconfig and click on OK.
- The System Configuration window will open.
- Select the Services tab first.
- At the bottom, checkmark the box for Hide all Microsoft services.

Hide all Microsoft services and disable the remaining third-party services - Now, only the third-party services will be visible. Click on Disable all button.
- After that, select the Startup tab and click on the Open Task Manager hyperlink.
- Click on all the third-party services one after another, and click on Disable button from the top menu.
- When done, return to the System Configuration window and click on the OK button.
- Restart your computer to get a clean boot environment. Now, you can proceed with updating your Windows 11.

11. Manually Download the Updates
If the error 0xC1900101 persists, you can try to download the updates manually. If you’re trying to download a cumulative update, go to Microsoft’s Update Catalog website. Then enter the KB number in the search field and hit the Download button. If you’re trying to install a feature update, use the Update Assistant to get the job done.
12. Fix for ASRock Motherboards
If you’re getting the error code 0xc1900101 on a computer equipped with an ASRock motherboard, you need to update the latest available BIOS version. For step-by-step instructions, go to ASRock’s support page. After that, enter BIOS (F2), disable the Compatibility Support Module, and download and run the Windows10Upgrade9252 executable.
13. Clean Installation of Windows 11 From USB Disk
If none of the above methods are capable of fixing error 0xC1900101, the last option for you is to install a fresh copy of Windows 11 using a USB drive. For this, you’ll need a virus-free and blank USB drive which is a minimum of 8 GB in size.
First, you need to download the Windows 11 installation media creation tool from the Microsoft website. Then, choose the USB flash drive to turn it into a bootable USB. Once Windows 11 OS is downloaded in the USB, you can install that copy to your computer to have an error-free installation process. To know about the complete step-by-step clean installation, check out our article on reinstalling Windows 11.
Also Read: Check If You Can Upgrade to Windows 11
Error 0xC1900101: Final Words
The 0xC1900101 error when upgrading to Windows 11 from Windows 10 or applying regular updates to Windows 11 could stop you from keeping your Windows PC up to date. This error also stops you from installing the regular security patches published by Microsoft.
Ultimately, this error could make your personal or work Windows 11 PC vulnerable to hacking and phishing attacks. Don’t take chances! Just try the troubleshooting steps mentioned above in the order they appear and fix the issue already.
Also, if you know any other way to fix Windows 11 error 0xC1900101 when updating or applying major operating system features upgrade, do mention that in the comment box below. Share this article with your friends, teammates, colleagues, and social media followers to help them when they face the same problem.
Next up, Error “Cannot Delete Folder: The Directory Is Not Empty” Fix.