
You can miss out on something important if the background noise is too high. But if you can read what’s being said, you can read instead of hearing; that’s where closed captioning comes in. It’s the text you’ll see at the bottom of your display that’ll show you what the speaker is saying. Thanks to this feature you’ll never miss out on what’s being said.
If English is your second language, reading what the speaker says makes understanding a whole lot easier. Closed captioning is different from open one. The viewer can turn closed captioning on or off, while the Open one is part of the video and can’t be turned off.
Contents
How to Enable Closed Captioning on Zoom
To turn on closed captioning, you’ll need to sign in to your accounts on Zoom’s official site. Once you’re in, go to:
- Account Management
- Account Settings
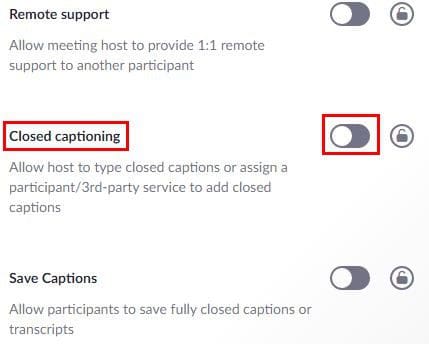
- Meeting tab
- In Meeting (Advanced)
- Enable closed captioning
It’s also possible to turn on closed captioning for a group of users. You can do this by going to Zoom’s official site and signing in. Once you’re in, go to:
- User management
- Group management
- Click on the group of interest
- Settings tab
- Meeting tab
- In meeting (advanced)
- Toggle on closed captioning
You can make this option mandatory for everyone by clicking on the lock to the right of the option.
Using Closed Captioning
Once you’ve enabled the option, the closed captioning option will appear at the bottom with the rest of the available options.

When you click on the option, you’ll see options such as Assign a participant to type. What this first option does is that you assign some to type closed captions during the meeting. Then there’s the option where you (the host) type the closed caption.
You’ll also see Copy the API token. You can give a third-party closed captioning service to integrate the service with your meeting with this option. Finally, there’s Enable Auto-Transcription. This last option will give you live transcription. Don’t worry about your participants knowing about this service since they will be notified.
How to Assign Someone to Type Closed Captioning in Zoom
To assign a participant to type closed captioning, you’ll need to click on the Assign participant to type option. Choose someone from the participant’s window and place the cursor over their name until you see the blue more option. Click on the Assign to type.

When the closed captioning has been assigned, a notification will be seen in the meeting controls. If you want to enter the closed captions as a participant, you’ll need to:
- Click on the closed caption option at the bottom
- When the closed caption box opens, type what you want the closed caption to say
- To submit what you type, press Enter
Only one person can be assigned to type the closed caption. If you want to use the option in a breakout room, you can only have one breakout session. Unfortunately, if you want to use a live transcript in a breakout room, you can’t since it’s currently not supported.
Zoom participants can also request for the host to start closed captioning. This can be done anonymously; don’t be surprised if you don’t see anyone’s name when asked for closed captioning. The host will see three options when asked for the feature. You can choose from enable, decline, or decline and don’t ask again.
Conclusion
If you don’t want your guests to miss a single word said in your meeting, enable closed captioning. You can turn it on from the very beginning or halfway through the meeting. Do you find closed captioning useful? Share your thoughts in the comments below, and don’t forget to share the article with others on social media.