

The Microsoft SwiftKey keyboard on Android is well-liked because it’s both flexible and capable of learning from how you use it. One of the most important things in a keyboard app is the layout and how natural it feels to use.
Microsoft SwiftKey allows you to configure the size and shape of the keyboard in a simple and intuitive way. You are also able to configure the key layout and how some of the keys appear.
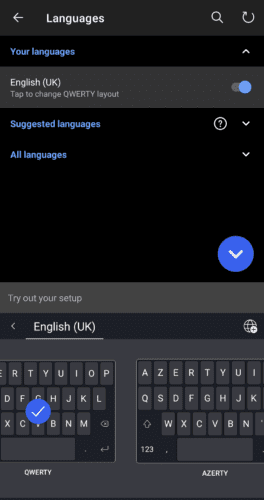
To change the keyboard layout, you need to open the SwiftKey app, then tap on “Languages”. Once in the Languages screen, if you tap on your language you will see a list of supported keyboard layouts. You can scroll through the keyboards layouts that are supported for your languages at the bottom of the screen. Once you’ve made your selection just tap it to confirm.
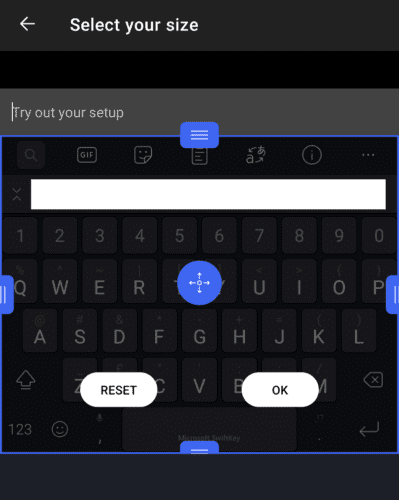
To change the size or positioning of the keyboard on the screen you need to tap on “Layout and keys” on the main SwiftKey settings page, then tap on “Resize”. In the resize mode you can easily adjust the dimensions you want the keyboard to take up with the outside sliders. The interior slider is used to configure the positioning of the keyboard.
Adjust each of these settings until you’re happy with it, then press “OK” to save. If you don’t like your changes, just tap “Reset” to reset the size and shape of the keyboard to default.
To configure the keys that are on your keyboard, you also need to be on the “Layout and keys” menu. The second from top option “Number row” can be used to enable or disable a row of numbers from displaying at the top of the standard keyboard. This setting can be used to quickly type numbers but causes the keyboard to take up more screen space.
You can also configure the appearance of the numbers & symbols keyboard by tapping “Number position in number & symbols layout”. Here you can choose between the standard experience of the numbers across the top or placing them at the side in an approximation of a numpad found on some physical keyboards.
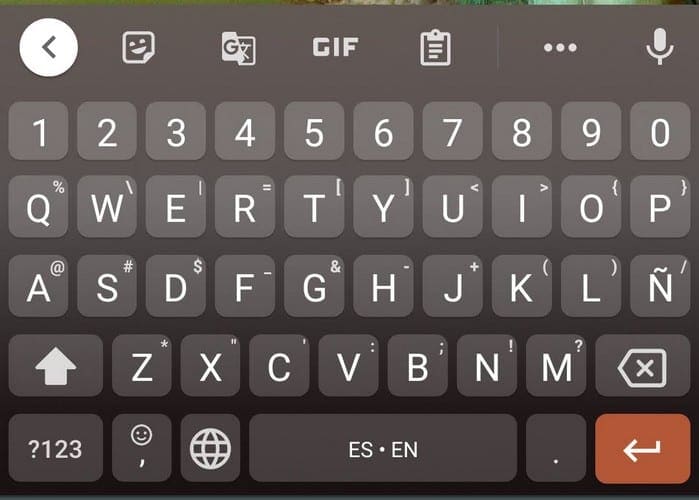
“Accented characters” allows you to type accented characters by long-pressing relevant keys, then swiping left and right to select the correct accent. “Arrow keys” places a set of four arrow keys under the keyboard that can be used to scroll through typed text. Finally, “Key pop-ups” is used to enable or disable a popup that appears above each key you press.
Tip: You can configure how long you need to hold a key for a long-press to be registered, via the slider at the bottom of the “Layout & keys” page.


How to switch fast between selected languages?
I have one question about can you set it up so that the @ sign is available all the time without long press