
Your AirPods microphone may sometimes stop working on Windows. The earbuds can play sound fine, but there’s no option to select the AirPods mic. That can be a major issue, especially if you need to regularly attend video meetings. Let’s explore how you can quickly solve this annoying issue.
What to Do If Your AirPods Mic Won’t Work on Windows
Unpair Your Devices
To solve the problem, unpair your devices. Navigate to Windows Settings, select Bluetooth & Devices, and locate your AirPods. Click on the three-dots, and choose Remove device.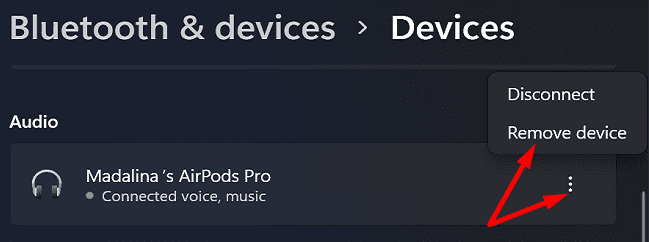
Put the earbuds back into the case, and restart your Windows computer. Then, pair your AirPods with your Windows computer again, and check if you notice any improvements.
Allow Apps to Access Your Mic
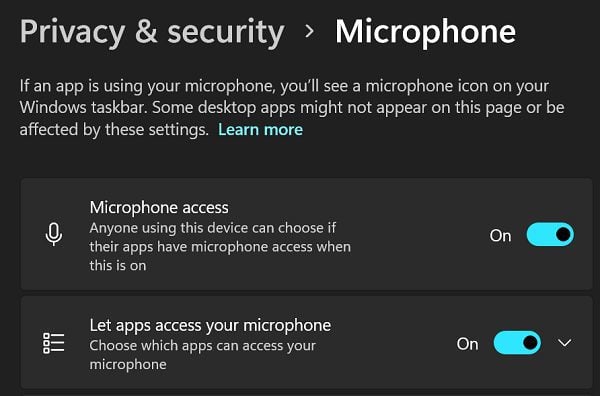
Check your privacy settings, and make sure apps can access your AirPods microphone.
- Go to Settings.
- Select Privacy & Security.
- Scroll down to Microphone.
- Make sure to enable Microsoft Access.

- Then, let apps access your mic.
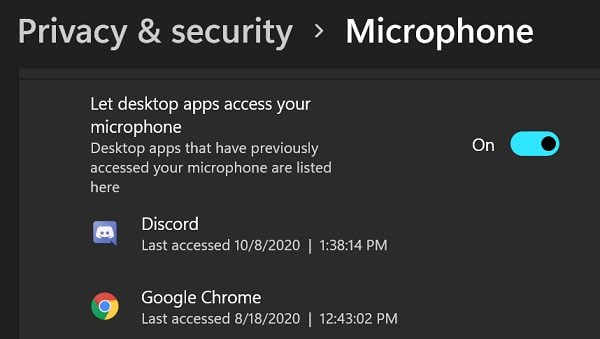
- Scroll down to the app that doesn’t capture your AirPods mic input.
- Make sure to toggle on the app so that it can access your mic.
- Additionally, allow desktop apps to access your microphone.
Set Your AirPods as Your Default Device
Be sure to set your AirPods as your default playback and recording device.
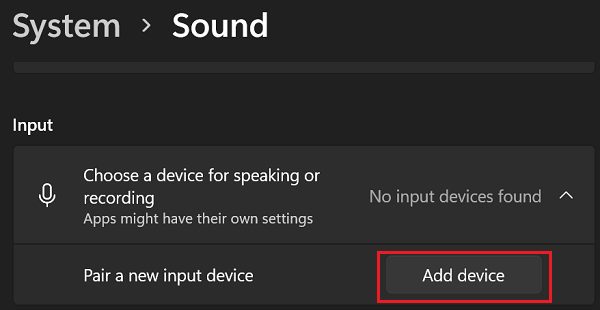
- Navigate to Settings.
- Select System.
- Then, click on Sound.
- Scroll down to Input.
- Set your AirPods as your default device for speaking and recording.
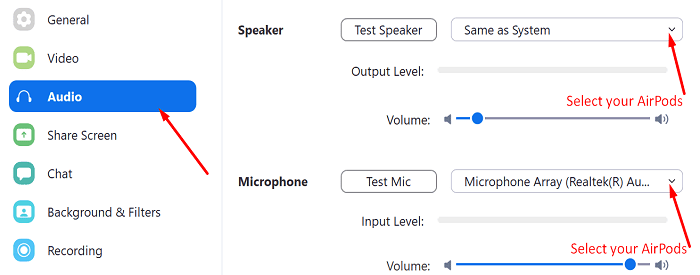
Additionally, go to your app’s settings, and set your AirPods as your default microphone. For example, if you’re using Zoom, go to Settings, select Audio, and select your AirPods as your default microphone.
Run the Audio Troubleshooter
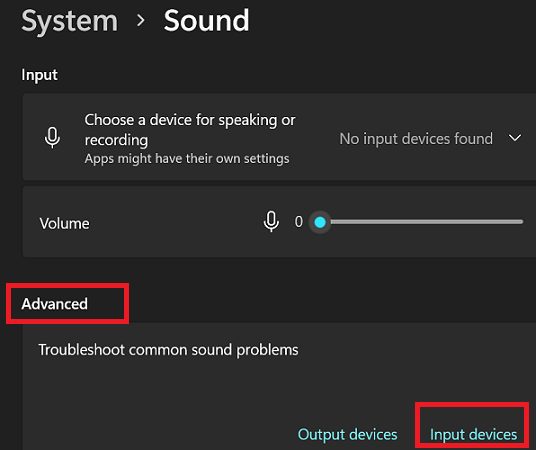
- Go back to System → Sound → Input.
- Scroll down to Advanced.
- Under Troubleshoot common sound problems, select Input.
- Follow the on-screen steps to run the troubleshooter.
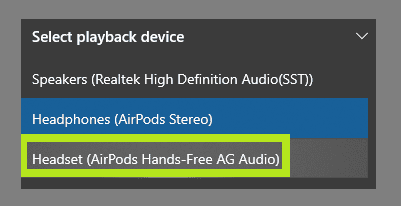
Use the Hands-Free AG Audio Option
Click on your Speaker icon. Then, select the Headset (AirPods Hands-Free AG Audio) option. Check if you can use your AirPods mic on Windows 11.
Even if this workaround does the trick for you, the sound will probably be pretty terrible, as many users have confirmed. But at least you’ll be able to use your AirPods mic.
Conclusion
If you can’t use your AirPods microphone on Windows 11, first unpair your devices. Then, put the earbuds back into the case, and restart your computer. Additionally, check your Privacy settings, and let apps access your AirPods microphone. Set your AirPods as your default input device, and run the Audio Input troubleshooter. If the issue persists, use the AirPods Hands-Free AG Audio option.
We hope you managed to solve your AirPods mic issues with the help of this guide. Leave a comment below and let us know which solution worked for you.