
The more apps you use and as the quality of pictures improves, the more you have to take care of your device’s internal storage. If you’re not careful, sooner or later, you’re going to find yourself seeing what you can erase to try and save as much storage space as possible.
If your Android device supports an SD card with a high capacity, that can be a huge relief. You can save your high-quality pictures on your SD card to free up space on your device’s internal storage. Let’s how you can change the storage location for your pictures.
Contents
Android 10: How to save Your Picture on Your SD Card
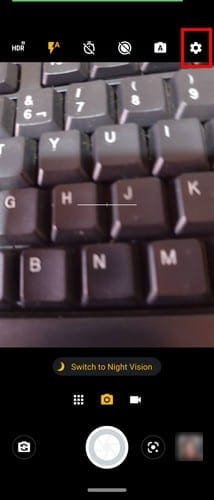
The better the quality is for your images, the more space they are going to take up. To gain internal storage on your Android device, you can configure your device’s camera settings. You can have your device save those pictures on the SD card. To get started, open your device camera and tap on the cogwheel.
Once you tap on the cog-wheel, you’ll be in your camera’s settings; swipe all the way down until you get to the Save settings sections. There, you’ll find the Storage option, tap on it, and your Android device should give you the option to change the storage path. Tap on the SD card option, and the change is done. There is no need to reboot your Android device.
How to Move Pictures You’ve Already Taken to the SD Card
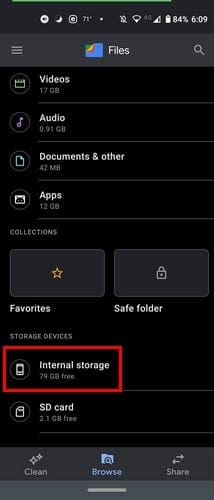
To move pictures you’ve already taken to your SD card, you’ll need to open your file explorer (Google Files was used for this tutorial). Go to Internal storage and see what files you have saved.
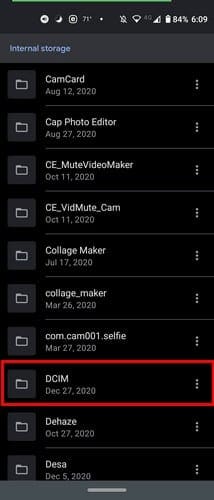
Once you’re in Internal Storage, swipe down until you see the DCIM folder.
Locate and long-press on the camera folder until it’s selected. Tap on the Move to option that will appear when you tap on the dots at the top right.
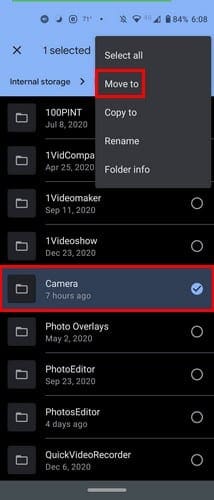
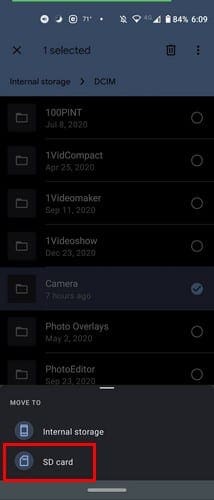
The option to move the Camera folder to the SD card should appear at the bottom.
The process shouldn’t take too long, and when it’s over, you’ll see how you now have more space in your device’s internal storage. You’ll notice how things will run smoother, among other benefits. Don’t forget that you can also free up space using Google Photos. Unlimited storage space will indeed be gone in June. Still, all the pictures and videos you save before that date don’t count to your 15GB storage limit.
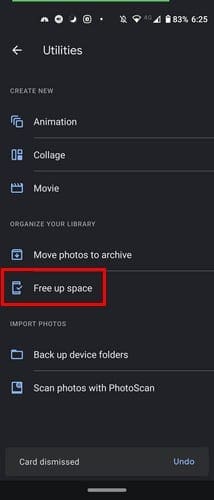
To free up space in Google Photos, all you have to do is open the app go to Library, followed by Utilities. The Free up space option will be in the mid-section. Depending on the number of files Google Photos already backed up, the process shouldn’t take very long.
Final Thoughts
By saving your picture to your SD card, you’ll always have access to your pictures. But, if you save them all on Google Photos, for example, you’ll have to wait to see your picture if you’re offline. If you were to perform a factory reset on your phone, you know your pictures are safe on your SD card. Do you save a lot of your picture on your SD card? Let me know in the comments below.

I need to get rid of DCIM and have JPEG only.
Also, is there a way to change existing data and pictures without deleting them? My files will not be excepted or cannot open it.
Trying to set Android Samsung S9 phone to only save photos to personal Google photo drive not School /work Drive. When I take a photo, it’s saving it to both- I can’t find the setting to stop this!
Thanks man, simple, concise easy directions. Love that!
How do I change the storage location to a different folder *on* the phone? (no sd card)
The option is greyed out.