
Do you want to turn your Windows 11 Taskbar into a space for all apps, files, folders, drives, and more just like the Dock on a MacBook or iMac? Well, you’re in luck! Today I’m going to explain various ways to use the Pin to taskbar feature on a Windows 11 PC.
With Windows 11, you can instantly access the programs or applications you need by pinning them to the Taskbar. This means you won’t need to search for programs or apps in the application tab or in the search box. Because you got all the programs and files you need right inside the Windows Taskbar space. All you need to do is click the necessary icon and access the programs or files instantly.
Contents
- 1 What’s Pin to Taskbar on Windows 11?
- 2 How to Pin Applications to Taskbar
- 3 How to Pin Open Apps to the Taskbar
- 4 How to Pin a File to the Taskbar
- 5 How to Pin a File to a Jump List of Programs to the Taskbar:
- 6 How to Pin Websites to the Taskbar by Using Edge
- 7 Use a Desktop Shortcut Tweak to Pin Anything to the Taskbar
- 8 Pros & Cons of Using Microsoft Windows
What’s Pin to Taskbar on Windows 11?
The Pin to Taskbar feature of a Windows operating system enables you to add apps to the Taskbar area. Then, you can simply click the app icon to run the program. No need to double-click the desktop icon or find the app in the Start menu. The Pin to Taskbar feature is available from Windows 8 operating system and continued to Windows 11.
You can utilize this functionality to make use of the Taskbar for productivity improvements. Create a list of apps you want to launch regularly and add those to the Taskbar. Now, you got all the apps you need right on the Taskbar, where other open apps also show up. Now, the Windows 11 Taskbar can handle more than just applications. Using a few tricks and tips, you can Pin to Taskbar almost anything on your Windows 11 PC.
When you pin all the necessary apps, files, drives, and websites on the Taskbar, it looks pretty similar to the Dock of macOS. So, if you’re envious of the Dock of a MacBook, follow the simple methods mentioned in this article to convert your Windows Taskbar to a similar tool.
Also read: Windows 11: How to Automatically Hide the Taskbar
How to Pin Applications to Taskbar
Find below some intuitive steps to pin apps to the Taskbar effortlessly:
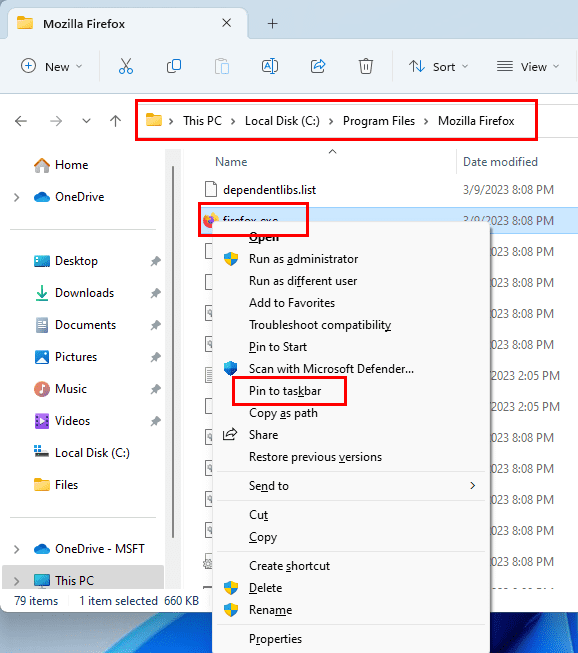
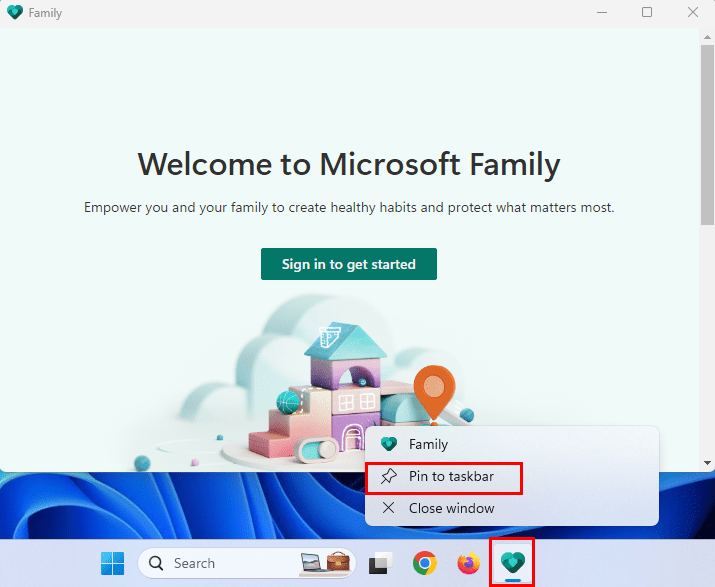
- Suppose, you’re in the installation directory of the app. Simply select the app and press Shift + F10 to find a long context menu. Choose Pin to taskbar.
- If the app is on the Desktop, just drag the app icon and drop it on the Taskbar.
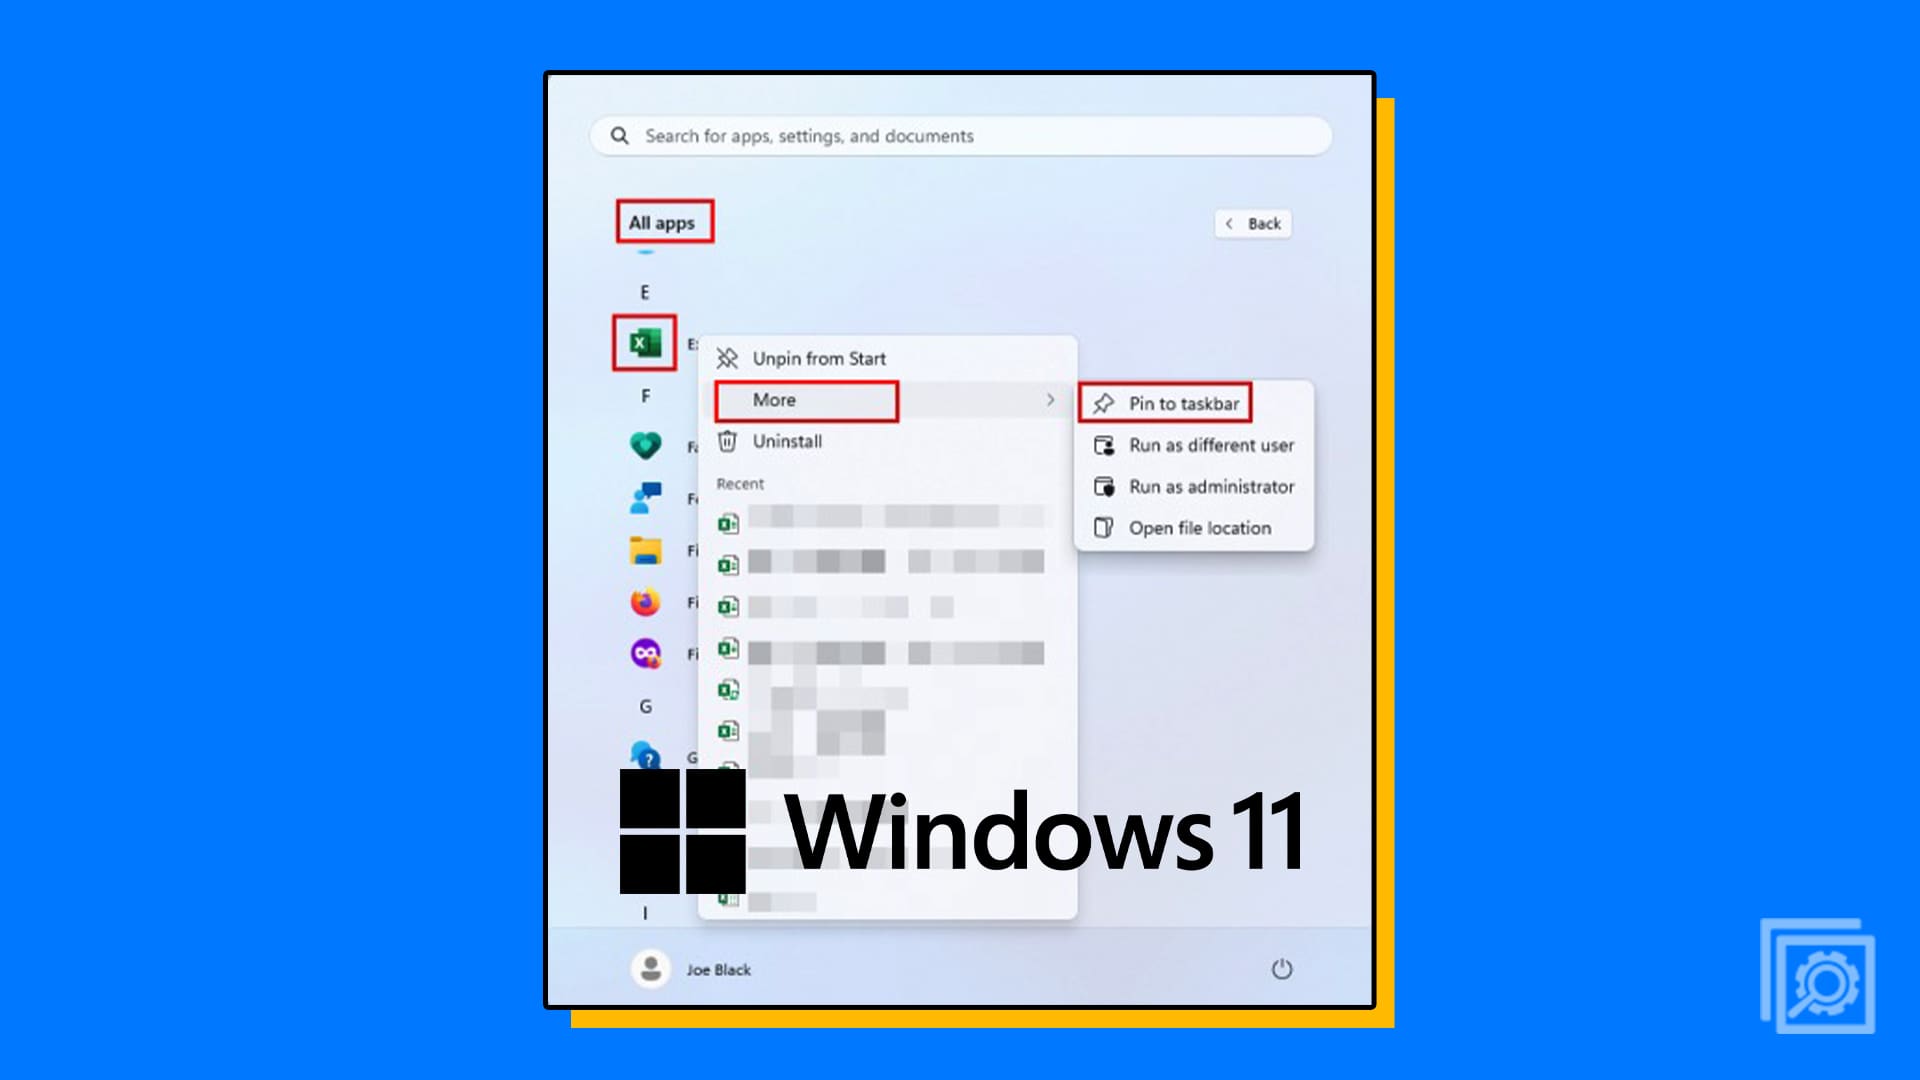
- When on the Start menu, right-click the app icon and choose Pin to taskbar option.
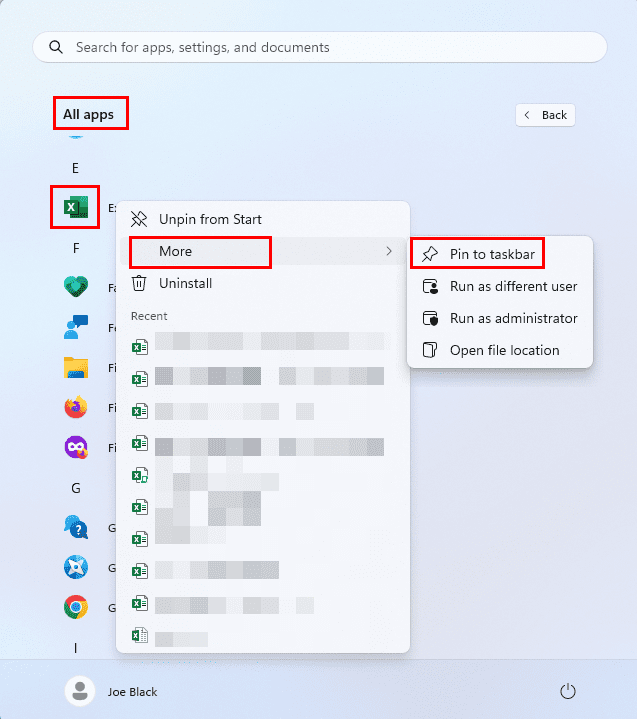
- You can also perform the above action from the Start menu > All apps section. Here, you just need to hover the cursor over the More option after right-clicking the target app.
How to Pin Open Apps to the Taskbar
To pin the running program or application to the taskbar, you can follow these steps:
- Search the name of the program by typing it in the Windows 11 search bar or choosing it from the Start menu to launch the app.
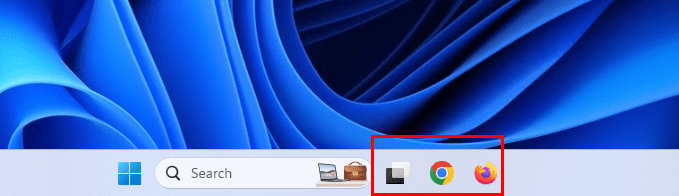
- Once the program starts to run, it’ll appear on the Taskbar.
- Click right over the app’s Taskbar instance to open the Taskbar context menu that shows various Taskbar-supported settings.
- One of these settings should be Pin to taskbar. Simply click that to add running software to the Taskbar.
- Now, when you close the app, you’ll see its link on the Taskbar.
That’s it! Next time, you don’t need to surf the whole PC for the app you’re looking for. Just click the Taskbar instance to open and get started with work, play, or fun!
Also read: Windows 11: How to Remove the Taskbar Search Button
How to Pin a File to the Taskbar
To pin any file to the Windows 11 Taskbar, follow these steps:
- Bring the file to the Desktop or Home Screen of your PC.
- Now, select the file and hit the Shift + F10 keys on the keyboard.
- This should open the extended context menu for the file type selected.
- Click Properties on the context menu.
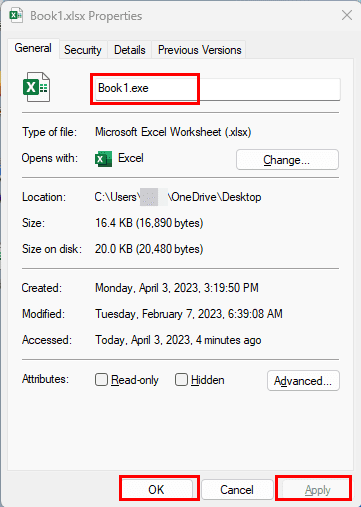
- Under the General tab, change the file extension name to .exe.
- Click OK and select Yes on the warning message that pops up to save the changes made.
- Now, drag the newly created file to the Taskbar and place it.
- Again rename the file to its original value.
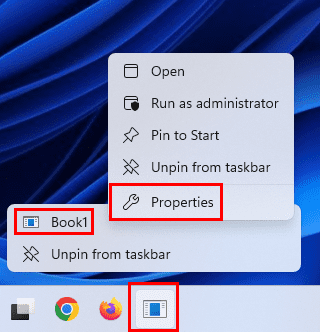
- Right-click on the Taskbar item you just added and right-click again on the file name.

- Click Properties and now add the correct file extension replacing the EXE in the Target box.
- Select Apply and hit OK to save the changes.
- Now, click the Taskbar item and the file should open in the dedicated application. However, the icon won’t change.
How to Pin a File to a Jump List of Programs to the Taskbar:
Suppose you added enough apps and folders on the Taskbar that it’s completely occupied. Now, you can add more content to the Taskbar Jump List. However, you can only do so for files that open with specific apps. For example, you can add as many Excel files as you want to the Jump List of the Excel app’s Taskbar instance. Here’s how:
- Right-click on the pinned program, like Excel, to open the Excel Taskbar Jump List.
- Under the Recent section, you should see recently opened Excel files.

- You can also open new Excel files if you want.
- Either for the Recent section or newly-opened Excel worksheets, you’ll see a push pin icon to the right.
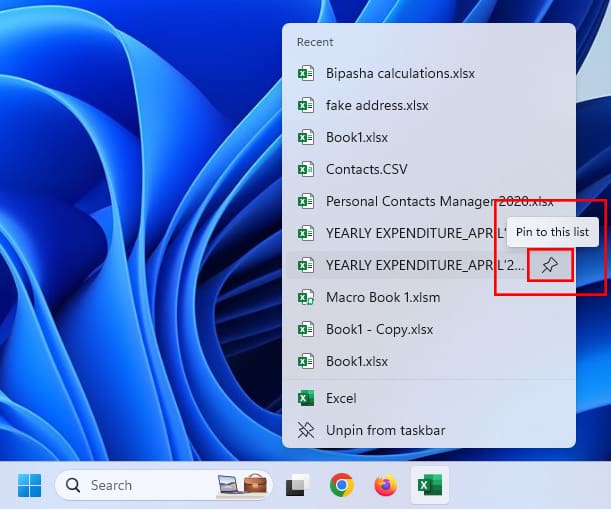
- The push pin icon is nothing but the Pin to this list command.
![]()
- Click the push pin to add the Excel worksheet to the Pinned section of the Excel Taskbar Jump List.
How to Pin Websites to the Taskbar by Using Edge
You probably like to use Google Chrome or Firefox to browse the Internet on Windows 11 PC, but Microsoft Edge is a great app to pin webpages to the Taskbar. Probably, this one feature could still appeal to you to use Edge instead of other web browsers. Here’s how it’s done:
- Launch the Edge browser.
- Visit the website you want to pin to the Taskbar.
- Click the ellipses icon in the top right corner of Edge to the left of the Bing or Discover icon.
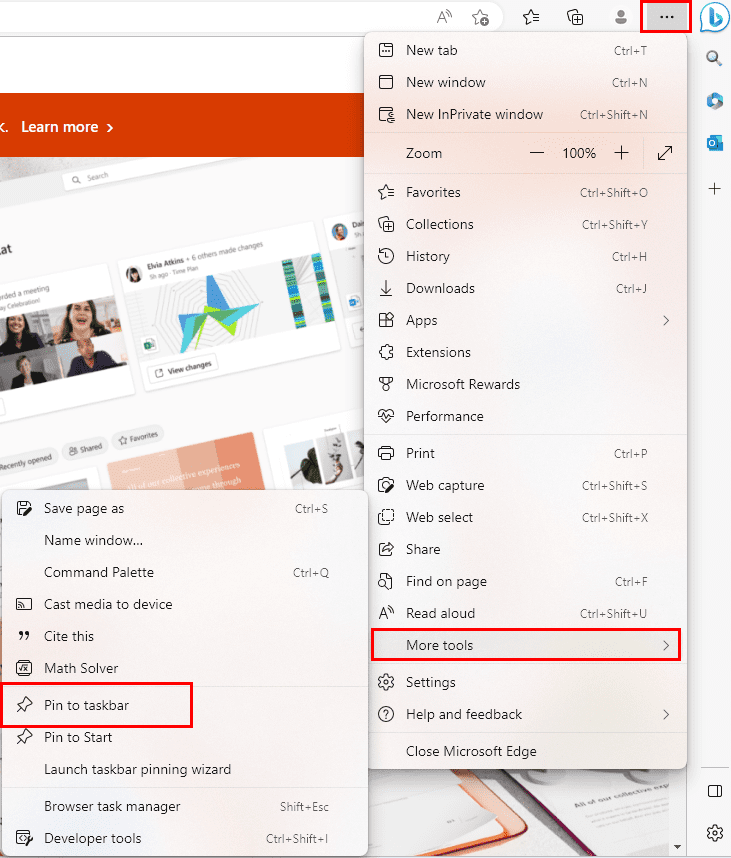
- A context menu will open. Find the More tools option and hover the cursor over it to open another menu.

- Here, you won’t miss the option Pin to taskbar.
- Click that and you’re all set.
This is a great way to access regularly visited websites and web apps. Just save the login ID and password for the apps, and web apps will behave just like a native Windows 11 app.
Don’t want to use Edge at all? No worries! To pin a website to the Taskbar by using Google Chrome, just follow these steps:
- Access the website in Google Chrome.
- From the top right of Chrome, choose the three vertical dots menu.
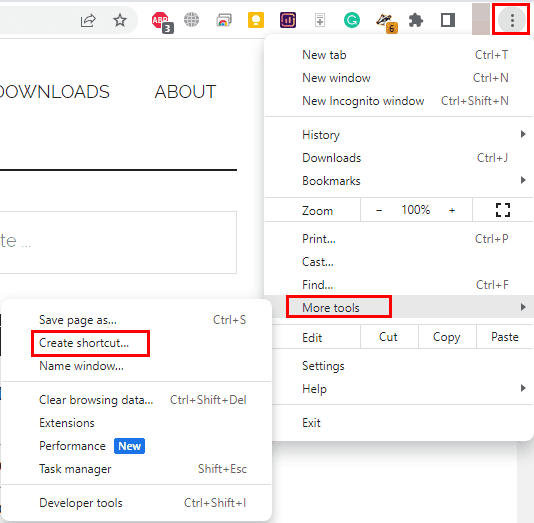
- Hover over the More tools option and then click on Create shortcut.
- The Create shortcut? dialogue box will appear.
- Write the shortcut’s name and hit the Create button to add a desktop shortcut.
- Now drag it to the Taskbar to pin it.
Use a Desktop Shortcut Tweak to Pin Anything to the Taskbar
You’ve learned various methods to add elements to the Windows 11 Taskbar. There are more components you can add. For example, a hard disk drive, folder, and almost anything else that you can use on Windows OS. Here’s how:
- Let’s consider, you want to add a drive from This PC to the Taskbar. To do this, open This PC.
- Select the HDD drive and drag it to the Desktop to create an instant shortcut.
- Now, select the Desktop shortcut and hit Shift + F10 to open the long context menu.
- At the bottom of this menu, you should see Properties. Click this option.
- Click the Target box and take the cursor to the start of the shortcut destination.
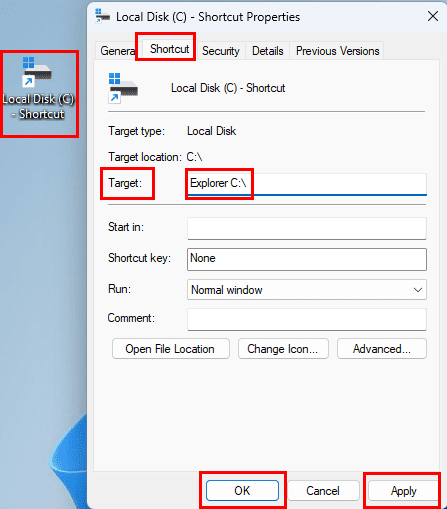
- Type Explorer and also add a space as shown in the above image.
- Click Apply and you’ll see that Windows 11 OS automatically adds the address of the Windows File Explorer app. For example, check the following code:
C:\Windows\Explorer.exe C:\
- Select OK to save and close the dialog box.
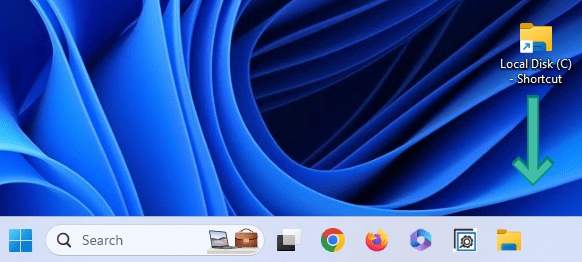
- Now, drag and drop the new shortcut icon on the Taskbar.
- Click the Taskbar instance of the HDD partition to go directly into the drive content without routing through This PC.
Pros & Cons of Using Microsoft Windows
Microsoft Windows 11 is still the most common operating system across the globe. The advantages of using Windows 11 were once measured against using rivaling desktop operating systems, such as macOS or Linux. Currently, there’s more danger of the Windows 11 operating system being surpassed by the usage of the Android mobile or tablet OS.
– Versatile
– Productive
– Secure
– Good Native Apps
– Bulky
– Resource Heavy
– Developed for keyboard & mouse
You can buy a USB drive with Microsoft Windows 11 Home Edition and join millions of users worldwide on a platform that is considered the industry standard.


I can pin Data Usage to start menu, but not taskbar. Probably doesn’t function on the taskbar.