It may not seem like a big deal, but changing the theme on your Windows 11 computer can be refreshing. Having to look at the same colors every time you turn on your computer can get boring. But the good news is that you have different themes, so you can switch to another when you get bored with one theme. There are methods you may already be aware of, but there could be others you haven’t tried before.
Contents
How to Change the Theme on Windows 11 Using Settings
For example, if you are uncomfortable entering codes or using the Run box, the easiest way to change the theme is by going into Settings. You can access Settings by pressing the Win + I keys for the fastest access, or you can click on the Windows Start icon and click on the Settings option. Once in Settings, click on Personalization, followed by the Themes option.
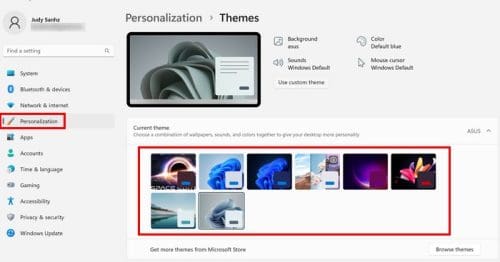
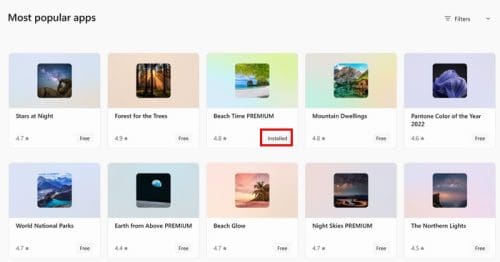
If you’re unhappy with what’s available, click the Browse Themes button below. It’ll take you to the Theme section of the Microsoft Store, where you can choose from a large variety of themes. The free ones will be labeled so, and the ones that are not will have their price tag. Don’t worry about remembering which you downloaded since those themes will be labeled Installed.
Once you’ve installed a theme, go back to the Themes section in Settings, where you’ll need to click on the theme to apply it. That’s one way you can change the theme on your Windows 11 computer, but if you’re experiencing issues applying this method, there are other ways to change the theme. One of them is by using the Run Box.
How to Change the Theme Using the Run Box on Windows 11
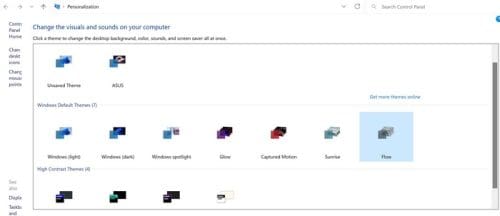
If you feel comfortable using the Run box, there is a code you can enter to get to those themes. Open the Run box by pressing the Windows + R keys. Once the box is open, enter shell:::{ED834ED6-4B5A-4bfe-8F11-A626DCB6A921}-Microsoft.Personalization. When the Personalization utility opens, you’ll see your available themes. Click on the theme, and it’ll be applied instantly.
If you’re using the Run box, you can also enter ms-settings:themes to open Themes in Settings.
How to Change the Windows Theme Using the Command Prompt
The Command Prompt is another tool to apply themes, but there is one thing to remember. You’ll need to know the name of the theme to apply it. It’s unlike the other options, where you can browse through them and click on the one you like without knowing the name. If you prefer to look through the available themes, you might want to try the other methods. But, if you know the name, here is how to add them. Open the Command Prompt by searching for it in the search bar, but open it as an Administrator. When it’s open, enter the following command C:\Windows\resources\Themes\aero.theme.
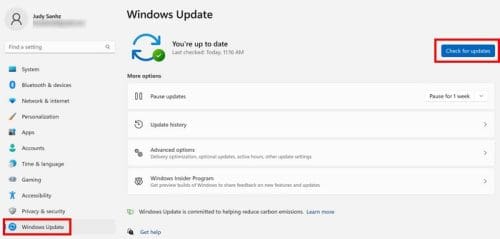
The theme will be applied without the need to restart your computer. If you entered the command and nothing happened, maybe installing any pending updates will help. To check for updates, press the Windows + I keys to go to Settings, followed by Windows Updates at the bottom left. If there are any pending updates, Windows will let you know.
How to Change Themes Using the File Explorer
If you’re already using File Explorer, then it’s going to be convenient to be able to change the theme from here. You may already have it on your taskbar, or you can search for it or press the Windows + E keys. In the address bar, paste %LocalAppData%\Microsoft\Windows\Themes. You should now see the themes you can apply. Double-click on them, and they will be applied.
How to Change Themes Using PowerShell
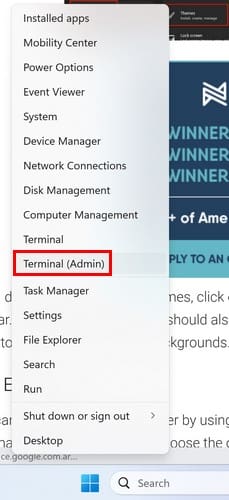
If you have memorized or saved the names of the themes somewhere, here is where you’ll need them. You can change themes using PowerShell but must specify the theme name. But first, you’ll need to open the PowerShell by right-clicking on the Windows Start icon and choosing Terminal (Admin).
When the PowerShell is open, add the following command and press enter. start-process -filepath “C:\Windows\Resources\Themes\aero.theme”
That’s one theme you can add, but you can also replace aero with dark, and the dark theme will be applied. There will be no need to restart your computer.
Further Reading
There are other places where you can also apply themes. For example, here is how to download new themes for Microsoft Edge. Or you might want to continue reading on how you can enable hiddenPixel theme on Sony Xperia phone. Remember to use the search bar to look for additional reading material.
Conclusion
If you feel that your computer needs a new look, there are various themes you can browse through. There is no limit to how many times you can change the theme. And as you can see, there are multiple ways to change it. Maybe an update is causing you to get an error when trying one method, so that’s where you try the other available ones. Which is your preferred method? Let me know in the comments below, and don’t forget to share the article with others on social media.