• Skip to main content
  • Skip to primary sidebar

Technipages

Smart phone, gadget and computer tutorials

  • Topics
    • Android
    • Gaming
    • Hardware
    • Internet
    • iOS
    • MacOS
    • Office
    • Software
    • Windows
    • Definitions
  • Product Reviews
  • Downloads
  • About
Excel: Make Header Row

Excel: Make Header Row

Posted on February 25, 2020 by Mel Hawthorne Leave a Comment

Creating a sticky header row is a great tool for making it easier to keep track of data in spreadsheets. It’s easy too – look below for instructions on how to set the top row of your spreadsheet to remain stuck even as you scroll down.

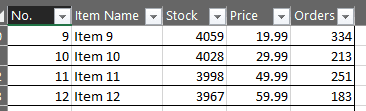
First, open your spreadsheet and make sure all the data you want is in the table. If not, at least make sure that all the columns are set up correctly and labelled. The top row will be the header bar – that means that that’s where you need to place your titles. For example, ‘Item Number’ or ‘Last Name’. Set at least one row of info if your table is otherwise empty, and mark all the columns that will contain info.

When that’s done, click on the Home button on the ribbon menu and select the option Format as Table. Pick one of the design pre-sets that features a prominent header row, and click on it. A new window will open where you can adjust the range of data if necessary, but more importantly, one where you can tick the box ‘My table has headers’.

Select ‘My table has headers’.

Make sure it is ticked and click confirm. The styling you chose will now show on your spreadsheet – and the top row featuring your titles will remain sticky if you scroll down the table.

An example of a sticky header row.

Tip:

If it seems like the header row isn’t sticking, make sure the field you have selected by clicking on it is part of the table. Clicking outside of it temporarily hides the sticky header, as it is possible to have more than one per spreadsheet – to set up multiple tables in one spreadsheet, repeat the above steps for each one.

You Might Also Like

  • Excel: Add Header and Footer
    Excel: Add Header and Footer
  • How to Add a PDF to Excel
    How to Add a PDF to Excel
  • How to Make an FTP Server
    How to Make an FTP Server
  • How to Make Your Own Ringtones
    How to Make Your Own Ringtones
  • How to Make Sure Waze App is Off
    How to Make Sure Waze App is Off
  • Excel: Shade Every Other Row
    Excel: Shade Every Other Row
  • Excel: Add Watermark
    Excel: Add Watermark
  • How to Make a Flowchart in Word
    How to Make a Flowchart in Word
  • How to Make Bootanimation on Android 10
    How to Make Bootanimation on Android 10

Filed Under: Office Tagged With: Excel 2019

Reader Interactions

Did this help? Let us know! Cancel reply

Your email address will not be published. Required fields are marked *

This site uses Akismet to reduce spam. Learn how your comment data is processed.

Primary Sidebar

Recent Posts

  • How to Increase the Size of Text on Any Website on iPad
  • Chrome: How to Fix Can’t Scroll Using Scrollbars
  • Samsung Galaxy S 21 Plus: How to Check How Much Memory Is Left
  • Google Photos: How to Export Your Albums
  • Bitwarden: How to Deauthorize All Sessions
  • Bitwarden: How to Clone an Entry
  • Bitwarden: How to View Your API Key
  • How to Fix Microsoft Teams Error 0xcaa80000

Who’s Behind Technipages?

Baby and Daddy My name is Mitch Bartlett. I've been working in technology for over 20 years in a wide range of tech jobs from Tech Support to Software Testing. I started this site as a technical guide for myself and it has grown into what I hope is a useful reference for all.

Follow me on Twitter, or visit my personal blog.

You May Also Like

© Copyright 2021 Technipages · All Rights Reserved · Privacy