

This tutorial shows you how to disable the File Compression feature in Microsoft Windows.
Contents
Windows 10, 8, 7, and Vista Command
- Select the “Start” button, then type “CMD“.
- Right-click “Command Prompt“, then choose “Run as administrator“.
- If prompted for a password, enter credentials for an account that has administrator rights.
- Type the following then press “Enter“.
fsutil behavior set disablecompression 1
You should receive a message that says “NOTE: Changes to this setting require a reboot to take effect.” Restart the computer to make the change stick.
If you wish to enable it again, you can use the command fsutil behavior set disablecompression 0
Windows Group Policy
- From the Group Policy Editor, navigate to “Computer Configuration” > “Administrative Templates” > “System” > “Filesystem” > “NTFS“.
- Open the “Do not allow compression on all NTFS volumes“.
- Select the “Enabled” radio button, then select “OK“.
Windows 2000 and XP NTFS Volumes
- Hold down the “Windows key” , then press “R“.
- Type “regedit” and select “OK“.
- Navigate to the following:
- HKEY_LOCAL_MACHINE
- SYSTEM
- CurrentControlSet
- Control
- FileSystem.
- Look for an entry on the right side for “NtfsDisableCompression“. If it doesn’t exist, you will need to create it. To do so, right-click on “FileSystem“, then select “New” > “DWORD Value“. Give the value a name of “NtfsDisableCompression“. Press the “Enter” key when you are done.
- Right-click the “NtfsDisableCompression” entry and click “Modify“.
- To disable compression set the “Value data” to “1“. (To enable compression again, set the Value data to 0 or delete NftsDisableCompression)
- Restart the computer to apply changes.
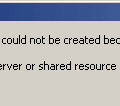
Now when trying to compress a folder, the following error will be produced:
An error occurred applying attributes to the file:
{file path and filename}
Access is denied.


Right click c drive go to properties go to general and unlock compress this drive to save disk space. Perfect n done
One way to get rid of ntfs compression is to use non 4KiB NTFS cluster size, cluster size is selectable at format time, but with some 3rd party tools cluster size can be changed without loosing data.
NTFS compression is only for 4KiB cluster sized NTFS partitions.
So just use 8KiB cliuster size up to 32KiB, do not use more than 32KiB (among it is possible) because some tools / disk apps will fail (like some defragmenters).
Also there is a more drastic solution, just disallow NTFS compression for all volumes (not sure how it dares with already NTFS compressed files), using a command in a command line run with admin rights.
To do not allow any NTFS compression on any volume, the comand is:
fsutil behavior set disablecompression 1
To undo that change (aka, allow NTFS compression on some volumes):
fsutil behavior set disablecompression 0
Hope that helps!
If none of the above works for you, try this method that worked for me:
Open My Computer, right click on your C: drive, then select “Attributes”, a window pops up, untick the 2nd bottom box which says “Compress files to save disk space” (or something similar to that)
I actually found a way on how to solve the compressed file download issue, please include it here!
Open CMD as admin then type compact/compactos:query to check if Win10 itself was compressed, if yes: congrats, we found the issue. Now just type compact/compactos:never to undo it. Can take a while until everything’s finished so give it a good while.
I already tried the command prompt line as administrator but nonetheless all my newly downloaded files are still compressed. Any way to turn this annoying “feature” off?
I don’t see any selection for “run as administrator” from the command prompt.
So actually… the command line way disabled file compression for one reboot it seems. When I rebooted again (several days later) it went right back to compressing files! I then went to modify the group policy, and it’s STILL compressing all new files on my computer… this is driving me nuts! Still looking for a -permanent- solution to this very annoying issue…
I just used the command prompt version of this fix to disable file compression that was driving me nuts because I ran low on diskspace recently, and it did the trick! I’m running Win10 64-bit version. Thank you for this!
I followed your instructions (command line), then I check the registry entry (it showed: NtfsDisableCompression, value data 1). But still the same: any file I download to my download folder is compressed (blue double arrows).
after windows 10 continiously compressing the files on my desktop to free up disk space, i found this tweak helpful to stop this behaviour that otherwise cannot be stopped by the user.