
When dealing with installers, configuration tools, and alert dialogue boxes, you almost always want to accept the default option. The default option is normally the right one. The Snap To tool may help save you some time with these types of menus and dialogue boxes. When enabled, Snap To causes the mouse to snap to the default option, so you can just click through menus quickly. This guide will walk you through how to enable Snap To.
First, you need to open the Settings app to the mouse options. To do so, press the Windows key, type “Mouse” and hit enter. Once in the mouse settings, click “Additional mouse options” on the far right.

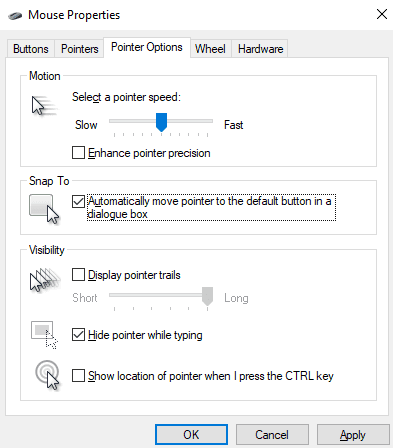
In the new Mouse Properties window, move to the “Pointer Options” tab. The second option on the page is “Snap To”. Tick the checkbox and then click “OK” or “Apply” to save this setting.
Tip: The Snap To setting only works for certain dialogue boxes and may not work in all scenarios. When it does, it can help you make selections quicker, but please always read what it is you are clicking on, especially when it comes to subscriptions, service agreements, and payment services.


