Backing up your data is always a good idea – in fact, it’s an important step in protecting said data from unforeseen circumstances, such as a stolen computer, failed hard-drive or even a quick soda spill on your laptop.
You should always keep your data stored somewhere else – a cloud service would be the best option as it doesn’t depend on you having or keeping a physical drive anywhere, but something like a USB stick or external hard drive will also work. Here is how to do that in Windows 10.
Basic backups
In addition to normal file maintenance, Windows itself also allows you to back up and then restore some data. To do so, you need to go to the backup options in your computer. Press the Windows key on your keyboard and type backup, then press enter.
In Windows 10, the backup service is called File History. You can use it to save backup copies of your system whenever you want. By default, File History will be turned off. In this menu, you can, however, switch it on.
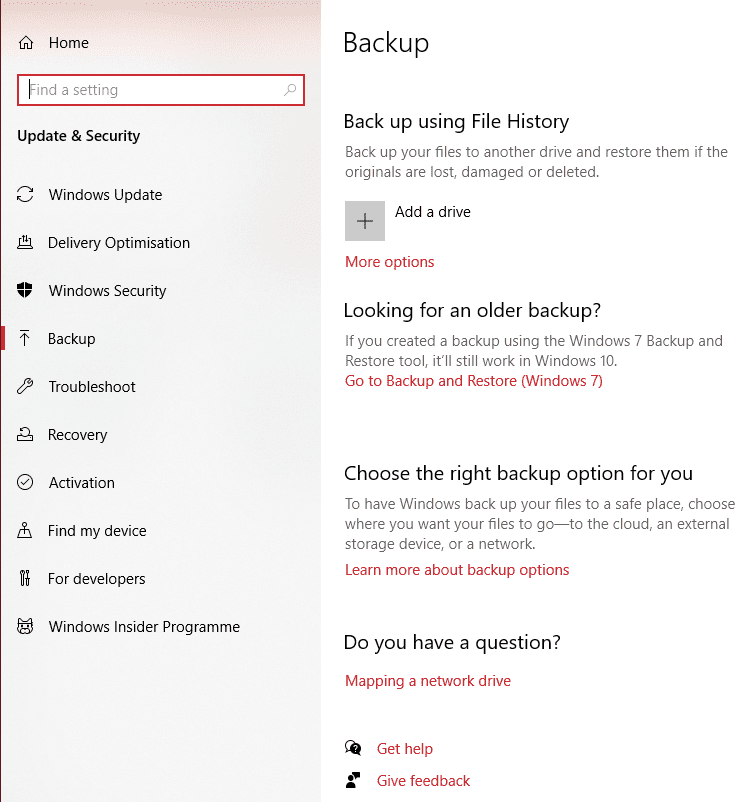
First, use the ‘Add a drive’ option to select which drive you want to back your files up to. This could be a USB stick, or, if your computer has multiple hard drives installed (for example, a C and D drive), you can select one of them. Specifically, it has to be the one that does NOT have the Windows installation on it.
Don’t worry, Windows will only show you the drives that are eligible for the service at any given time.

When you’ve selected the right drive, the option will change to ‘Automatically back up my files’ – a toggle that will be switched on. If you are happy with that, you don’t need to do anything else! If you want to customise what is backed up, follow the additional steps below.
Further instructions
Click on ‘More options’ underneath, and you’ll see some additional options.
Tip: If you click on ‘More options’ before selecting a drive to back up to, these options won’t be visible!

The first option here is a button that will let you back up your system immediately. Alternatively, you can also select when your computer backs up, and how long to keep the backups for. Please be aware that while the backup files aren’t too big, they WILL take up more space as time goes on, and frequent backups that are kept ‘Forever’ will eventually take up a lot of space. Consider changing these settings to something more space-saving.
Tip: We recommend backing up every 3 hours, and to keep backups for a year. In most cases, that will be plenty!
Below that, you can choose which folders to back up. By default, most if not all of your high-level folders should appear in this list. To remove one, click on it and select ‘Remove’. To add a missing one, click on the ‘Add a folder’ option at the top and select the folder you want to back up.
At the very bottom, you can also then exclude a folder – this option is great if you want most but not all sub-folders in a location backed up. For example, let’s say in your ‘Pictures’ folder, you have eleven sub-folders named after some holiday locations you’ve been to – Italy, Spain, Mexico, Japan, etc, however, you didn’t enjoy your trip to Mexico and don’t want to back those pictures up. Select the ‘Pictures’ folder as one of the ones to be backed up, and then select the ‘Mexico’ folder as one of the excluded ones. That way, all except Mexico will be backed up!
Restoring from backups
Naturally, once you’ve made these backups, you can also restore them. That means going back to, or re-creating what was backed up by File History. Please be aware that only folders included in the backup will be available to be restored.
To restore files, you need to open a separate option in File History. To do so, press the Windows key on your keyboard and type ‘Restore your files’, then press enter. You’ll be able to restore from complete backups. Ongoing backups (especially your first one) won’t be available yet.
Tip: Your very first backup will take quite some time to create. It won’t be available until it’s done – before that, you will see a notice telling you to wait for it to finish.
Navigate to the file or folder that you want to restore – you’ll see a list of the available options, and you’ll be able to switch between versions as you like – if, for example, you want to restore an earlier version and still have the backup, you can do that.
Click the restore button at the bottom in order to get your selected content back – you can alternatively right-click on it and select ‘Restore to’ in order to pick a different location (than the original) to save your content to.