Snipping Tool is a screenshot software on your Windows computer for screenshots and videos. The software first appeared in Vista and has been there ever since. You can take screenshots with the software and edit them without needing another software. But, thanks to an update, you can also record specific areas of your display. Here’s how to record only the needed areas and save your recordings without sharing too much of your screen with others.
Contents
How to Record Specific Areas of Your Display on Windows 11
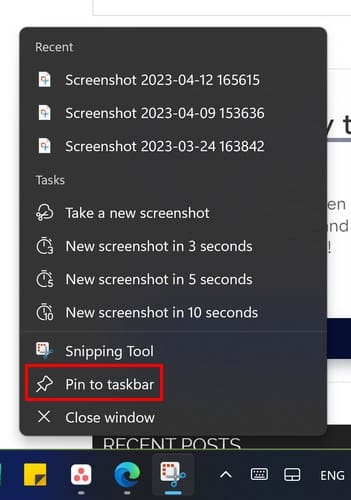
To record only a particular area of your screen, you’ll need to press the Windows + S keys. When the search field appears, start typing Snipping Tool, and choose the best result. If the tool is something you know you will be using frequently, it’s best to pin it to the taskbar for faster access. You can do this by right-clicking the tools icon on the taskbar and choosing Pin to Taskbar.
When you see the Snipping Toolbar, click on the camera icon. You’ll know you’ve selected it since it’ll have a blue line under it. Click the New button to start recording, and choose the area you want to record. Click on the Start button, and the red dot will indicate that the tool is recording; there will also be a timer so you know how long your video will be.

Remember that the Snipping Tools lets you record the whole screen or parts of it. There is no limit to how big the recording area can be. You can pause or stop the recording, or if you want to start over, click on the trash icon to discard the recording. You’ll also see an option to share the recording with others which is great if you created the recording to show someone how to do something.
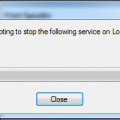
When you’re ready to end your video, click the square icon. Within a few seconds, you’ll see a preview of the recording. You must click the play button since it won’t play automatically. If you’re happy with what you see, click on the save icon that looks like a floppy disk at the top right. Alternatively, press Ctrl + S. Give your video a name and ensure to save it in an area you’ll remember.
![]()
Since it’s a video, the Videos section is a great area. Click the save button and the next time you open File Explorer, you’ll know where to find your videos. Your videos will always be in MP4, and there is no shortcut you can use to start a recording and not have to open the tool like you did to follow this tutorial. When you start recording, the tool will count down from three, and there is no way to add more time to the countdown. There are also no editing tools to use, not even a few. Hopefully, Microsoft will give the tool at least a few editing tools so users don’t have to use third-party software.
Further Reading
There are other tools you can use to record your display on Windows 11; discover the three methods you can use. If you’re using the Xbox Game Bar for recording, here is how you can make some changes to that. You also have the search bar at the top right if you need to search for a specific topic.
Conclusion
Snipping Tool may not have any editing tools for your screen recordings, but it gets the job done. It’s a great tool if you only want to record your screen without the need to edit it in any way. Remember to save your recording in an area where it can easily be found, or if you don’t want to save it, you can also share it without saving it. Maybe you have storage issues; the less you save, the better. How useful do you find Snipping Tool? Let me know in the comments below, and don’t forget to share the article with others on social media.