Due to the constant addition and deletion of files, data blocks on your hard drive get jumbled, messy, and fragmented over time. It becomes increasingly difficult for your operating system to locate them, and the fragmented files slowly clog up the hard drive itself.
Disk defragmentation is the process whereby all data, files, and information are rearranged on your hard drive and placed in contiguous blocks for easier access. The result is that your drive spends less time moving as it searches for files, which can help a PC run like a dream.
In older versions of operating systems like Windows, defragmentation was a process that had to be done manually. The problem was that most users didn’t know about defragmentation or its benefits. That’s why newer versions of Windows perform this process automatically.
Sometimes, however, you may want to perform a manual “defrag” yourself. This article will show you how to do just that.
Contents
Manual Defragmentation Guide
Even though defragmentation processes are automatic these days, both Windows 10 and 11 still make the Disk Defragmenter program available. In truth, SSD defragmentation is no longer necessary thanks to automation. But if you want or need to perform a manual defrag, this is the tool you’ll need to use.
Steps
- Click on the Search icon (the magnifying glass) in your Start menu.
- Type “
defrag” or “defragment” into the text box and wait for the “Defragment and Optimize Drives” system icon to appear. Click it.
- A window will open that’ll show you all available hard drives on your PC (including external hard drives), along with their level of fragmentation.
- Select the hard drive you want to defrag, and then click “Optimize” to manually begin the defragmentation process.

- The defragmentation process will begin with an analysis of the drive, followed by a number of “passes” to fully reorganize the data.
- You can stop the process at any point by clicking the “Stop” button. Once the disk has been defragmented, the “Stop” button will disappear, and the “Analyze” and “Optimize” buttons will reappear.


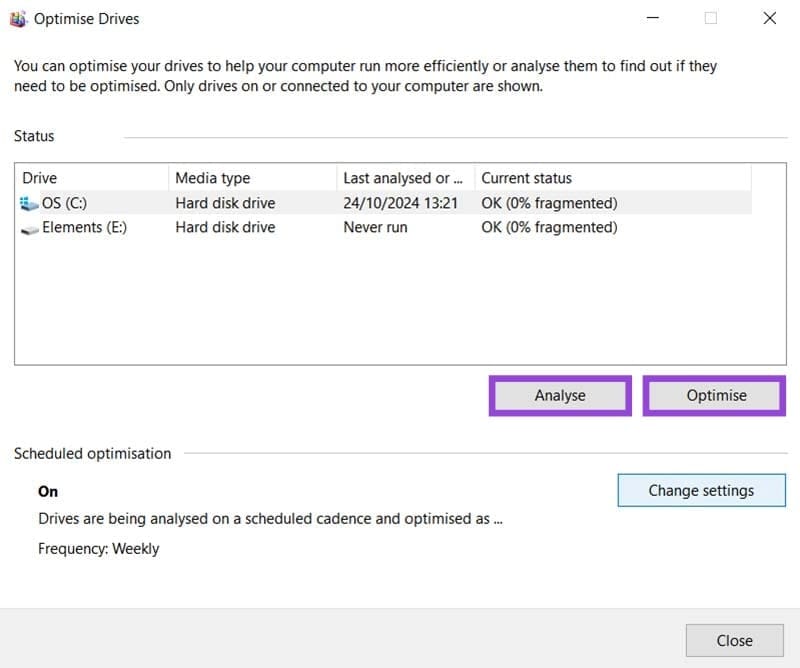
Because disks are automatically defragmented by Windows, it’s likely that the current status of all drives is listed as “OK”. You can also check the date of the last analysis to see how accurate the information is. External hard drives are not normally analyzed automatically by the PC.
If you’d just like to check the fragmentation of a hard drive without committing to the whole defrag process, then simply click on your desired drive, and then the “Analyze” button.
The defragmentation process will take approximately seven passes to complete. This process may take quite a while, depending on the level of fragmentation of your hard drive and the speed and power of your PC. It’s best to leave this process running overnight or when you don’t need to use your computer.
Change Your Automatic Defragmentation Settings
Windows gives you some options as to when and how automatic defragmentation takes place. Though the process takes place in the background and is designed to be as non-obtrusive as possible, it does use resources and can affect your machine’s performance. This might be an issue at times when you need the full functionality of your machine. But whatever your reason for needing to change your defrag settings, here’s how to do it:
Steps
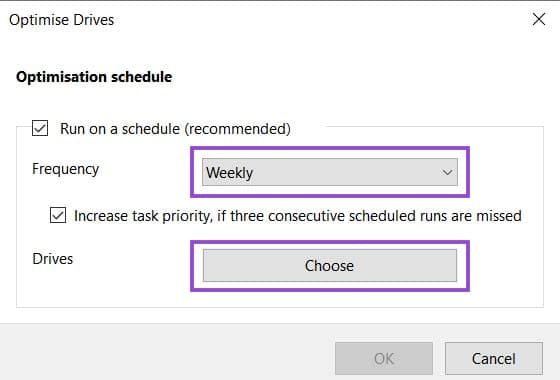
- In the “Defragment and Optimize Drives” window, click the “Change Settings” button.

- In the window that pops up, you can choose the frequency of the defragmentation: either daily, weekly, or monthly.
- Click the “Choose” button to select which drives should be automatically defragmented. You can also choose whether or not to automatically optimize new drives.

- You can disable automatic defragmentation entirely by unchecking “Run on a schedule (recommended)”.


It’s normally a good idea to keep the defragmenter running automatically. Otherwise, you’ll have to keep performing the process manually yourself, or risk a much slower hard drive.
How Often Should You Defrag Your PC?
Whether you choose to defrag manually or set an automatic defragmentation schedule, you might be wondering how often you need to optimize the files on your hard drives. Defragmentation is an intensive and time-consuming process, after all.
A general rule of thumb is once a month for most PCs. But there are other factors that can come into play:
- When last your drive was defragmented. For manual optimization, consider the last automatic defragmentation date.
- If your PC constantly uses intensive programs such as video editing software and 3D design, you might need to defrag more regularly.
- A defrag is a good idea after you’ve done a major clean-up of your file directories.
The Benefits of Regular Defragmentation
The fact that Windows has made disk optimization an automatic process should tell you just how important regular defragmentation is. Here are some of the major benefits:
- Longer life – The more the movable parts of a hard drive have to work to find files, the shorter their lifespan. Defragmenting reduces the amount of work your hard drives have to do.
- Faster scanning – Searches and antivirus tools work much faster when a hard drive is better organized.
- Speed boost – Not only will files load and be found faster, but boot times will be reduced too.
- Fewer errors – Bad sectors are avoided and fetch errors are reduced with regular reorganization.