Local Security Authority (LSA) is a critical component in Windows operating systems that enforce security policies. It manages user logins, authentication, and related security tasks. In Windows 11, LSA protection adds an extra layer of security, but what does it mean if it’s turned off? Let’s dive into the details.
Contents
- 1 What Is Local Security Authority (LSA)?
- 2 Is It Good or Bad to Turn Off LSA Protection?
- 3 How to Check and Enable LSA Protection in Windows 11
- 4 When Might You Consider Disabling LSA Protection?
- 5 How to Disable LSA Protection in Windows 11
- 6 LSA Protection and Third-Party Security Solutions
- 7 Monitoring and Auditing LSA Activity
- 8 Final Thoughts
What Is Local Security Authority (LSA)?

LSA is a process that runs as a protected service in Windows. In addition, it authenticates users and applications, manages local security policies, and generates access tokens. These tokens contain information about user privileges and are used to grant or deny access to system resources.
LSA protection is a feature introduced in Windows 8.1 and Windows Server 2012 R2. It adds an extra layer of security by running the LSA process in an isolated environment known as a “protected process.” This isolation prevents code injection attacks, where malicious software attempts to insert code into the LSA process to gain unauthorized access or privileges.
Is It Good or Bad to Turn Off LSA Protection?
Pros of Having LSA Protection On:
- Enhanced Security: By isolating the LSA process, it becomes more challenging for malware to inject code into the system.
- Compliance with Security Standards: Many organizations require LSA protection to meet specific security compliance standards.
Cons of Having LSA Protection Off:
- Increased Vulnerability: Turning off LSA protection makes the system more susceptible to code injection attacks.
- Potential Compliance Issues: Disabling LSA protection may lead to non-compliance with certain security regulations, depending on the organization’s requirements.
How to Check and Enable LSA Protection in Windows 11
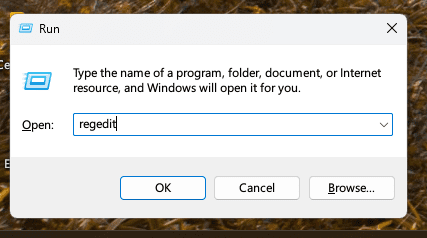
- Open the Registry Editor: Press
Windows + R, typeregedit, and press Enter.

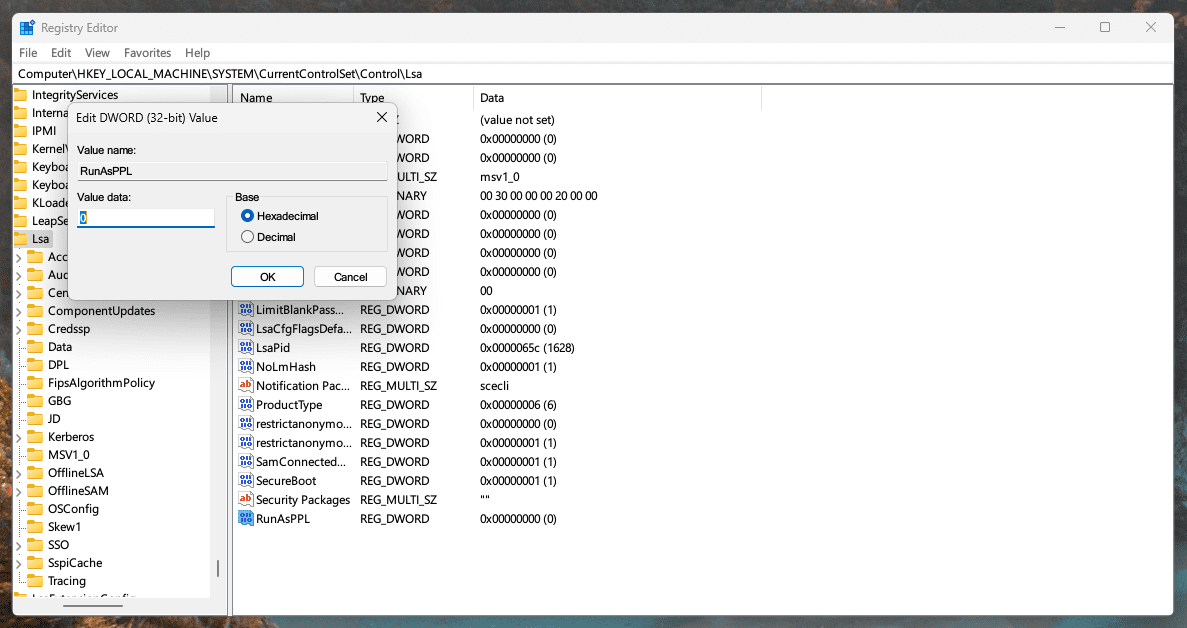
- Navigate to the LSA Key: Go to
HKEY_LOCAL_MACHINE\SYSTEM\CurrentControlSet\Control\Lsa.

- Look for the ‘RunAsPPL’ Entry: If it’s set to 1, LSA protection is enabled. If it’s missing or set to 0, LSA protection is disabled.
- Enable LSA Protection: Right-click on the ‘Lsa’ key, choose ‘New > DWORD (32-bit) Value’, name it ‘RunAsPPL’, and set its value to 1.

- Restart Your Computer: The changes will take effect after a restart.


When Might You Consider Disabling LSA Protection?
While experts advise maintaining LSA protection, you might see specific scenarios necessitating its disablement:
- Compatibility with Legacy Software: Some older applications might require direct access to the LSA process, and LSA protection could interfere with their functionality.
- Testing and Development Environments: In controlled environments where security is not the primary concern, disabling LSA protection might be necessary for specific testing or development tasks.
However, these scenarios are rare, and turning off LSA protection should only be done after careful consideration and consultation with IT or security experts.
How to Disable LSA Protection in Windows 11
If you find it necessary to disable LSA protection, follow these steps:
- Open the Registry Editor: Press
Windows + R, typeregedit, and press Enter. - Navigate to the LSA Key: Go to
HKEY_LOCAL_MACHINE\SYSTEM\CurrentControlSet\Control\Lsa. - Modify the ‘RunAsPPL’ Entry: If the ‘RunAsPPL’ entry exists, right-click it and choose ‘Modify.’ Set its value to 0.

- Restart Your Computer: The changes will take effect after a restart.
Note: Disabling LSA protection should be done with extreme caution, and it’s advisable to consult with a security professional or your IT department before making this change.
LSA Protection and Third-Party Security Solutions
Some third-party security solutions might require specific configurations related to LSA protection. Always refer to the documentation provided by the security software vendor to ensure proper setup and compliance with best practices.
Monitoring and Auditing LSA Activity
Various tools and solutions can provide insights into authentication events, policy changes, and potential security threats for organizations that need to monitor and audit LSA activity. Furthermore, utilizing these tools can enhance the security posture and ensure that LSA protection functions as intended.
Final Thoughts
Local Security Authority protection in Windows 11 is vital to maintaining a secure and resilient system. While there might be rare cases where disabling it is necessary, the general recommendation is to keep it enabled.
Understanding the role of LSA protection and knowing how to check and modify its status. And being aware of the implications of turning it off is essential for individual users and IT professionals.
By embracing the security features built into Windows 11, such as LSA protection, users can enjoy a safer computing experience, and organizations can align with best practices and compliance standards. Moreover, always prioritize security and seek professional guidance when dealing with critical system settings like LSA protection.