Creating a folder on your Windows 11 computer is a must. Creating folders can help keep your files organized for easy finding. You can create as many folders as you want, and if you ever feel like you don’t need one, you can erase them at any time. Right-click on the newly created folder and choose the delete option.
You may already have your preferred method of creating a folder, but the more options you’re aware of, the better. That way, you can choose the one that’s more convenient for you at the time. You never know; you might create folders using the longest method. Or, you could be doing something else and need to create a folder, and thanks to knowing all the available methods, you save some time in the folder-creating process.
Contents
Various Ways to Create a Folder In Windows 11
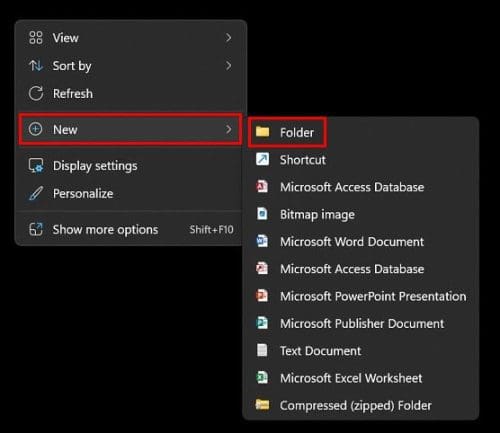
You save time and energy when you start with the simplest way to do something. So with that in mind, the easiest way to create a folder in Windows 11 is through the Context Menu. Go to your desktop and right-click on the area where you want your folder to go. Place the cursor on the New option, and a side-windows should appear. The folder option will be the first one on the list.
Another quick route you can take to create your new folder would be to use the following key combination. First, you need to go to the location where you want to make the folder. For example, if you want a new folder in Pictures, go to that location and press Ctrl + Shift + N keys. Your folder will appear with the title part highlighted so you can give your new folder a name.
Using the Command Prompt
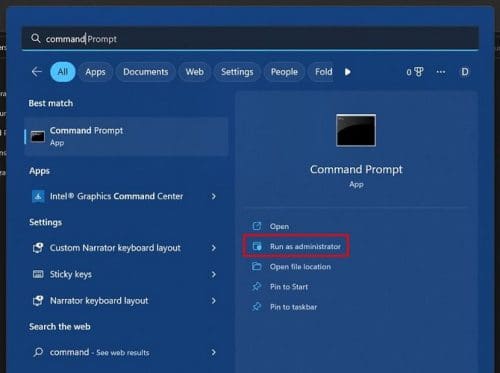
It’s also possible to use the Command Prompt to create your new folders. It may not be the fasted method, but if you’re already using it for some reason, here is how you can create your new folder. Open the Command Prompt (run it as an administrator) by searching for it in the search bar. You can search for it by typing the first few letters in the search bar until it appears in the search results. Don’t forget to choose the option to run it as an administrator.
When it opens:
- Choose yes when you see the User Account Control (UAC) prompt
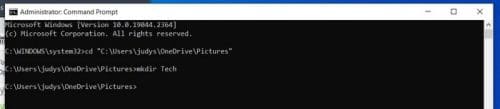
- Type cd and the location of where you want to create your new folder – To copy the path of the new folder, you’ll need to go to the file or folder whose path you want to copy. Once you’re there, press Shift and right-click on the file or folder. Towards the bottom, you should see the Copy As Path option click on it. You won’t see a message letting you know it’s been copied, but it has. Go back to the Command Prompt and past it using the Ctrl + V keys.
- Type mkdir and the name of the folder you are creating. If you are creating more than one folder, type all three names with a space between the names.
- Once you press enter, the folders should be created.
Now go to the path where you wanted the file. For example, if you wanted to create a folder in Pictures, that is where you would need to check. That’s all there is to it when it comes to creating one or more files using the Command Prompt. The Command Prompt may seem scary initially, but when you’re careful about what you enter, everything should go as planned.
Using the File Explorer
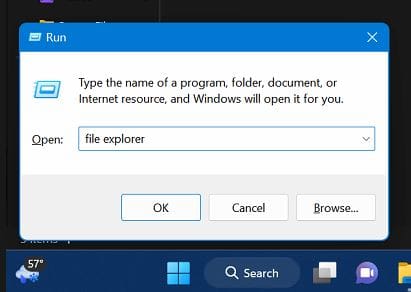
If the previous two methods are not what you’re looking for, you can always try creating a new folder using File Explorer. You can open it in various ways; for example, you can press the Windows and E keys. That would be the fastest way, but if, for some reason, the key combination didn’t work, you can try opening it by using the Run Command Dialog Box by pressing the Windows and R keys. Once the box is open, type explorer and click on OK. You can also right-click on the Windows Start menu and choose the File Manager option. The option will be towards the bottom.
Once it’s open, go to where you want to make your new folders. Click on the New button at the top left and choose the folder option.
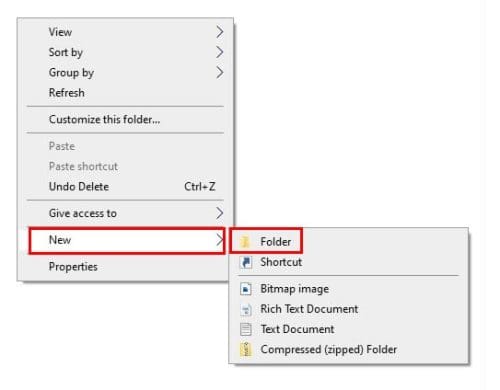
If you’re on Windows 10, you’ll need to right-click where you want the folder to go and place the cursor on the New option. Click on the Folder options, and don’t forget to give your new folder a name.

The new row with the folder should appear. If you think you created the folder in the wrong place, you can always right-click on it and choose the Undo new option to erase the new folder.

If you were only using one method to create your folders, here are a few more. The more options you have, the better. You could be using the Command Prompt and need to create a new folder. If you didn’t know that you could create a new folder from the Command Prompt, now you know, so you can use the program you’re already using to do it.
Further Reading
Since we’re on the subject of creating folders, don’t forget to check out our article on how you can also create, delete, and manage them on Dropbox. See how you can also create and erase folders on Outlook if you haven’t gotten a chance to create them.
For those times when you want a little extra security, you can also create a locked folder in Google Photos. For those pictures that you don’t being seen by the wrong eyes, these folders are perfect for protecting those pictures of your 3rd-grade recital. There are various other places you can also create folders; for example, you also have Google Drive, and since there are always issues to deal with when it comes to problems, you might also want to read up on how you can fix the issue in Outlook when the set of folders can’t be opened.
Conclusion
Creating folders in Windows is easy, even if you’re getting started with the OS. There are various ways you can go about creating the folders. So, you can choose the easiest one for you. You can create a new folder using keyboard combinations or other methods that require a few clicks here and there. Which method do you think you’re going to use? Let me know in the comments below, and don’t forget to share the article with others on social media.