Leaving the screen on your computer doesn’t only waste power; it can also make it easy for anyone to look at what you’re working on. So if you’re working on the guestlist for your friend’s surprise going away party, it might not be a surprise if you leave the screen on for too long.
The good news is that adjusting the time the screen stays on is easy, and you have various options to choose from. Let’s see how you can make that screen stay on for the least amount of time possible.
How to Change the Screen On Time on Windows 10
To modify the time the screen on your Windows 10 computer stays on, you’ll need to go into Settings. You can do this by clicking on the Windows icon at the bottom left of your screen. Click on the cogwheel and click on the Settings option. Once you’re there, go to System, followed by the power and sleep option.
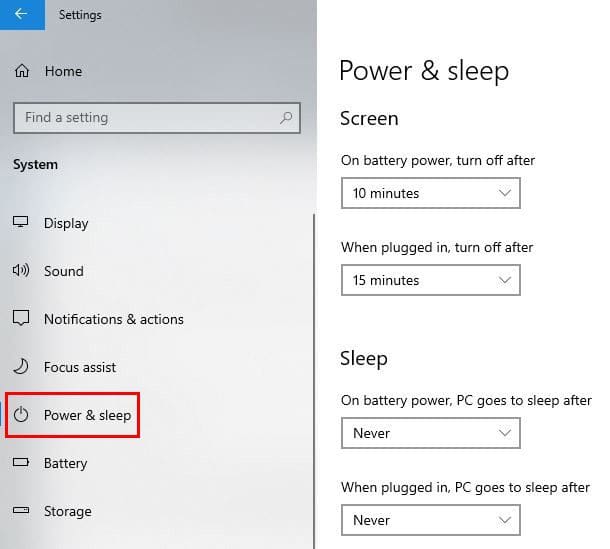
You’ll see the option to set two different times. You can choose the screen time when you have your laptop plugged in and when it is on battery power. Click on the dropdown menu to the side. You’ll have quite a few time options to choose from.

You’ll also see options to customize the sleep options as well. When your computer sleeps, that doesn’t mean that it’s off. As you can see, reducing the amount of time your laptop screen remains on is simple. If you’re gone for more than that amount of time, you can relax knowing that Windows turned off the screen for you.
Conclusion
With time everything gets more expensive, and that includes electricity. By setting a time for Windows to turn off your screen, you can save yourself a pretty penny. What time did you choose to have your screen turn off? Share your thoughts in the comments below, and don’t forget to share the article with others on social media.