

Computers use two main types of memory: RAM and storage. RAM is fast and expensive and is used to store data used by currently running programs. Storage, usually in the form of an HDD or SSD, is slower and cheaper than RAM and is used to save data for the long term. By using fast RAM to store data for currently in use programs, they can load data faster. If your computer doesn’t have enough RAM for the currently loaded programs, it uses virtual memory as a temporary stopgap measure.
Virtual memory is a portion of your storage drive allocated for use to swap out data stored in RAM when the RAM is full. Utilizing the virtual memory space comes with a performance impact. Any data moved there can then only be accessed at the slower speeds of the hard-drive. This performance impact is still preferable to not having any virtual memory at all, because it would mean just deleting the data from the RAM when it is too full.
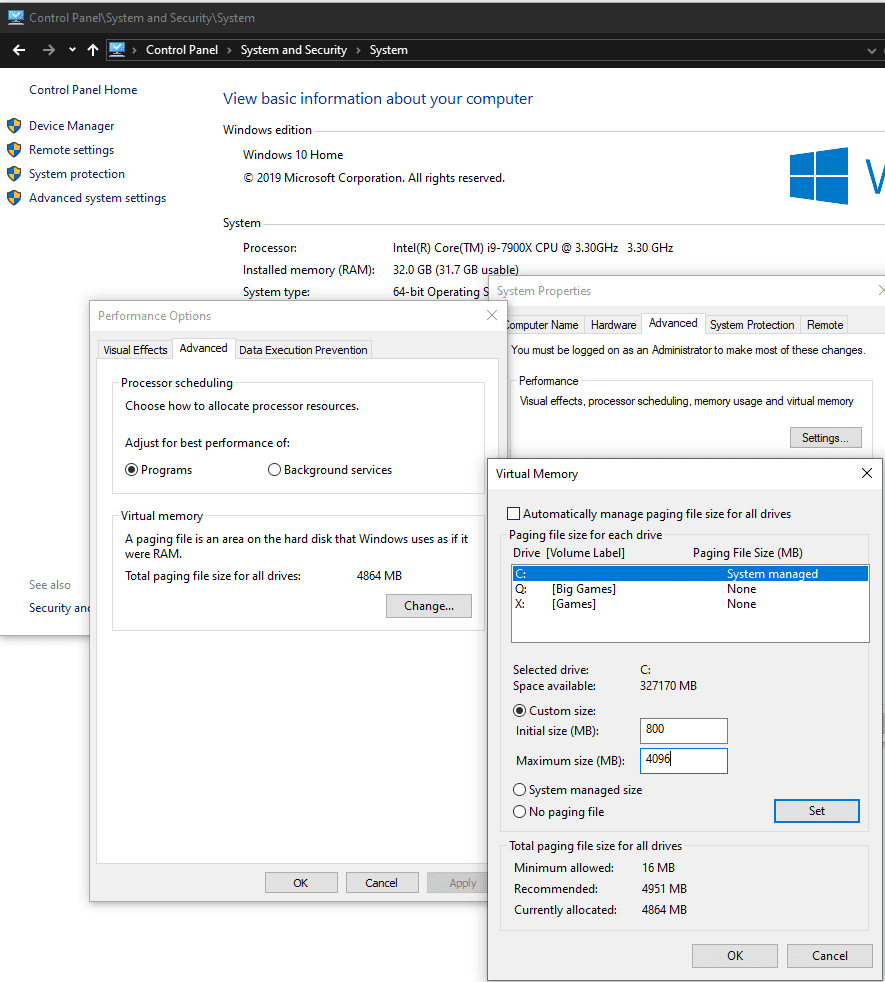
So, virtual memory is a good thing, but how do you configure how much virtual memory your system has? First, you need to open Control Panel and browse to “Control Panel\System and Security\System”. Click on “Advanced system settings” on the left-hand side of the page. In the new system properties window, move to the “Advanced” tab and then click the “Settings” button in the Performance box.
In the “Performance Options” window, move to the ”Advanced” tab and click “Change” in the “Virtual memory” box. This will now open the Virtual Memory configuration window. From here you can configure the amount of hard-drive space on each of your hard-drives allocated for virtual memory usage. You just need to untick “Automatically manage paging file size for all drives” and then select a custom size for each drive.
In general, you should allocate around 4GB of storage for use as virtual memory, this will be more than enough for any reasonable workload. Windows recommends 800MB as a minimum as this allows space to save error reports for crashes and blue screens. Don’t set your system below the recommended value as you risk performance problems under heavier work loads. It’s worth noting that your computer doesn’t use this virtual memory until its actual RAM is used up.
Tip: If your computer is regularly running out of RAM and using virtual memory you should upgrade the amount of RAM your computer has. Virtual memory is not designed to act instead of RAM, and your system will perform much better with more RAM. For modern machines, a minimum of 8GB of RAM is recommended.


I am having 10 gb of virtual ram but I am not able to play Free fire. And when I start the game it lags and suddenly the game closes automatically
I have 3 gb of installed ram .
please help me