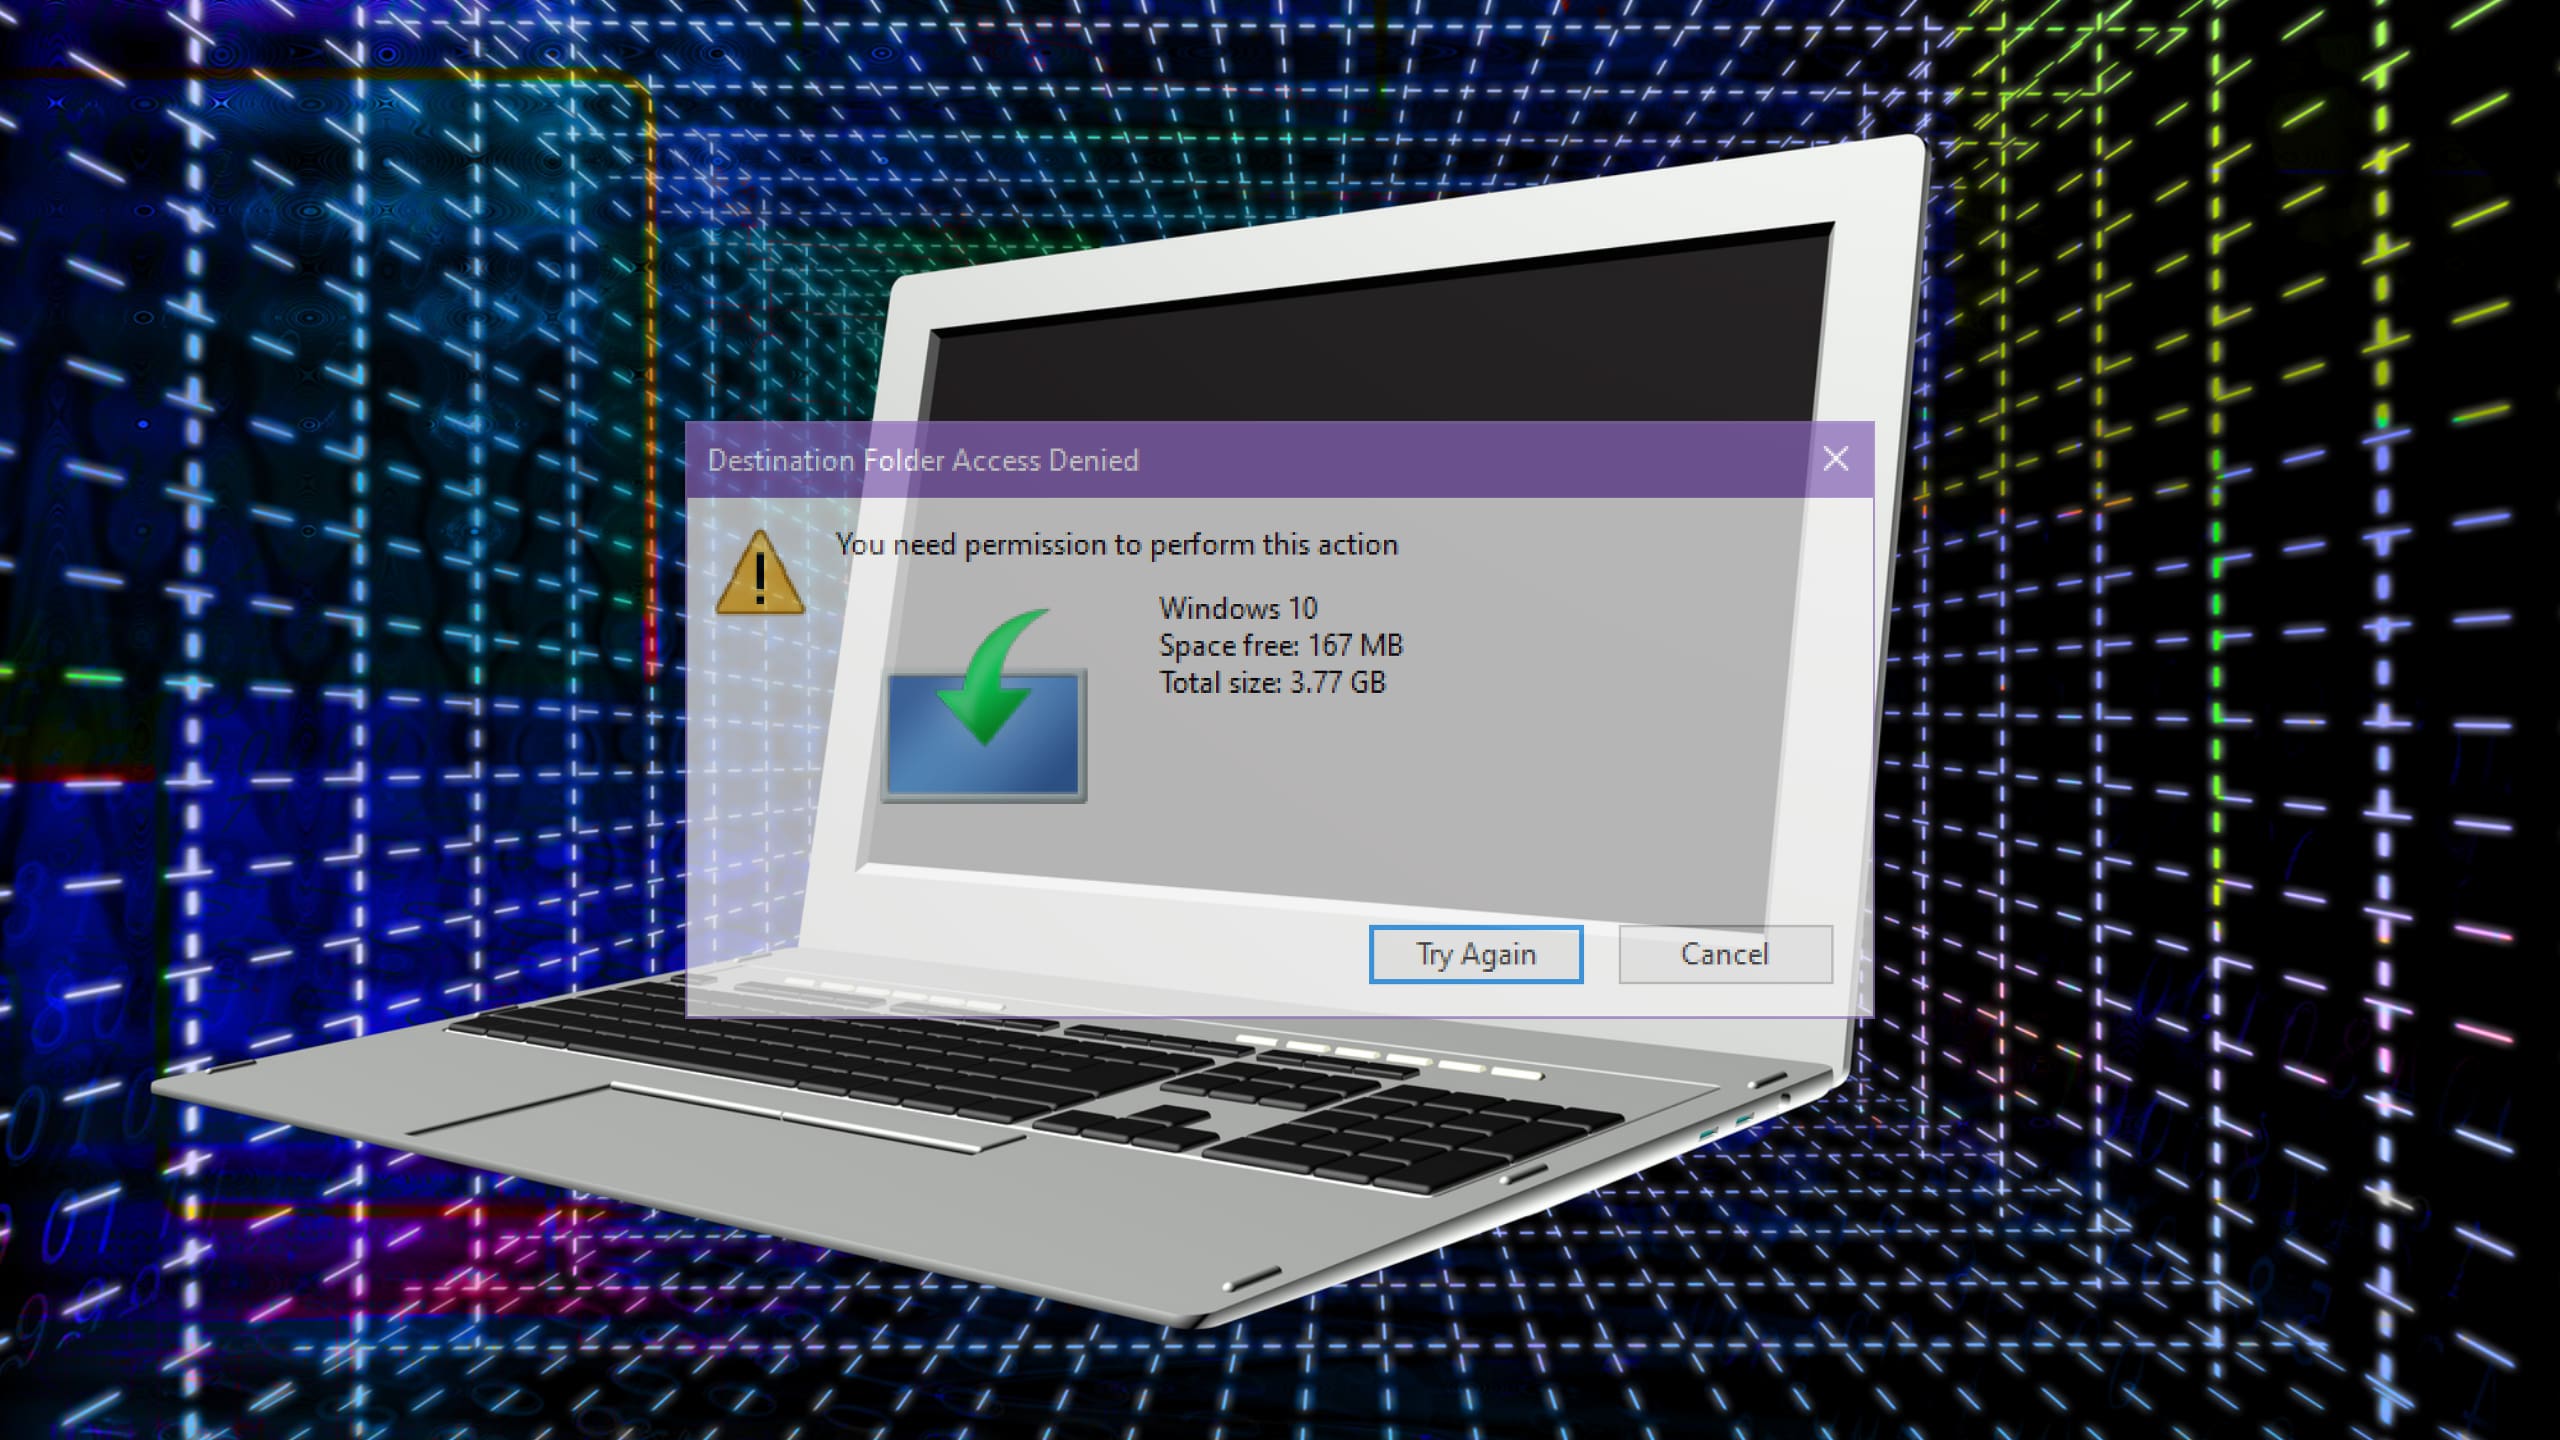
Windows 11 24H2 was a significant problem for many Steam fans. The size of the update, the number of bugs, and the performance issues in the app and other system components had people scrambling to revert to 23H2. After all, it isn’t Steam if the client is not starting and games are not launching.
In this article, we’ll be helping you address this issue with a few troubleshooters and help you get gaming again.
Contents
Steam Games Won’t Launch After Windows Update – What to Do
Unfortunately, there’s no one hard and fast fix that will solve Steam games not launching for all users. PCs, their specs, and manufacturers all differ, meaning several troubleshooting solutions are necessary. Hopefully, what we’ve assembled below will help you.
Fully Update Your Windows and Everything Else
As of writing this article, it’s been almost a year since Windows 11 24H2 dropped. Apart from the smaller patches, hot fixes, and cumulative updates, 25H2 is currently being rolled out to selected PCs. Before doing anything else, it’s vital to ensure that both Windows and the Steam client are fully up to date.
Many of the initial Steam problems, such as Ubisoft games failing to launch, have been addressed since the release of the update, which demonstrated why it’s good to keep up with those update notices.
Update Your Graphics Drivers
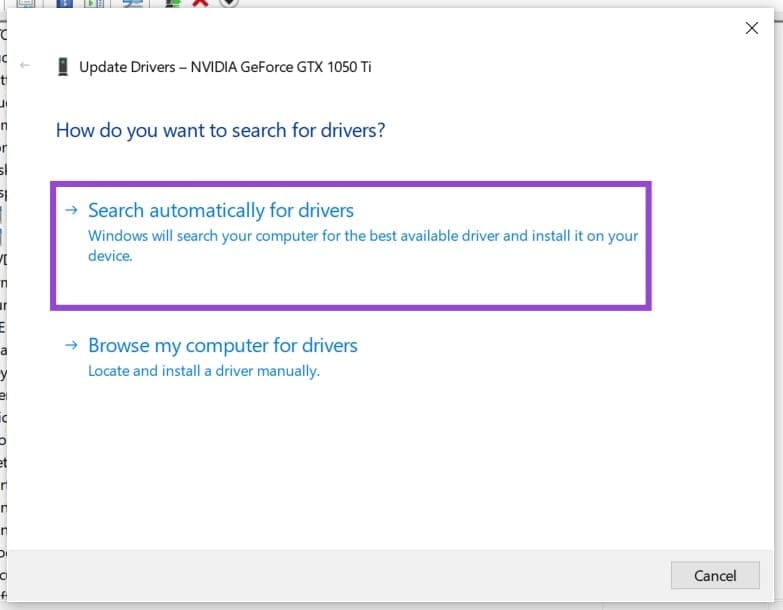
The 24H2 version forced many manufacturers to rush to apply hot fixes in an attempt to keep up with Microsoft’s problematic update. Meanwhile, outdated graphics drivers could also contribute to games and the Steam client failing to launch. Graphics card updates might not be a high priority, but they are still vital. You can update yours (AMD or Nvidia) through their clients or through the Device Manager. Here’s how:
Step 1. Open the Run dialog (Win + R) and type “devmgmt.msc” and click “OK.”
Step 2. In Device Manager, click on “Display Adapters” and then right-click your graphics card.

Step 3. Select “Update driver.”
Step 4. Choose “Search automatically for drivers” and your machine will scan. Any new drivers will be displayed, and you can click them and follow the steps to install.
Disable Auto HDR
If your PC supports Auto HDR, it may be the cause of your games failing to launch or crashing once they do start. To fix this, just disable it. Here’s how:
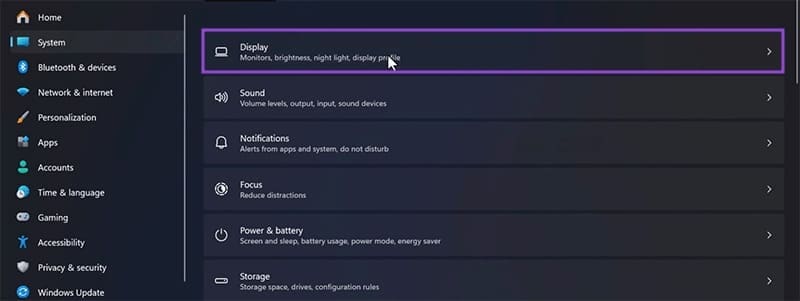
Step 1. Open Settings (Win + I) and navigate to “System” in the sidebar.
Step 2. Click “Display.”
Step 3. Scroll down until you reach “Graphics” and click it.

Step 4. If your PC supports Auto HDR, you should see an option called “Auto HDR” with a slider next to it. Drag this to “Off.”
Step 5. See if the game launch issue is fixed.
Using PowerShell to Fix Steam
If the Steam client itself, not just the games, is failing to launch, you can always attempt a fix in PowerShell. Here’s what to do:
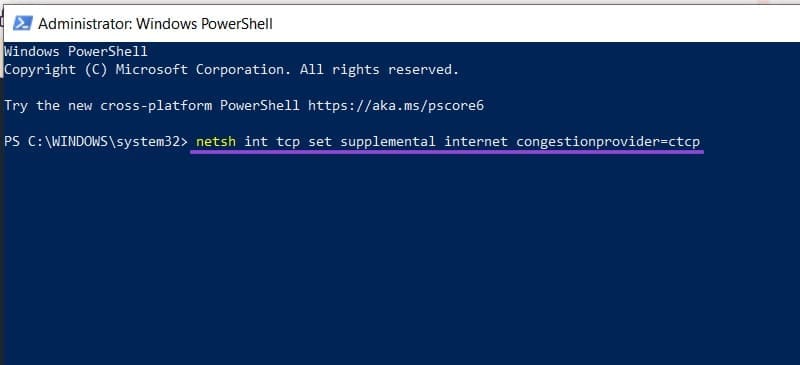
Step 1. Open the search bar and type in “PowerShell.” Right-click the icon and run as Administrator.
Step 2. In PowerShell, enter the following command: “netsh int tcp set supplemental internet congestionprovider=ctcp” and press “Enter.”
Step 3. See if this resolves your issue.
Reinstall Steam
As a last-ditch attempt, this might not be successful, but you can always try to uninstall and reinstall Steam. Doing so will clear current settings that may be causing lingering problems with launching games.