Nvidia’s Control Panel is a fantastic tool to adjust your graphics settings on the fly – when it’s working. But if your Control Panel keeps crashing, there could be any number of underlying problems that need to be resolved.
This article will take you through how to fix a crashing Nvidia control panel.
Contents
What to Do When the Nvidia Control Panel Keeps Crashing
The Nvidia control panel houses your GPU graphics and 3D settings. If it crashes, your graphics card will still work, but you won’t be able to change things, which can be frustrating. It’s also important to note that the Control Panel is a different program from Nvidia’s GeForce Experience and the newer app, which mostly handles drivers, optimization, and updates.
If you’re facing constant crashes with your Control Panel, there are several remedies to try. We’ll run through some major ones below:
Restart Things
Let’s start with the simplest solution. If your Control Panel has crashed, simply restart the program and try again. If the problem persists, restart your PC and see if that solves the problem. It sounds obvious, but it’s amazing how often we forget to try this.
Administrator Privileges
Running programs in Admin mode often solves many problems regarding access that might arise. Admin mode cuts through all this by granting all permissions by default. Here’s how to run the Control Panel as an Admin:
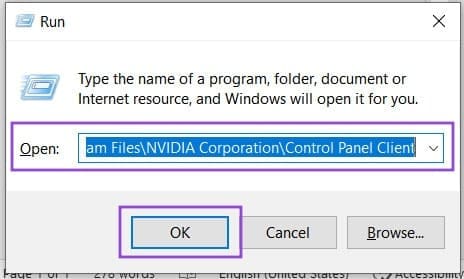
Step 1. Open the Run dialog (Win + R) and enter “C:\Program Files\NVIDIA Corporation\Control Panel Client.” Then hit the “OK” button.
Step 2. In the new window that pops up, right-click the “nvcplui.exe” file and select “Run as administrator” from the Context menu.
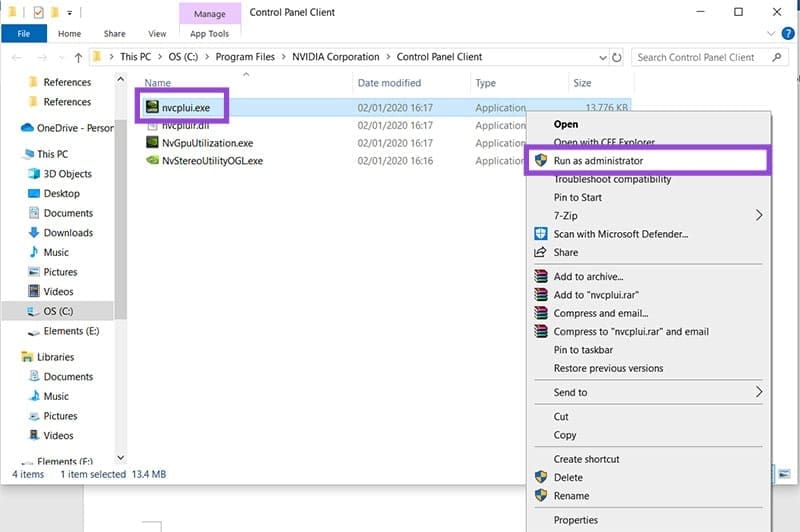
Step 3. Confirm the User Account Control popup and the Control Panel should open.
Update the Control Panel
An older version of the Control Panel may be clashing with the newer software of Windows. Even though you can’t open the Control Panel without crashing it, you can still update things via the system tray. Here’s how:
Step 1. Open your system tray and right-click the Nvidia icon.

Step 2. Choose the “Check for updates” option.
Step 3. A new window will pop up. On the “Updates” tab, click the “Check for Updates” button. You’ll be able to see if there are any new versions of the Control Panel. If there is, follow the hyperlink to Nvidia’s website to download it.
Speaking of updates, you should also ensure your version of Windows is the latest. It’s also worth checking if your graphics drivers are up to date too. Use your Nvidia app or the GeForce Experience to see if there are any available to download.
Repair System Files
A constantly crashing Nvidia Control Panel may be symptomatic of larger system corruption. It’s a good idea to scan and fix any problems via Command Prompt. Here’s how:
Step 1. Open the Run Dialog (Win + R) and type in “CMD.”
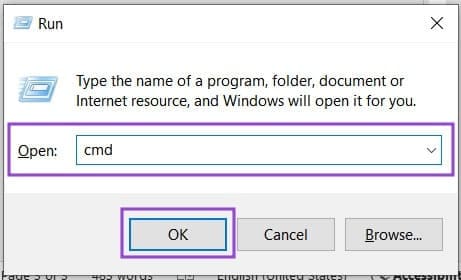
Step 2. Instead of “OK,” press (Ctrl + Shift + Enter) to run Command Prompt as Administrator.
Step 3. Start a system scan by entering “sfc/scannow” and hitting “Enter.”
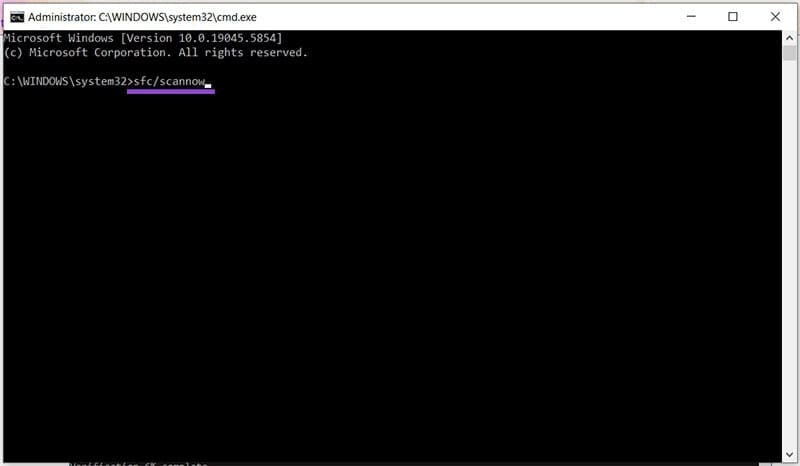
Step 4. The system scan will begin and take a few minutes. Once complete, you’ll receive a report as to the state of your system.
If there are problems, you can run the DISM cleanup tool to attempt a repair. Simply enter “dism /online /cleanup-image /startcomponentcleanup” into Command Prompt and wait a few hours for it to work its magic.
Delete the Binary Files
If the Control Panel constantly crashes whenever you try to manage your 3D settings, the problem may be corrupted binary files. Deleting them might help solve the issue. Here’s how:
Step 1. Open a new Explorer window (Win + E) and type “C:\ProgramData\NVIDIA Corporation\Drs” into the address bar.
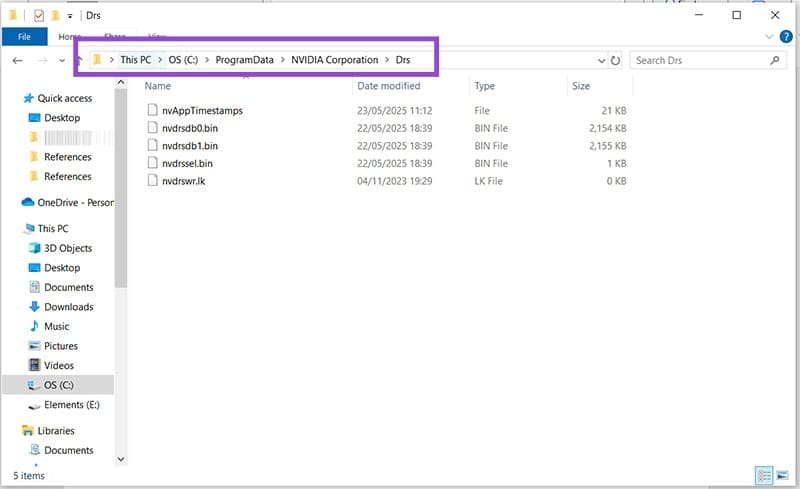
Step 2. You’ll need to delete both the “nvdrsb0.bin” and “nvdrsb1.bin” files. Press (Shift + Del) on each to skip sending them to the Recycle Bin and deleting them directly and permanently.Step 3. Restart your PC. Your binary files will be rebuilt upon restarting your machine.