

Knowing how to cancel your VPN subscription is a must unless you want to be charged for another year and not entirely use it. That’s why it’s important to know how to cancel your NordVPM auto-renew. It’s a simple process, and it shouldn’t take you too long to do.
The following tutorial will show you how to prevent NordVPN from charging you for another year. If you were to forget and were charged for another month or year, canceling the recurring payment will not help you get your money back. To get a refund you will need to contact customer support.
How to Cancel Your NordVPN Auto-Renew
Every company wants to keep their customers as long as possible, but sometimes, it’s just not possible. Whatever it is that is making you cancel your NordVPN auto-renew, know that the process is easy to do.
The cancellation process is the same, whether you purchased NordVPN with a credit card or through PayPal. First things first, you’ll need to sign into your NordVPN account on the website. Once you log in, make sure that you’re in the My Account option.
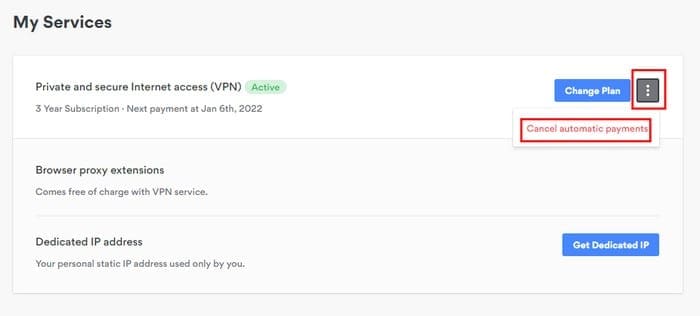
Under the My Services section, you will see all the plans you’ve signed up for. To the right of the Change plans option, you-ll see three vertical dots. Click on them and Cancel automatic payment option should appear.
You should see a window appear asking you if you are sure that you want to cancel your automatic payment. Click on yes and a green line across your screen with the words Automatic payment has been successfully canceled. The process does not end here since you still need to contact customer support to get your money back.
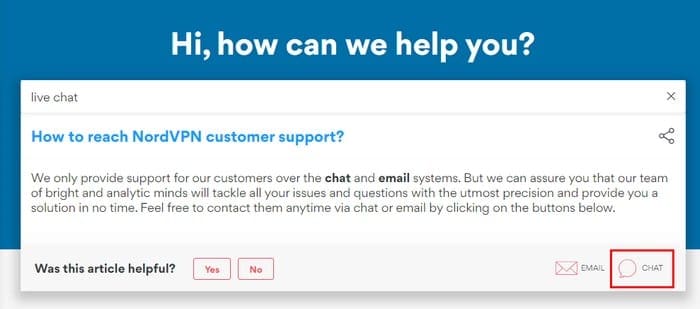
Go to NordVPN‘s site and then go to their Help Center by clicking on help at the top right. In the search option type Live Chat and a box with the question How to reach NordVPN customer support should appear. At the bottom right of that box, you should see the chat icon.
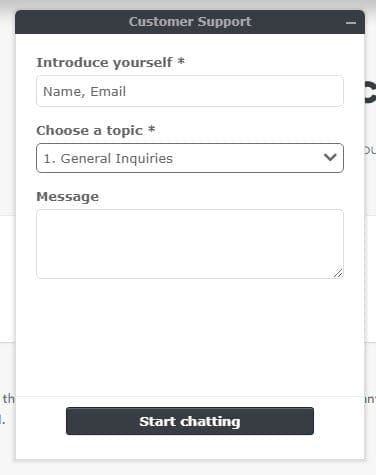
Click on the icon and a customer support window will appear. In that box, you’ll need to enter information such as your name or Email, Chat topic (payments, router, connection issues), and finally your message. Once you’ve entered all that info, click on the Start chatting button at the bottom and you’re good to go.
Conclusion
I started using NordVPN on a one month trial to see if it convinced me. So far I am one happy camper with it and decided to buy it for a more extended period. NordVPN will really give you your money back if for some reason you don’t want to to use the service anymore.

I wanted, per Log-In, to CANCEL the Automatic Subscription Reneval TODAY, on 4th december 2020
BUT, I do not get the three vertical dots shown.
SO, I therefore, cannot click on them, – and cannot Cancel the automatic payment option.
I want in either way, – to CANCEL the Automatic Payment, – TODAY, please.
Best Regards
Torben