
Do you need to connect to a computer or storage device on a home or workplace network using your MacBook or iMac? You’ve come to the right place! Find the best methods to map a network drive on Mac with step-by-step instructions.
The need for digital storage is increasing every day as the size of TV shows, movies, games, documents, images, and software is also growing. After buying a 512 GB SSD MacBook or iMac, you soon find that there is barely any space on your Mac. Now, you need to rely on external storage solutions. You get networked attached storage (NAS) for home or business needs. But, you find that it’s not something like a USB external storage that you can just connect and start copying files.
For a NAS device, you need to learn how to map a network drive on your MacBook or iMac by connecting the NAS to your home or office Wi-Fi network. There are other utilities for mapping network drives on macOS too. Read below to learn the methods you can use to map a network drive yourself and get started with binging or work.
Contents
What Is Network Drive Mapping on Mac?
Network drive mapping on Mac is simply adding a networked computer or storage space to the Finder app of the macOS. Once added, you can open Finder and access the content of the connected server just like macOS’s internal hard disk storage or iCloud Drive.
When you map a network drive on Mac, it’s quite similar to mapping two or more Windows 11 devices in a Home Group, home network, or office network. The ultimate goal is to access content from remote storage, drives, computers, and servers without physically accessing those resource locations.
Also read: What to Do if Windows Cannot Map Network Drive
Why Should You Map a Network Drive on a Mac?
Find below the reasons to map a network drive on MacBook and iMac:
- You can access workplace data from office servers at home when working from a home office.
- It’s the most trending way to extend your Mac’s internal storage by connecting it with NAS storage remotely.
- If you create a home network and connect all the macOS devices by mapping network drives, you can access the content of all the Macs of the home.
- You may need to learn how to map a network drive on a Mac as a part of the high school or college computer science course curriculum.
How to Map a Network Drive on a Mac
Here are the step-by-step instructions for methods to set up a network drive on macOS. The steps are pretty similar in macOS editions like Ventura, Monterey, Big Sur, Catalina, Mojave, High Sierra, etc.
1. Use the Connect to Server Feature
Suppose you know the address of a remote server, shared Mac, shared Windows 11 PC, etc., on a network, you can use various network address formats and protocols to connect to those resources. Find below the address formats and protocols a macOS supports:
| Sharing Protocol on macOS | Address Format on macOS |
| SMB shared folders and servers | smb://DNSname/sharename
smb://IPaddress/sharename If you don’t know Sharename, simply enter the DNS or IP and wait for the user account and password prompt on Mac |
| For Windows-based servers and shared folders, use CIFS protocol | cifs://DNSname/sharename
cifs://IPaddress/sharename |
| NFS (Linux) server | nfs://DNSname/pathname |
| WebDAV protocol for collaborative authoring on server locations | http://DNSname/pathname
https://DNSname/pathname |
| FTP with read-only access only | ftp://IPaddress/sharename |
Now that you know which protocol to put before ://DNS or IP address, find below the step to add a network drive on your Mac:
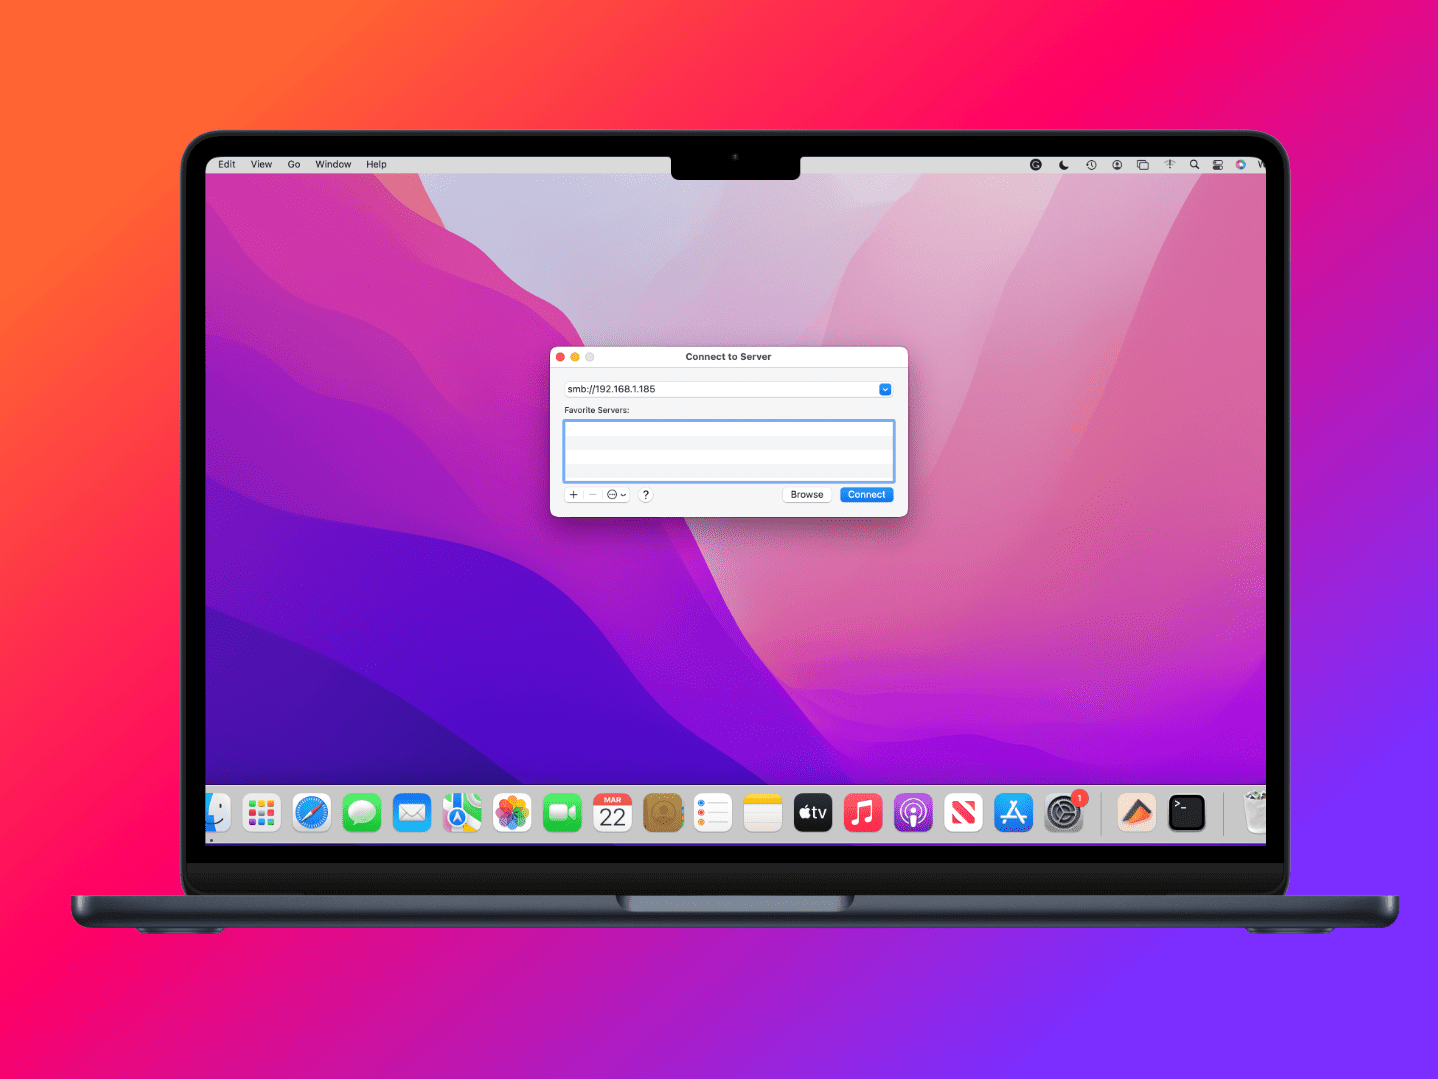
- On the Mac toolbar, select the Go menu and click Connect to Server (Command + K)on the context menu that opens.
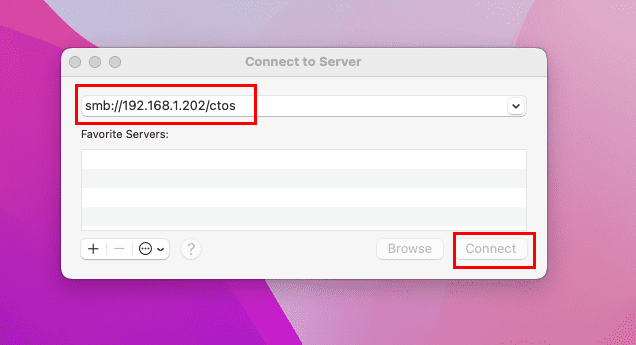
- Enter the address to where the resource is or IP or DNS you wish to map in the Server Address field. Here’s an example of a networked drive or computer:
smb://192.168.1.202
- Now, hit the Connect button to initiate the communication.
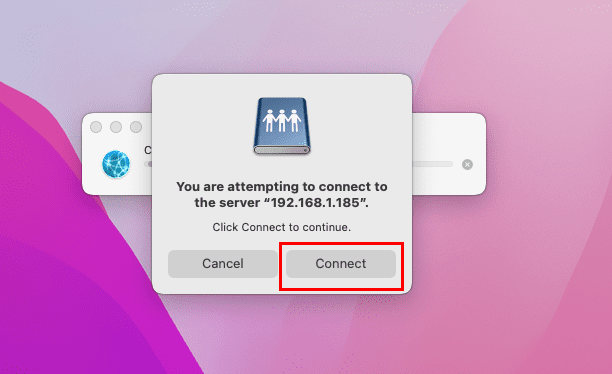
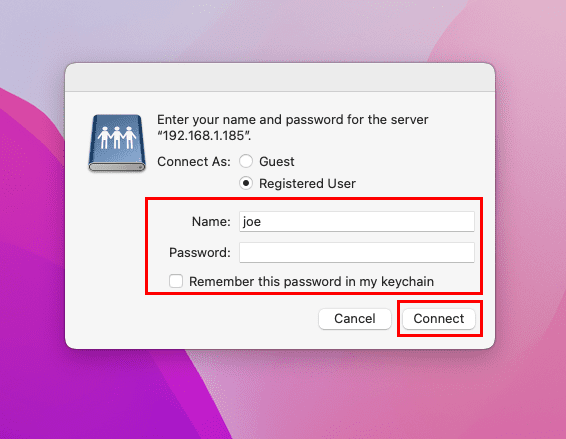
- Mac will show a pop-up window to enter the user name and password for the networked server, drive, or computer.
- Enter the required credentials and hit Enter to set up the connection.
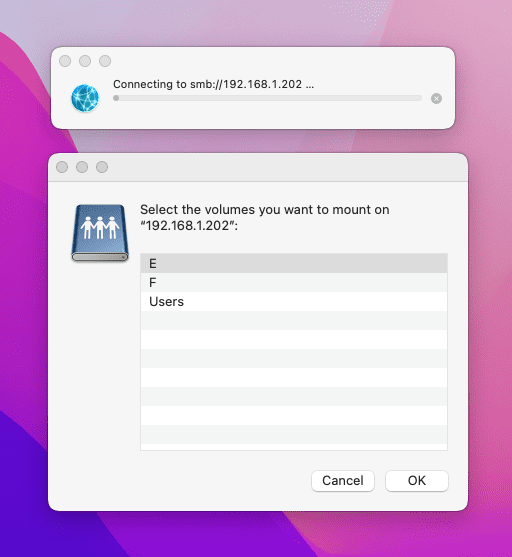
- Now, you should see the dialog box that shows the accessible storage drives on the server or NAS, or computer.
2. Add Favorite Servers to Connect to a Server Menu
You don’t need to re-enter server details each time you need to access a remote resource on the Ethernet or Wi-Fi network. You can save servers that you frequently visit as Favorite Servers. Here’s how it’s done:
- Go to Connect to Server window by following the steps mentioned above.
- You must see an Add or plus (+) icon at the bottom left corner of the window.
- Select the plus (+) button to save the current Server Address to your list of Favorite Servers.
- Enter the username and password that is required to access the resource. Check the Remember this password in my keychain box if you wish to store the credentials for use at a later time.
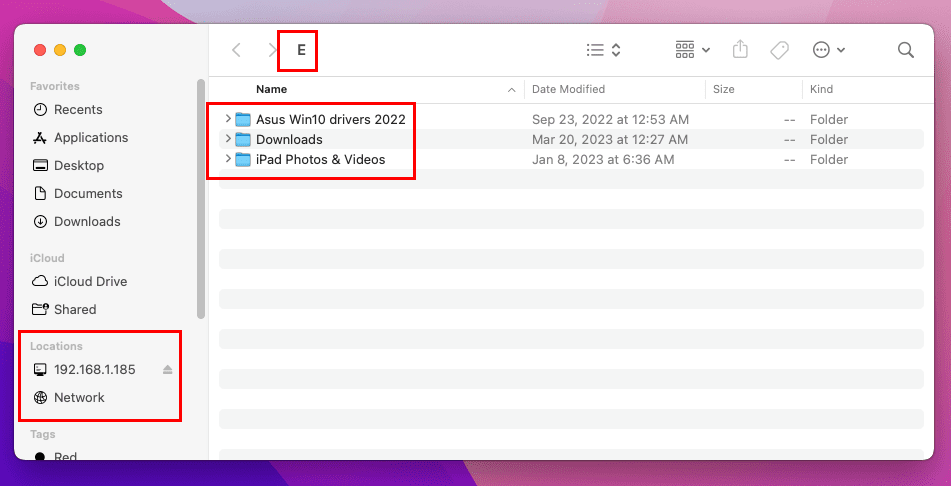
- The newly added location will show up on Finder, Network, Computer, and Locations. From these directories, you can access the mapped network drive on MacBook or iMac.
3. Automatically Connect Drives at Login
So far, you learned how to map a network drive on Mac. Now, find below how to keep the networked storage locations, servers, or computers connected to the device immediately after a system restart. This method allows you to use network resources reliably without going through the one-time connection method explained earlier.
- Perform the steps to map a drive as listed above in the Connect to Server section.
- Open System Preferences (Monterey) or System Settings (Ventura) from the Mac toolbar by clicking the Apple menu.
- Inside the System Preferences window, choose Users & Groups.
- Initially, you should see the Password tab on Users & Groups.
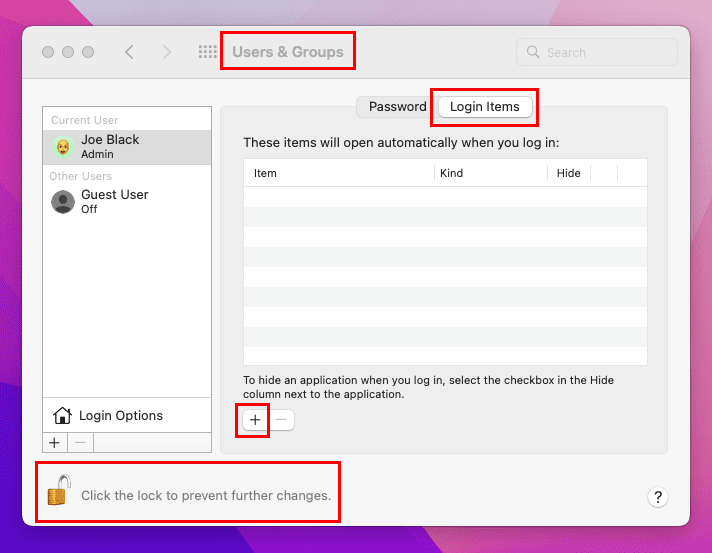
- Click the Login Items tab to find items that you can put into Startup right after restarting and account login on MacBook or iMac.
- Ensure the lock in the bottom-left corner is unlocked. Select it to change it if needed.
- Drag the mapped drives from the desktop to the Users & Groups window.
- Alternatively, click the plus (+) icon below the Item column.
- On the Locations section, double-click the network destination of your choice.
- Now, choose the folder you want to add to the Login Items.
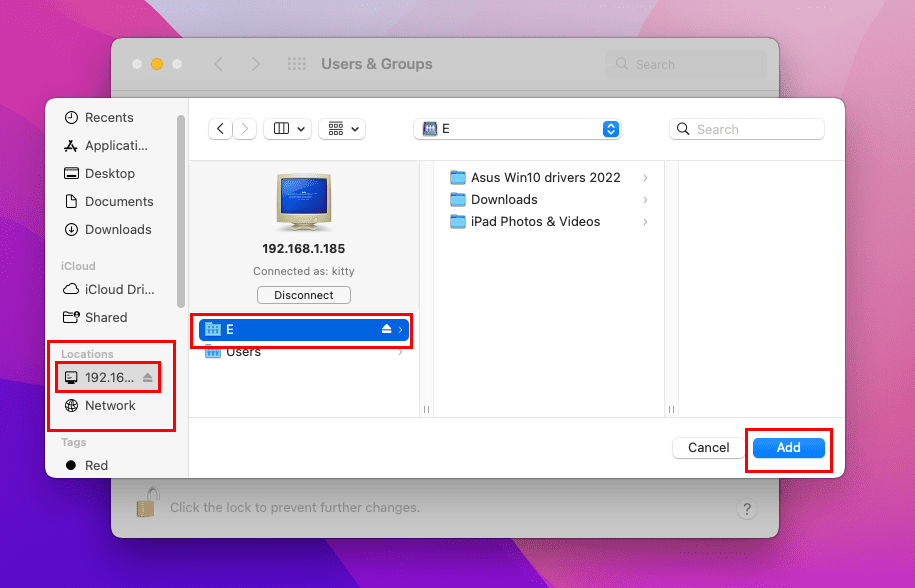
- Click Add to put the network destination in the list.
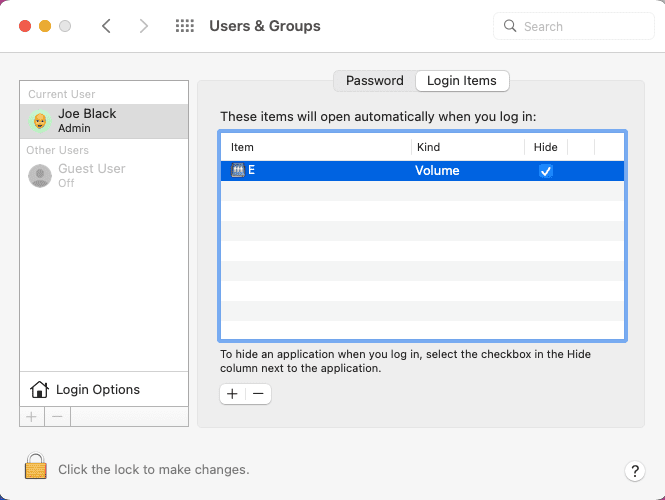
- Check the Hide box next to your mapped volume, otherwise, a window will open automatically.
The mapped drive will automatically connect at login from now on. You can simply access it from the Go menu on the Mac toolbar > Network > Name.
4. Add the Networked Drive on the Mac Desktop
Suppose, you must access multiple NAS devices or networked computers to manage databases or apply device updates. In such cases, you can add each networked drive on the MacBook or iMac desktop by following these effortless steps:
- Ensure that the networked server or drive is already connected to your Mac.
- Now, click the Finder icon on the Mac toolbar and select Preferences on the context menu.
- In Finder Preferences, click the General tab.
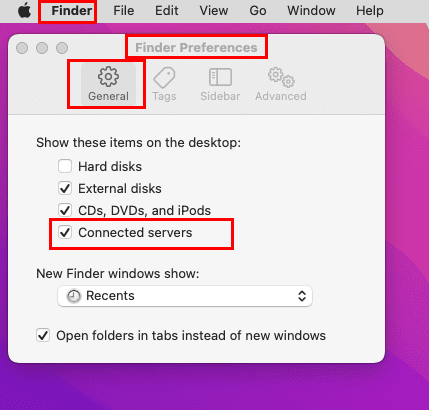
- Checkmark the checkbox close to the Connected servers option.
- Now, you should see a new icon on the Desktop.
- Double-click the icon and you’ll directly access the networked drive, server, computer, or NAS.
Do you want to add the mapped network drive in the Finder sidebar for quick access to shared resources online? You can do so if you follow these steps:
- Click Go on the Mac toolbar and select Network on the context menu.
- Now, access the network address and arrive at the directory where you stored your files.
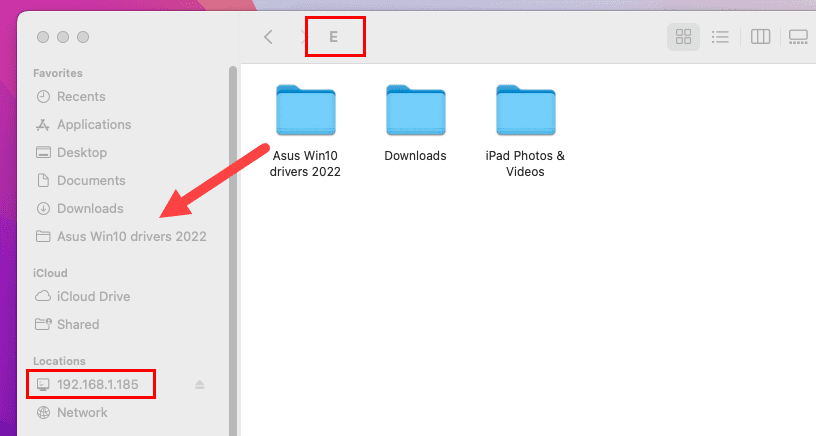
- Drag and drop the directory from the right-side list of the Network window into the Finder sidebar.
- That’s it! You’ve got a cool shortcut to the remote storage directly on the sidebar just like iCloud Drive.
5. Map Network Drive on Mac and Create an Alias
This is another way to instantly access your network resources without going to Connect to Server, enter the server address, authenticate, and connect. Here’s how it’s done:
- Hold the Command key and press K.
- In the Connect to Server dialog box, enter the DNS or IP address of the network resource in the Server Address field.
- Click Connect and then authenticate the connection using the user name and password.
- When you see the content of the network destination, consider that a reliable connection has been established.
- Now, open the Finder Preferences pane by clicking the Finder icon on the Mac toolbar.
- Make sure the box next to Connected Servers under General is checked.
- Right-click on the icon on your desktop representing the mounted NAS or network drive.
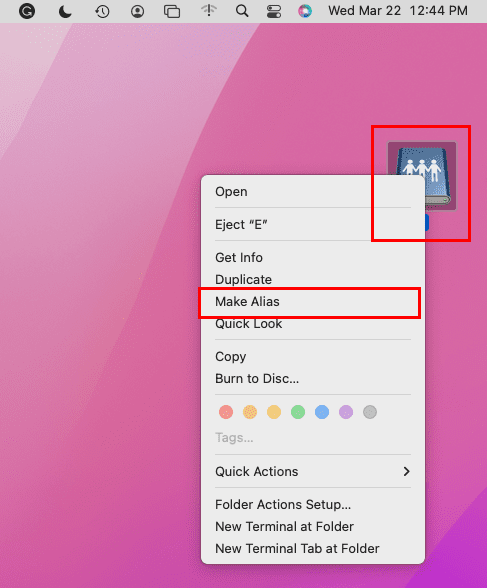
- Choose Make Alias.
- You can optionally rename the drive to something more specific.
- It helps when there are multiple NAS, computers, and server drives that you access frequently for business or professional purposes.
- Go back to Finder Preferences and uncheck the box next to Connected Servers.
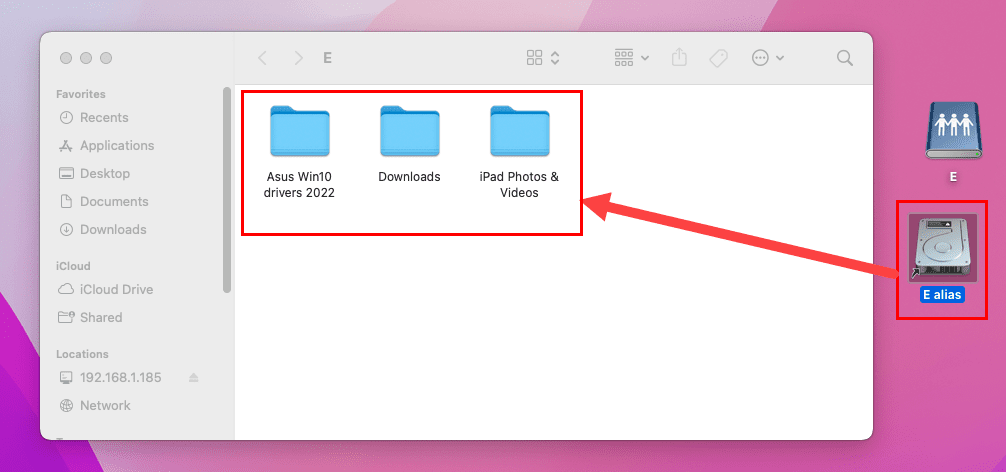
Upon restart or disconnect, just double-click on the alias. The alias will take you directly to the networked device directory.
Conclusion
Now you know how to map any network drive on Mac. Choose a method from the above and give it a try. Don’t forget to comment below if you know of any other effortless methods to add a network drive on macOS. Also, do share the article within your social networks to help other Mac users import their remote resources into the Mac Home Screen.
Next up, how to change saved WiFi passwords on macOS.

Thanks man! Works like a charm!
GREAT…thanks for the info!!! :-)
I never, ever react to blogs.
But now… This just plain works!
Fantastic post!!
Thanks!
Hi Mitch & Kevin,
thank you for the guideline, the procedure works well except one point, “Automatically Connect Drives at Login”, point 7.
This step is not stopping the Finder to open automatically. How to solve this? as it is annoying to have the Finder starting at each machine start.