How to take screenshots on Windows 11 is a common query. If you want to know the methods that work, continue reading.
Screenshots work as a tangible reference for anything that’s taking place on your computer screen.
While downloading media isn’t supported by certain websites and social media, you can take screenshots in those cases.
Taking screenshots on your Windows 11 laptop or desktop is simple and easy. Using some handy keyboard shortcuts, you can capture a screenshot in Windows 11.
Contents
How to Take Screenshots on Windows 11 in 5 Different Ways
Method 1: Use PrtSc Key
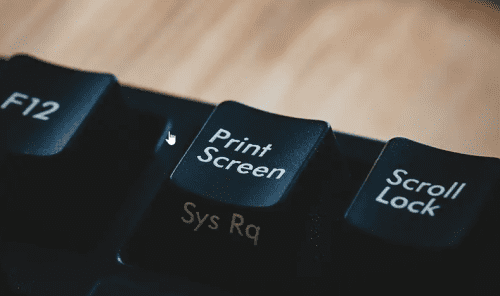
It’s undoubtedly the most commonly used method for taking screenshots on Windows 11 and earlier versions of Windows OS.
Almost everyone is familiar with this method, which involves clicking on the Print Screen (PrtSc) key. It can take screenshots of your complete screen.
The only problem with this method is that you can’t directly use the screenshot. You need to paste it into some app and save it.
To help the readers, we compiled all the necessary steps below to take screenshots using the PrtSc key:
- Make sure the page you want to take the screenshot of is evident on your screen.
- Press the Print Screen or (PrtSc) key on your keyboard.
- Thus, the screenshot is copied on the clipboard.
- Open any app like Microsoft Paint that allows pasting a copied image from the clipboard.
- On a blank Paint file, press the CTRL + V keys or click on the Paste button.
- The screenshot will be visible on Paint.
- Press the CTRL + S together or click the Save button.
- A window will appear where you need to add the file name and may change the storage location.
- Click on the Save button.
That’s it! It’s how you can take a screenshot on Windows 11.
Method 2: Snipping Tool
Windows 11 Snipping Tool is a much more convenient alternative to the previous method. It’s a built-in tool that lets you take screenshots, save them, share them, and do more.
You can either open this tool from your app list or press the Windows+Shift+S keys to open it directly. Here is how to take screenshots on Windows 11 with Snipping Tool.
- Open the Snipping Tool from the Start menu and click on the New (scissors icon) button.
- You can also use the Windows + Shift + S shortcut to take a screenshot.
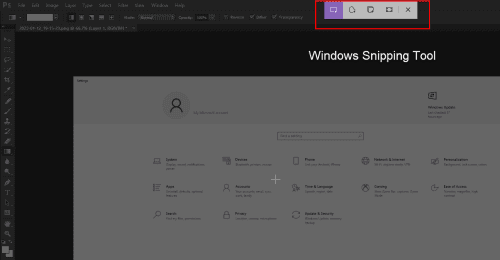
- A small toolbar will be visible on top of the screen.
- There will be four options: rectangular, freeform, window, and fullscreen.
- Choose your preferred one.
- You must select the screen area with the cursor for the first two options.
- Once the selection is complete, the tool will take the screenshot and make it available on the Snipping Tool window.
- From there, you can edit, annotate, save or share the file.
Method 3: Xbox Game Bar
Do you know that Xbox Game Bar also comes with the option that lets you take screenshots on Windows 11?
If you’re a serious gamer, you must already be aware of that. This section could be quite a revelation for the rest of the readers!
It’s capable of capturing your entire screen, barring the Windows toolbar. The screenshots are saved in this folder:
C:\Users\ADMIN\Videos\Captures.
- From any screen, press the Windows+G keys.
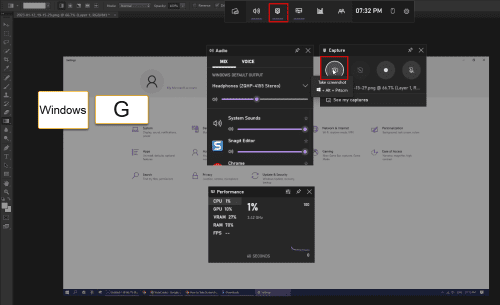
- It’ll open the Xbox Game Bar on top of your screen.
- A small window containing a capture button (camera icon) will also appear. Click on that button.
- The screenshot will be taken successfully by the app.
- To check the latest capture, you can click on the prompt shown by the Xbox Game Bar.
- You can also click on the See my captures on the Capture window to view all screenshots it took.
What to Do If Windows+G Doesn’t Open the Capture Window?
If Windows+G only brings the bar but not the capture windows, it’s because the capture widget is not selected in the settings of Xbox Game Bar. Here is how to fix that:
- On the Xbox Game Bar, click on the Widget Menu. It’s usually the leftmost button of the bar or located beside the Xbox icon.
- Click on the star icon beside Capture to make it a favorite. It’ll put the capture on the main bar.
- Click on it to open the small Widget windows. Unless you use any other feature from the bar, pressing CTRL+G will open the capture window along with the Xbox Game Bar.
Method 4: Use Windows+PrtSc Keys
This method is a tweaked version of the popular PrtSc way. It allows you to take screenshots and save them immediately.
To take a screenshot of your Windows 11 laptop screen, you can press Windows + PrtSc. Your screen will dim for a second, which symbolizes the screenshot capturing.
The screenshots taken in this method are stored in the Screenshots folder, which you can find in the Pictures folder.
The default image file format is PNG. Moreover, after taking the screenshot, you can even use it in different apps by pasting it.
Method 5: Use Alt+PrtSc Keys

Imagine you have several windows open on your computer and don’t want those to appear in the screenshot.
Using the PrtSc key will need you to crop the screenshot later. You are using Alt+PrtSc. This method will only take a screenshot of your active window, hiding the Windows taskbar.
After taking the screenshot, you need to paste it into tools like Microsoft Paint and save it for further use.
Conclusion
Screenshots are helpful when you need to captwhat’sat’s on your computer screen. Most know one or two standard methods to capture screenshots in Windows 11.
But these popular methods don’t always fit your specific needs, such as taking screenshots of a particular area of your screen.
These were the different methods for taking screenshots on Windows 11 usingfive5 different techniques. If one metdoesn’tsn’t work for some reason, you can try others.
Tell us which of these Windows 11 screenshot methods you prefer. Also, check out how to reset an app on Windows 11.