System Restore is a handy way to roll back your current version of Windows if you’re dealing with software conflicts or the loss of a particularly beloved feature. The process itself is quite simple, but problems can still arise. This article will take a look at the Error Code of 0x81000204, which tells you that the rollback did not complete properly.
Let’s dig deeper and explore a few possible fixes.
Contents
Why This Message Pops Up
When you use System Restore, your PC will revert to a previous version of Windows by using system files and settings. If these have changed, been lost, or somehow corrupted, you’ll receive a pop-up with Error 0x81000204. The message itself suggests scanning your hard drive. If you’ve tried to use System Restore a few times and been greeted with the same message, it’s time to get started on the fixes.
System Restore Error 0x81000204 Fix
Below are some possible fixes for the System Restore error:
Check Your Disk Health
Let’s start by following the advice of the error message itself and scanning your Windows hard drive. To do this, you’ll need to use Command Prompt. Here’s what to do:
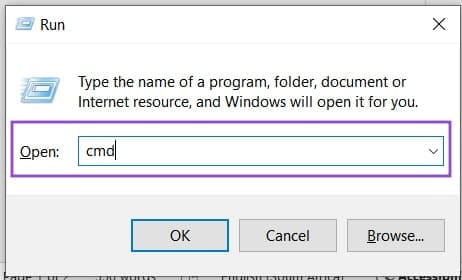
Step 1. Open the Run Dialog (Win + R) and type “cmd” into the box provided. Press Ctrl + Shift + Enter to run the Command Prompt as an Administrator, instead of pressing the “OK” button.
Step 2. In the Command Prompt window, type “chkdsk [disk name] /r” and hit “Enter.” The “/r” will check for bad sectors. You can also include “/f” to fix any corruption found.
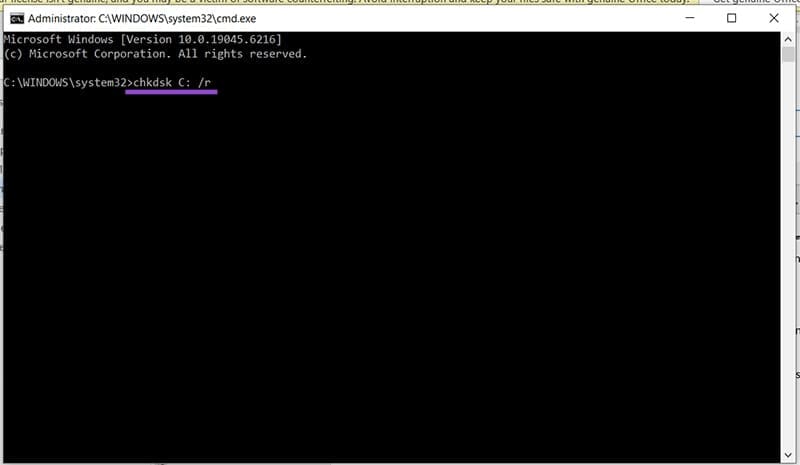
Step 3. Restart your computer once the process is finished (to be sure) and try System Restore.
The System File Checker Scan (SFC)
Your next step in Command Prompt should be to run an SFC scan. This checks drivers, libraries, and other system configuration files. Here’s how to run the scan:
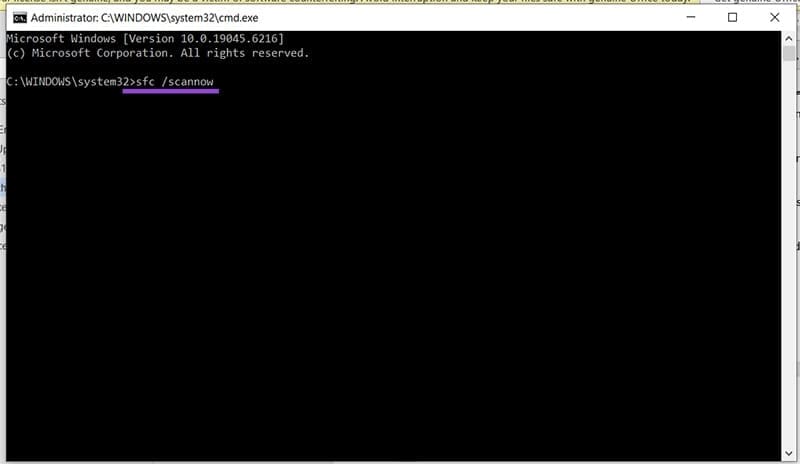
Step 1. Open Command Prompt via the Run dialog or search bar and “Run as Administrator.”
Step 2. In the window that pops up, type: “sfc /scannow” and press “Enter.” The scan process will begin, which may take some time, depending on your drive.
The Deployment Image Servicing and Management Scan (DISM)
While we’re in Command Prompt, it doesn’t hurt to run a quick DISM scan to check that all Windows image files (.wim, .vhd, .vhdx) are clear of corruption. Here’s what to do.
Step 1. Open Command Prompt.
Step 2. Type the following into Command Prompt, hitting “Enter” after each one: “DISM /Online /Cleanup-Image /CheckHealth”, “DISM /Online /Cleanup-Image /ScanHealth”, and “DISM /Online /Cleanup-Image /RestoreHealth”
Step 3. Restart your computer once the entire process is done and try System Restore.
Check Required Services
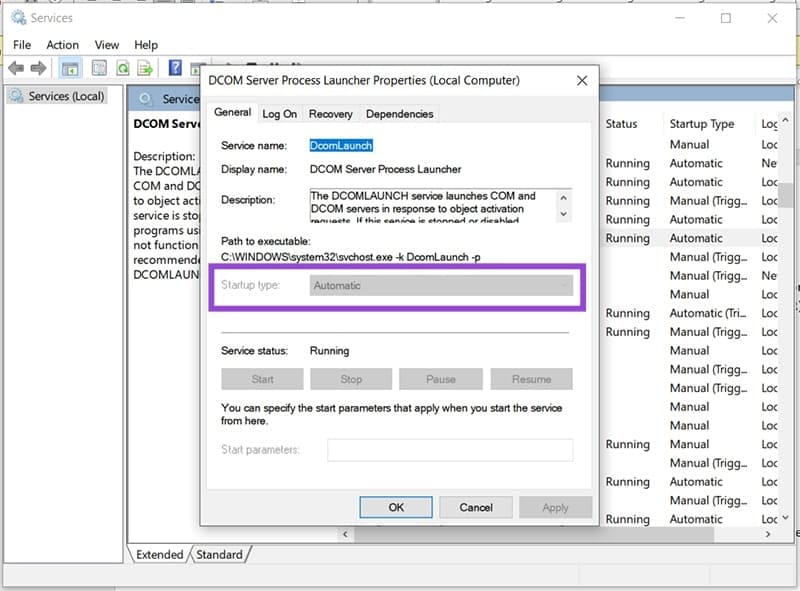
If one or more of the background services in Windows aren’t working properly, this may cause Error 0x81000204. You can fix this through the Services utility. Open this through the Run Dialog (Win + R) and enter “services.msc” before pressing (Ctrl + Shift + Enter).
The services to check are:
- DCOM Server Process Launcher
- Microsoft Software Shadow Copy Provider
- Volume Shadow Copy
- Plug and Play
- Remote Procedure Call (RPC)
Check the status of each one, and if one isn’t running, be sure to double-click it and change the “Startup type” to “Automatic.”