There are a lot of things that can cause the dreaded Blue Screen of Death (BSOD), but there’s one specific BSOD that can be especially perplexing. The frustrating thing about the “FAT FILE SYSTEM” Blue Screen Error is the laundry list of possible reasons behind it. But there are just as many possible fixes to try.
In this article, we’ll provide a comprehensive set of solutions to try until a certain shade of blue no longer appears on your screen.
Contents
What Causes the FAT FILE SYSTEM BSOD?
To understand this particular blue screen issue, it helps to know that there are many fixes. The issues that can cause this sudden shutdown include:
- Driver issues or compatibility
- Corrupted or missing files, especially system files
- Malware and viruses
- Outdated system software
- Hard drive issues
It doesn’t stop there, but those are the major ones. Let’s look at the fixes that target these problem areas.
Fixing the FAT FILE SYSTEM BSOD on your PC
With this particular blue screen, it pays to keep trying solutions until your issue is resolved. Let’s get started:
Scan Your PC for Malware
Before anything else, it’s good to check that your computer isn’t infected. Run your antivirus to scan for potential malware, viruses, or trojans. A clean PC also prevents further corruption after applying other fixes.
Update Your Drivers
Starting simply, outdated drivers and software clashes are a prime cause of this (and other) BSODs. It’s a good idea to start troubleshooting by updating all major hardware component drivers. Device Manager is your friend here:
Step 1. Open the Run Dialog (Win + R) and type in “devmgmt.msc” before pressing (Ctrl + Shift + Enter) to run as Administrator.
Step 2. In the Device Manager, right-click on major hardware components (disk drives and display adapters are two major culprits) and choose “Update drivers.”

Step 3. In the next screen that pops up, choose “Search automatically for drivers” and let your PC find the right drivers for your hardware.

Step 4. Restart your machine.
Keep doing this for all major components. In the case of certain hardware, you can also check the manufacturer’s site for the latest drivers to install.
Check for Bad Drivers
Driver Verifier is a tool that can scan and check for faulty or corrupted drivers. It’s run through the Command Prompt. Here’s how to use it:
Step 1. Open the Run dialog and choose “Run as Administrator.”
Step 2. In Command Prompt, type “Verifier” and press “Enter.”
Step 3. In the new window, check “Create standard settings” and press the “Next” button.

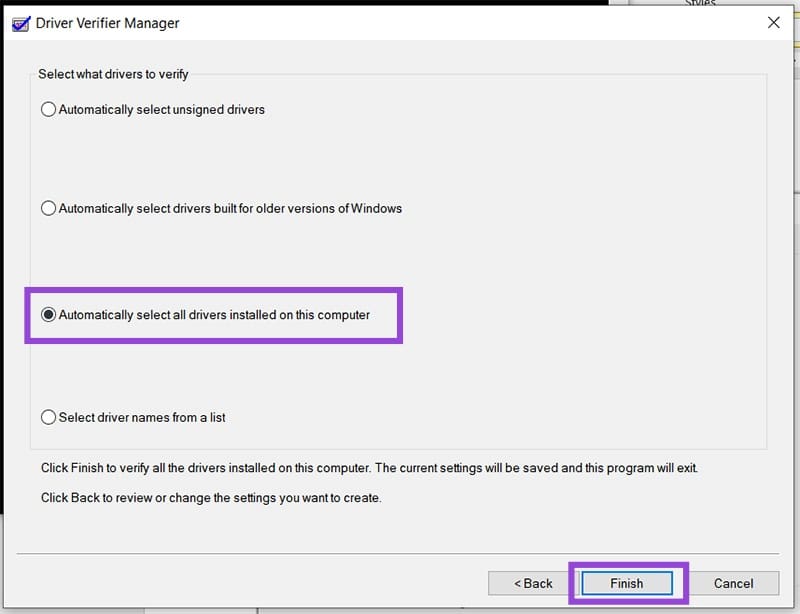
Step 4. To test everything, select “Automatically select all drivers installed on this computer” and click “Finish.”
Step 5. Let the scan complete, reboot your PC, and see if the issue is resolved.
Check Your Disk With Command Prompt
A good way to check your hard drives for corruption is by running the Disk Checker in Command Prompt. Here’s what to do:
Step 1. Type in “cmd” into the Run Dialog (Win + R) and press (Ctrl + Shift + Enter) to run as Administrator.
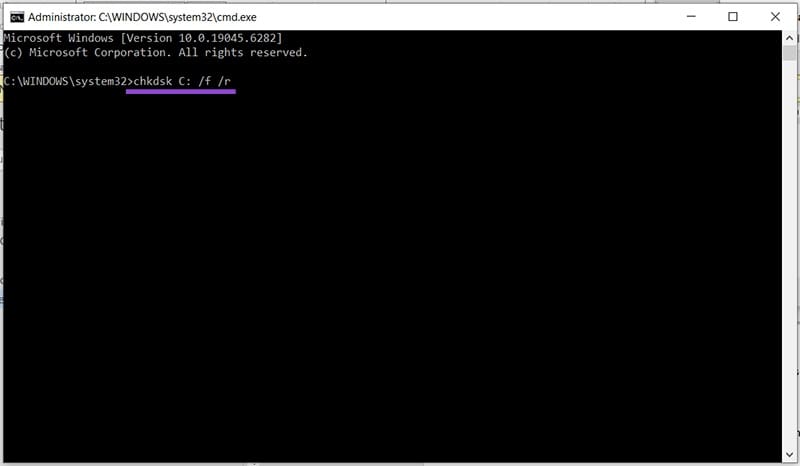
Step 2. In Command Prompt, type “chkdsk” followed by the letter of your drive. Typing in “/f” and “/r” allows you to fix errors and recover information, respectively. It’s a good idea to use both, e.g., “chkdsk C: /f /r”
Step 3. Let the scanner run after pressing “Enter.” This may take some time. Restart once done.
The System File Checker Scan (SFC)
Another Command Prompt check is to run the SFC to check system files. Here’s how:
Step 1. Open up Command Prompt via the Run dialog or search bar and choose “Run as Administrator.”
Step 2. Type: “sfc /scannow” and press “Enter.” The scan process will begin, which may take some time, depending on your drive.

Test Hardware
If faulty hardware is triggering the BSOD, you can narrow down the culprit by attaching and detaching various components. Restart after detaching each one to see if the issue persists. Another test is to plug the same device into a different computer and see if it causes an error.