It all starts with the BIOS. Whenever you boot up your PC, this system initializes the hardware, tests everything, and begins the boot of the operating system. If you’re suddenly greeted with the message “BIOS corruption has been detected,” then things are looking pretty serious for your Dell machine.
Fortunately, we’re here to help you with a few troubleshooting techniques in this article.
Contents
The Dell Knell
“BIOS Corruption has been detected” is a specific message that’s unique to Dell machines (although BIOS issues can occur with all machines). It appears when the machine first boots. It goes hand in hand with the Auto Recovery process and there’ll also be a message about the power status of your machine, which can also play a role. The problem arises when the screen message indicating BIOS corruption has been detected and auto-recovery is triggered keeps popping up.
There are a few possible solutions depending on the underlying problem, so let’s get started:
Fixing “BIOS Corruption Has Been Detected”
To address a problem with your Dell BIOS, it’s important to be methodical and try each solution until one works:
Before You Troubleshoot
Before you get started, there are basic tasks you can perform that can save you plenty of time. If your Dell is a laptop, ensure that it’s fully charged. If the BIOS Auto-Recovery screen lists your power as “Inadequate,” this might be causing BIOS problems and hindering the recovery process.
You should also completely shut down the machine. You can do this via the operating system (if possible) or by activating the automatic kill switch. To do this, press and hold the power button for at least 10 seconds. If the machine starts normally after this, then you’re in luck. If not, shut it down properly again.
Enter BIOS Recovery Manually
If Auto Recovery is constantly letting you down, the best solution is to do it yourself. Shut down your machine, ensure it’s fully charged (if applicable) and do the following:
For laptop users:
- Disconnect and reconnect the charger.
- Press and hold “Ctrl + Esc” simultaneously until you see the keyboard backlight turn on.
- The Dell logo should appear and you’ll be taken to the BIOS Recovery screen.
For PC users:
- Restart your machine.
- On restart, simultaneously hold the “Ctrl+Esc” keys.
- You should be taken to the BIOS Recovery screen.
Your machine may restart a few times before getting to the Recovery Screen, so don’t worry. If you don’t have a backlight on your keyboard, look either at the Caps Lock button or the lights on your PC.
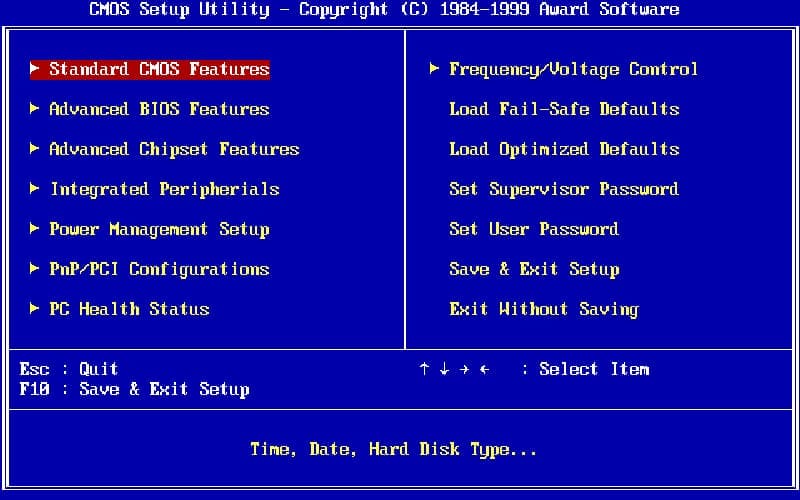
Choosing Your Solution

Once in the BIOS Recovery screen, you’ll have a few options to choose from that might solve your problem. Most modern Dell machines support BIOS Recovery 2 or 3. If one doesn’t work, you can try the next. They are:
- Recovery – Choose this option to attempt to recover the BIOS. This is done from the hard drive itself, via a USB device, or by using the currently flashed BIOS. Only BIOS Recovery 3 allows for boot recovery.
- Rollback – This option will revert to the BIOS settings of an earlier version of the firmware.
- Reset – Probably your last resort. This option will reset the BIOS to its default factory settings.
For some of these options, you might be required to enter an Admin password, so have it handy.