There is always something to do. It can be as simple as getting something from the store or as important as a presentation at work. Sure, they are various apps you can try to organize the things you need to do, but one simple-to-use app you can try is Microsoft To-Do. Besides adding your tasks, you can also personalize them to give them your personal touch by adding a background. You can keep the essential tasks in one list and the non-important ones in another for better organization. And, of course, you can create your lists.
Contents
- 1 How to Create a Task in Microsoft To-Do
- 1.1 How to Edit/Delete Your Tasks on Microsoft To-Do
- 1.2 How to Share a List or Task on Microsoft To-Do
- 1.3 Keyboard Shortcuts for Microsoft To-Do
- 1.4 How to View All Your Lists and Tasks Simultaneously
- 1.5 How to Turn on Dark Mode in To-Do
- 1.6 How to Assign a Task in Microsoft To-Do
- 1.7 How to Group Specific Lists in Microsoft To-Do
- 1.8 Further Reading
- 1.9 Conclusion
How to Create a Task in Microsoft To-Do
Creating a new task in Microsoft To-Do is simple. The tasks you’ll make will be inside a list, or they can be on their own. When you first open the app, you” already see lists such as:
- My Day
- Important
- Planned
- Assigned to me
- Tasks
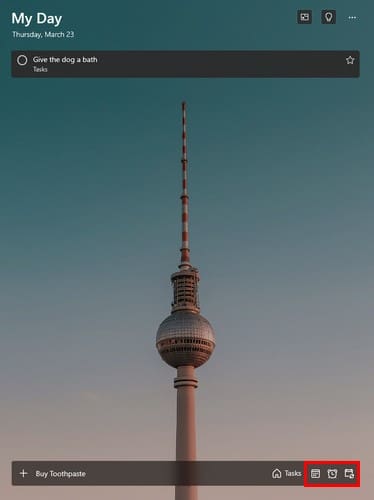
The My Day list is where you can add all the tasks you need to do for that day. Or, you can use it for tasks you created that day. You’ll see additional options to the right when you type your task at the bottom. You can do things such as:
- Add due date
- Reminder
- Repeat
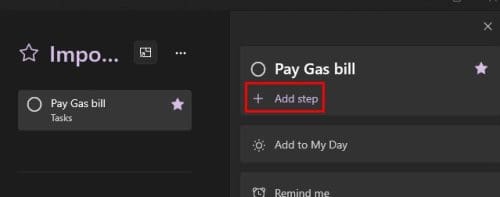
Once you’ve created the task, you can click on it to add more information. For example, you’ll see options to add a file and a note. At the bottom right, you’ll see how long you created the task and the option to erase it. There will be a start next to your task. Click on it if you want to mark your tasks as important. You can also add steps to your task. For example, you need to prepare dinner, but you can add sub-tasks, and those sub-tasks can be what you need to buy at the market.
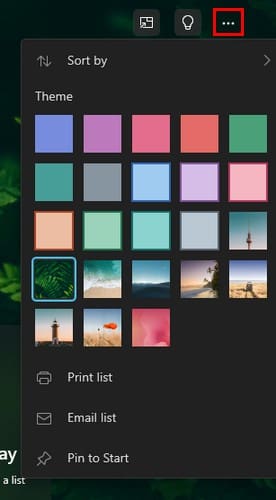
Personalizing Your Tasks
If you’re unhappy with the default design, your tasks can have a look you want. To change the background, click on the three dots. You’ll see different backgrounds you can choose from, and there will also be options to print, send, and pin to start.
How to Edit/Delete Your Tasks on Microsoft To-Do
You’ve created your tasks, but now you must make some changes or erase them altogether. Go to the list with the task or the task itself and click on it to open it. As soon as it opens, you can change the name and click on the other fields to make any changes. To erase the task, right-click and choose the Delete task button. For Android, you’ll need to long-press on the task, tap on the three dots at the top right, and choose the Delete task option. To erase multiple tasks, long-press on the tasks one by one and the dots at the top right, followed by the delete option. You can erase tasks that have or have not been completed.
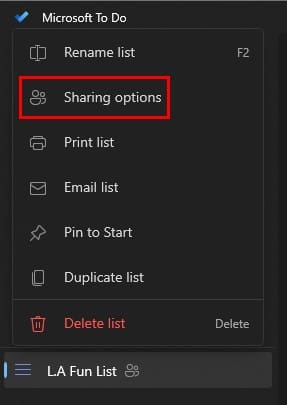
You need to plan a party, but you need help. There are many things to buy, but by inviting someone to your list, they can see what you need to get from the list. You can invite them by right-clicking on the left and choosing Sharing options.
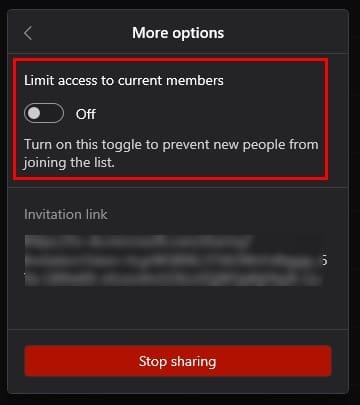
When you click on the option, you’ll see a window with a link to invite others. You can copy the link and send it through WhatsApp or choose the invite via email button. Once someone has joined the list, you can see a list of who by clicking on the people icon at the top right. The number beside it is the number of members. You should now see the list of members and who the list’s owner is. If you don’t want any new members, click on Manage Access and toggle on the feature for that. You can also end it all by clicking on the Stop Sharing button.
You won’t get a notice when the other person adds a task; it’ll only appear on the list. If you’re using the Android app, you can send the invite link using apps such as WhatsApp, an option you don’t get on the Windows app.
Keyboard Shortcuts for Microsoft To-Do
- Ctrl + 1= Open Sidebar
- Ctrl + N= New Task
- Ctrl + R= Sync
- Ctrl + L=New List
- Ctrl + F=Search
- Ctrl + D= Completed task
- Ctrl + T= Add a task to My Day
- Ctrl + V= Paste the value from the clipboard
How to View All Your Lists and Tasks Simultaneously
You can view all your tasks in the same place by turning on Smart Lists. The All option is not enabled by default, so you must go into Settings to change that. To go to Settings, click on your profile picture, followed by the Settings option. Once you’re in, scroll to the Smart List section and enable the All option.

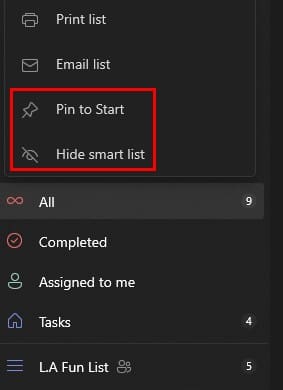
You should now see an All list where you can view all your tasks and lists. If you don’t see a list you created, maybe it’s on another account you have. You can easily switch accounts in To-Do by clicking on your profile picture and choosing the Manage Accounts option. If you haven’t added the account, click Add Account and follow the instructions on-screen. You can pin it to the Start menu or hide it by right-clicking on the list.
Tip: You can also find specific tasks by adding a hashtag. For example, you can type something like Park #Toys. So the next time you want to know where you take your dog that involves toys, you can type in the search bar #toys, and all the tasks with that hashtag will appear.
How to Turn on Dark Mode in To-Do
To give your lists that dark stealth look, click on your profile and choose Settings; scroll to the Theme section and choose Dark Theme.
How to Assign a Task in Microsoft To-Do
You’ve created a list with everything you need for your party. To assign your friend the task of getting the ice, in the add taskbar at the bottom, type @name. Replace the name for the name of the person you want to assign that to, and when you press enter, you’ll see the person’s initials next to the task so you can easily see which ones you gave to them. To see the tasks assigned to you, you only need to click on the Assigned to me list.
The list should already be there, but if you don’t see it, you’ll need to go to Settings and, under the Smart list section, enable the option for Assigned to me. If your tasks have a due date, you can see them in the Planned list.
How to Group Specific Lists in Microsoft To-Do
Putting specific lists together can help you get organized. For example, you have an anniversary party to plan, and you need a list of the food, guests, decorations, etc. You can create a group called Anniversary Party and lists for the previously mentioned things. You can group the lists by clicking on the New Group button.

Name your group and press enter. Drag the lists you can want to add, and when you click on the dropdown menu, you’ll see the ones you added.
Further Reading
If you’re still in the reading mood, you can read the article on creating a To-Do list in Microsoft Teams. If you’re an Android user, there is also an article on five free to-do apps you can try to get things organized. Remember the search bar when you’re ready to read about another topic.
Conclusion
When you have everything organized, you save so much time. Microsoft To-Do is a great app with various features to help you add what you need. You could probably think of a few things it could improve on but it’s a good option. Remember that you can only erase a group when you’ve erased or removed the lists you’ve added. How useful do you find Microsoft To-Do? Share your thoughts in the comments below, and don’t forget to share the article with others on social media.