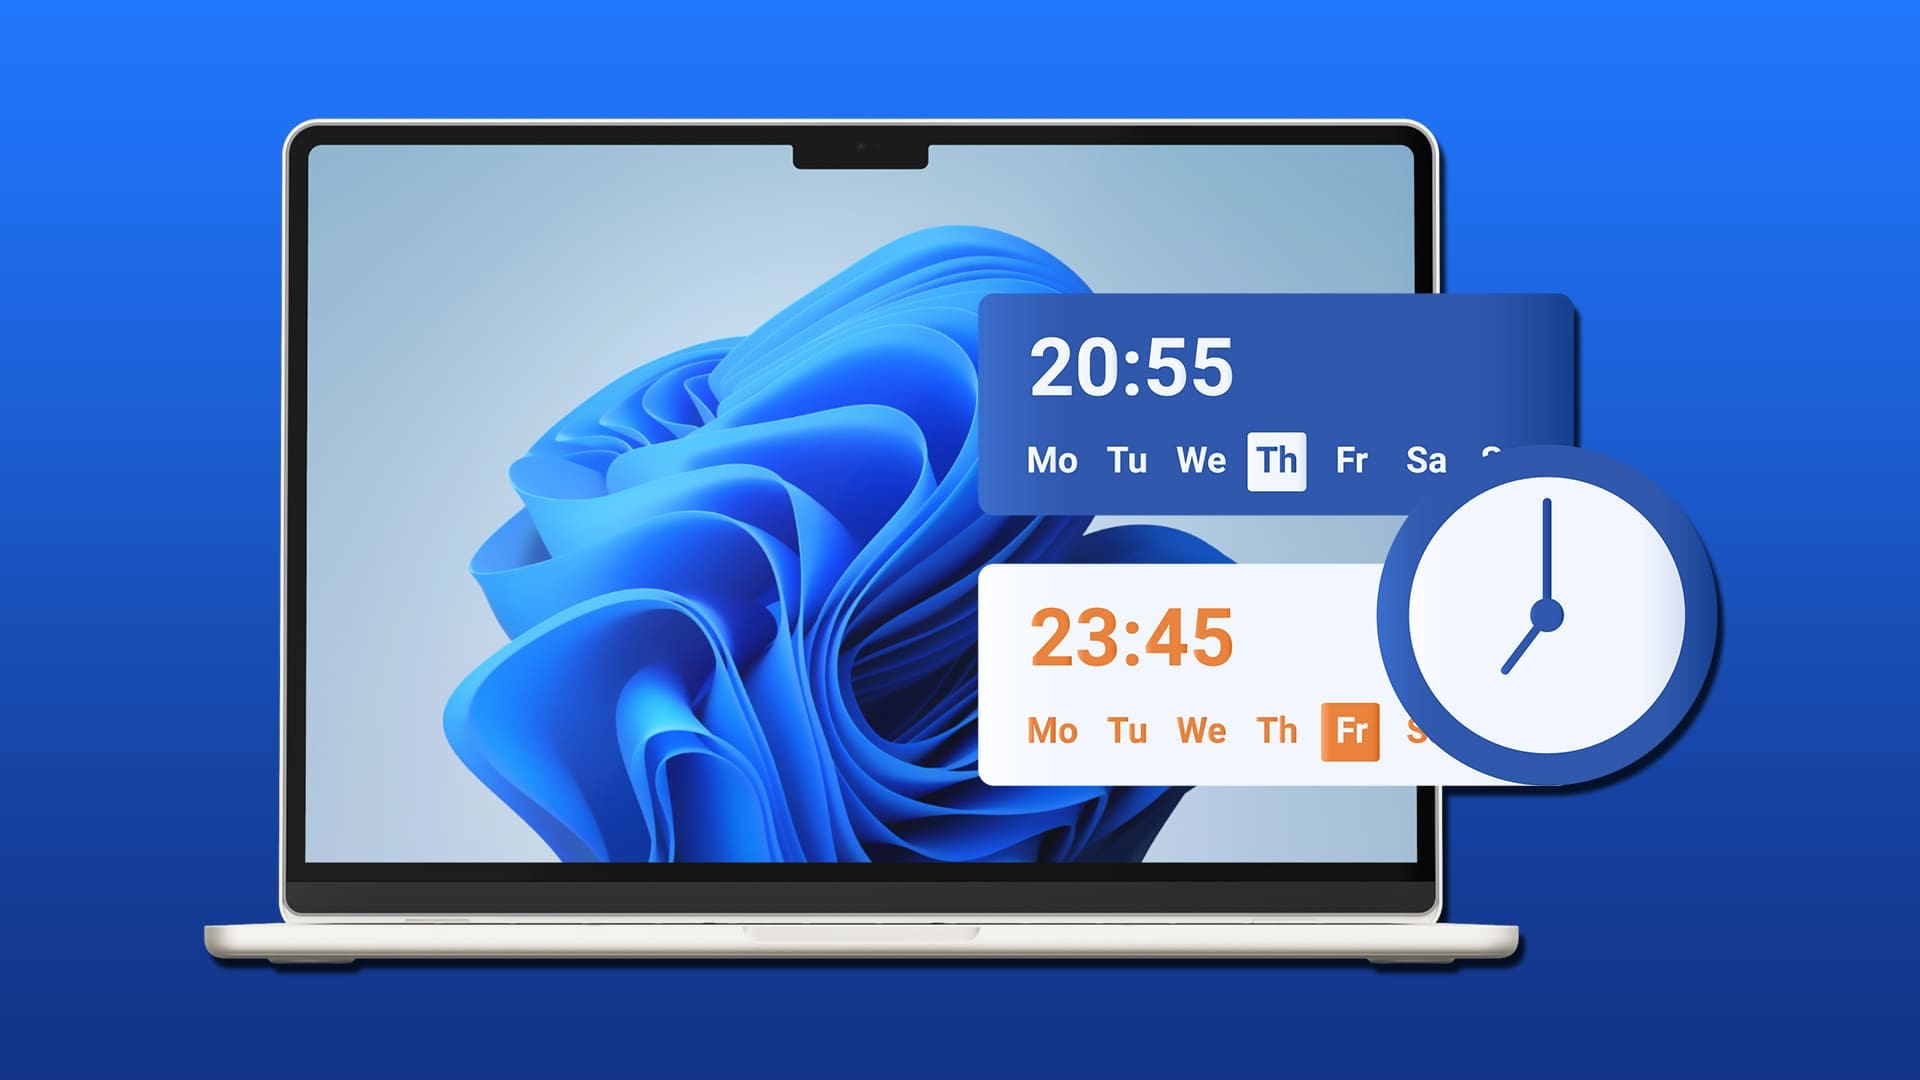
If you happen to have family, colleagues, or clients in different countries and time zones, it’s helpful to have multiple clocks on your Windows device. That way, you can quickly and easily see what time it is in other parts of the world that matter to you, which is helpful for scheduling calls, meetings, etc.
Windows 11 lets you add two additional clocks on top of the default one, for a total of three. This guide shows how to add multiple clocks in Windows 11.
How to Add Multiple Clocks in Windows 11: Step-by-Step
Adding clocks in Windows 11 is a quick and easy process, carried out through a submenu of your device settings. Here is a full breakdown of how it’s done, one step at a time:
Step 1. Open the Settings. You can do this by either using the Start menu shortcut or by pressing the “Windows” and “I” keys on your keyboard at the same time.
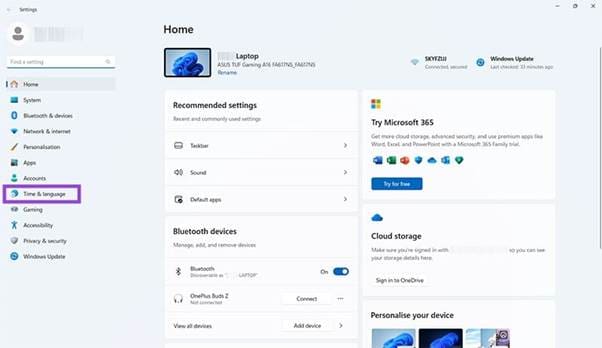
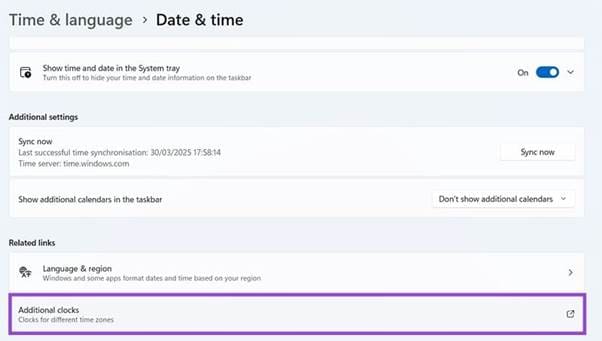
Step 2. Go to “Time & language” and then click on “Date & time.”
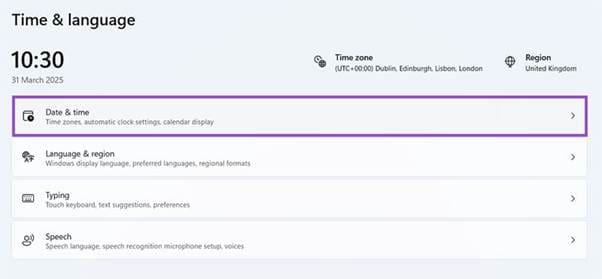
Step 3. Scroll down to find the “Additional clocks” button and select it.
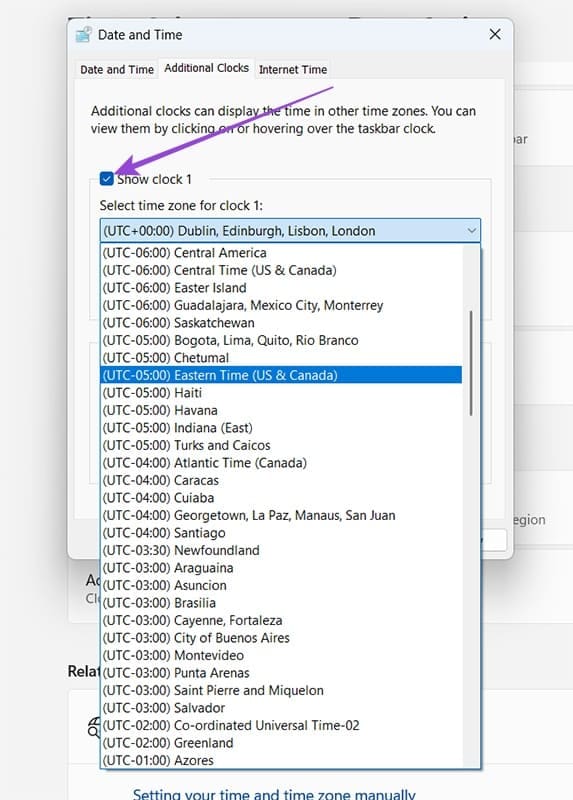
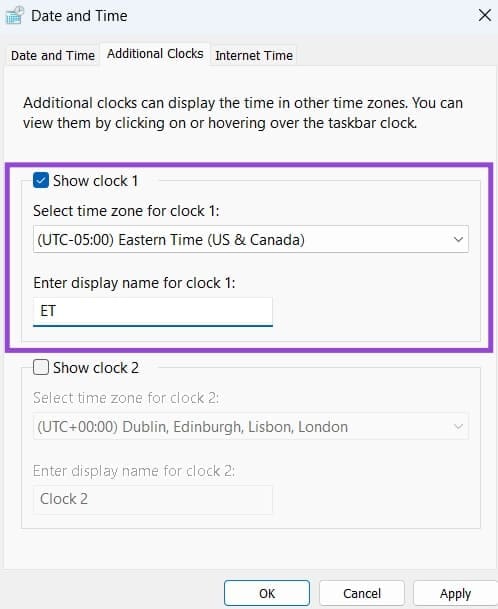
Step 4. A pop-up window will appear with the Additional Clocks settings. You can then check the box next to “Show clock 1” and click the drop-down menu to select which time zone you want the clock to display.
Step 5. Enter a display name for your chosen clock, once you’ve set the time zone.
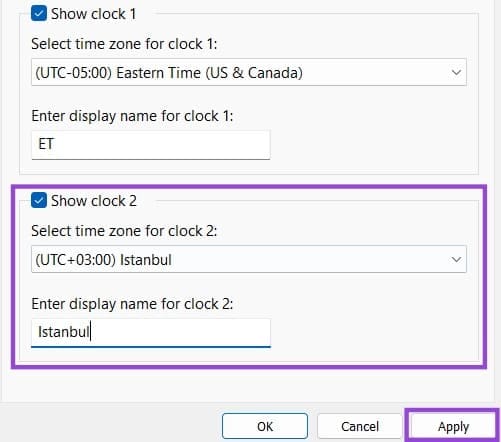
Step 6. Repeat the process for “Clock 2,” if needed. Then, when you’re happy with the settings of the two clocks, click the “Apply” button, followed by “OK.”
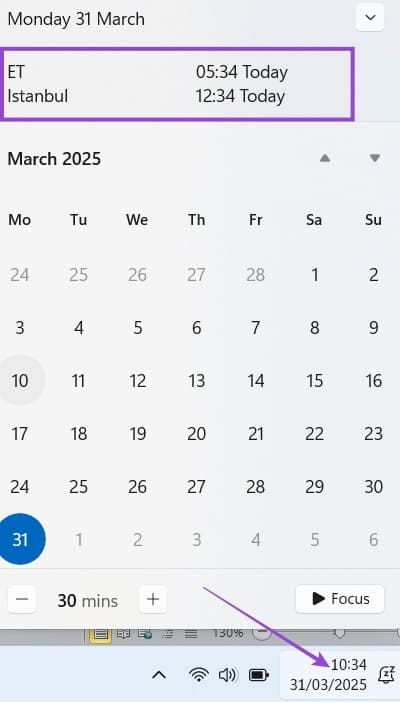
Step 7. Only your default clock will actually appear in the taskbar, but whenever you wish to view the others, just click on the time in the bottom-right. A window will appear showing both of your added clocks, just above the calendar.
What if You Need to Add Multiple Time Zones on Windows 11 Beyond the Limit of Three?
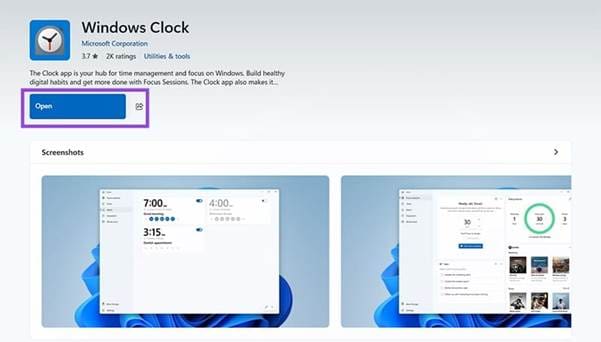
As explained, Windows 11 lets you add a total of three clocks to your taskbar. But if that isn’t enough for you, there are other options. You could, for instance, download the Windows Clock app to your system, or a third-party clock app, and configure that to see the time in different parts of the world.
Here’s a quick look at how to use Windows Clock.
Step 1. Find and download Windows Clock from the Microsoft Store.
Step 2. Open the app. It may need to update automatically before you can start using it. Then click “World clock.”
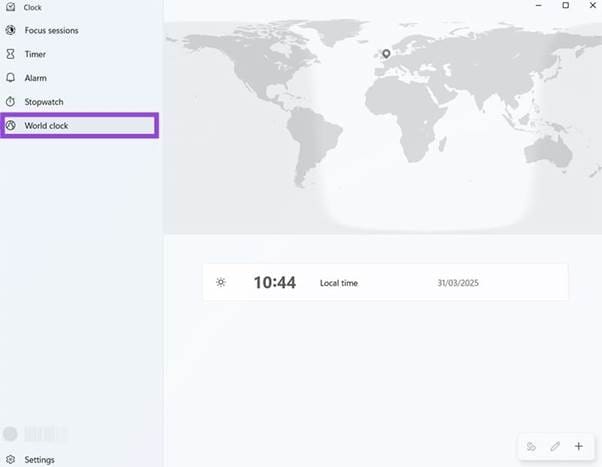
Step 3. Click the “+” icon to add a new clock, anywhere around the world. You can type in the location you want to see the time of, select it from the list of results, and then press “+ Add” to confirm your choice.