

If you want to keep your mailbox clutter-free, you need to keep things organized. Instead of letting hundreds or thousands of messages linger in your inbox indefinitely, you can simply delete those that are irrelevant to you. One option is to hit the Delete button. But that can become quite tiresome and time-consuming, especially when you have hundreds of emails in your inbox.
The good news is that you can automatically delete emails using filters. Let’s explore how you can do that.
Contents
How to Automatically Delete New Emails in Gmail
- Launch Gmail and go to Settings.
- Then select See all settings.
- Click on the Filters tab.
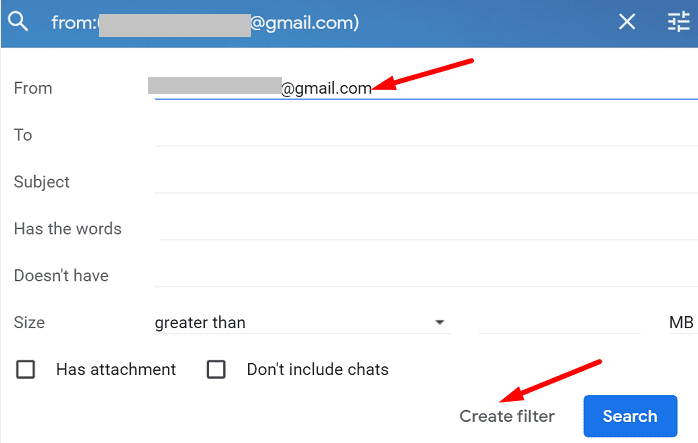
- Click on the Create new filter button.

- Then, select that filter you want to apply to automatically delete incoming messages (sender, subject, specific keywords, attachments, and so on).
- Hit the Create Filter button.
 Check the Delete it checkbox to apply the filter and instruct Gmail to automatically delete all the emails that fall into that category.

 Check the Delete it checkbox to apply the filter and instruct Gmail to automatically delete all the emails that fall into that category.
For example, if you want to automatically delete all new messages coming from a specific sender, add their email address in the From field. If you want to delete emails that contain specific keywords, enter them in the Has the words field. You can create as many filters as you want.
These filters apply to new messages. If you want to delete old emails, the best solution is to filter them by date and delete them in batches.
How to Delete Batches of Old Emails in Gmail
If you want to delete a batch of old messages, you can filter them and delete all the emails that fall into that category.
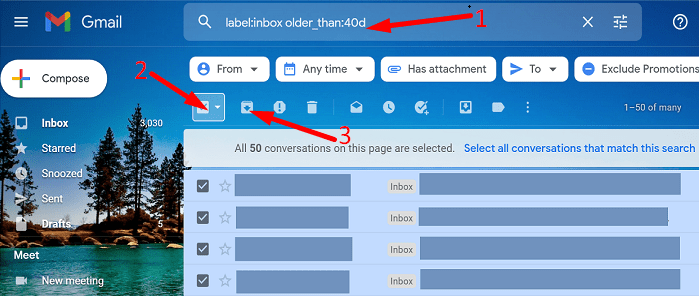
- Launch Gmail and click on the Search field.
- Then filter old emails using one of the following formats:
label:inbox older_than:Xdlabel:inbox older_than:Xmlabel:inbox older_than:Xy- Note: The letter X represents the number of days, months, or years you want to use to filter your emails.

- Note: The letter X represents the number of days, months, or years you want to use to filter your emails.
- Then select all the emails that meet the criterion you used and hit the Delete button.
If you don’t want to permanently delete your emails, you can simply archive them.
Conclusion
To automatically delete messages in Gmail, create a filter based on specific keywords, email addresses, and so on. Then apply the filter to incoming emails. To delete old emails, filter messages older than a particular date and hit the Delete button.
Did you manage to delete unwanted messages from your Gmail inbox? Let us know in the comments below, and don’t forget to share this quick guide on social media as well.


Will a user that has created a filter to automatically delete messages see the deleted messages in the trash bin or do they disappear?