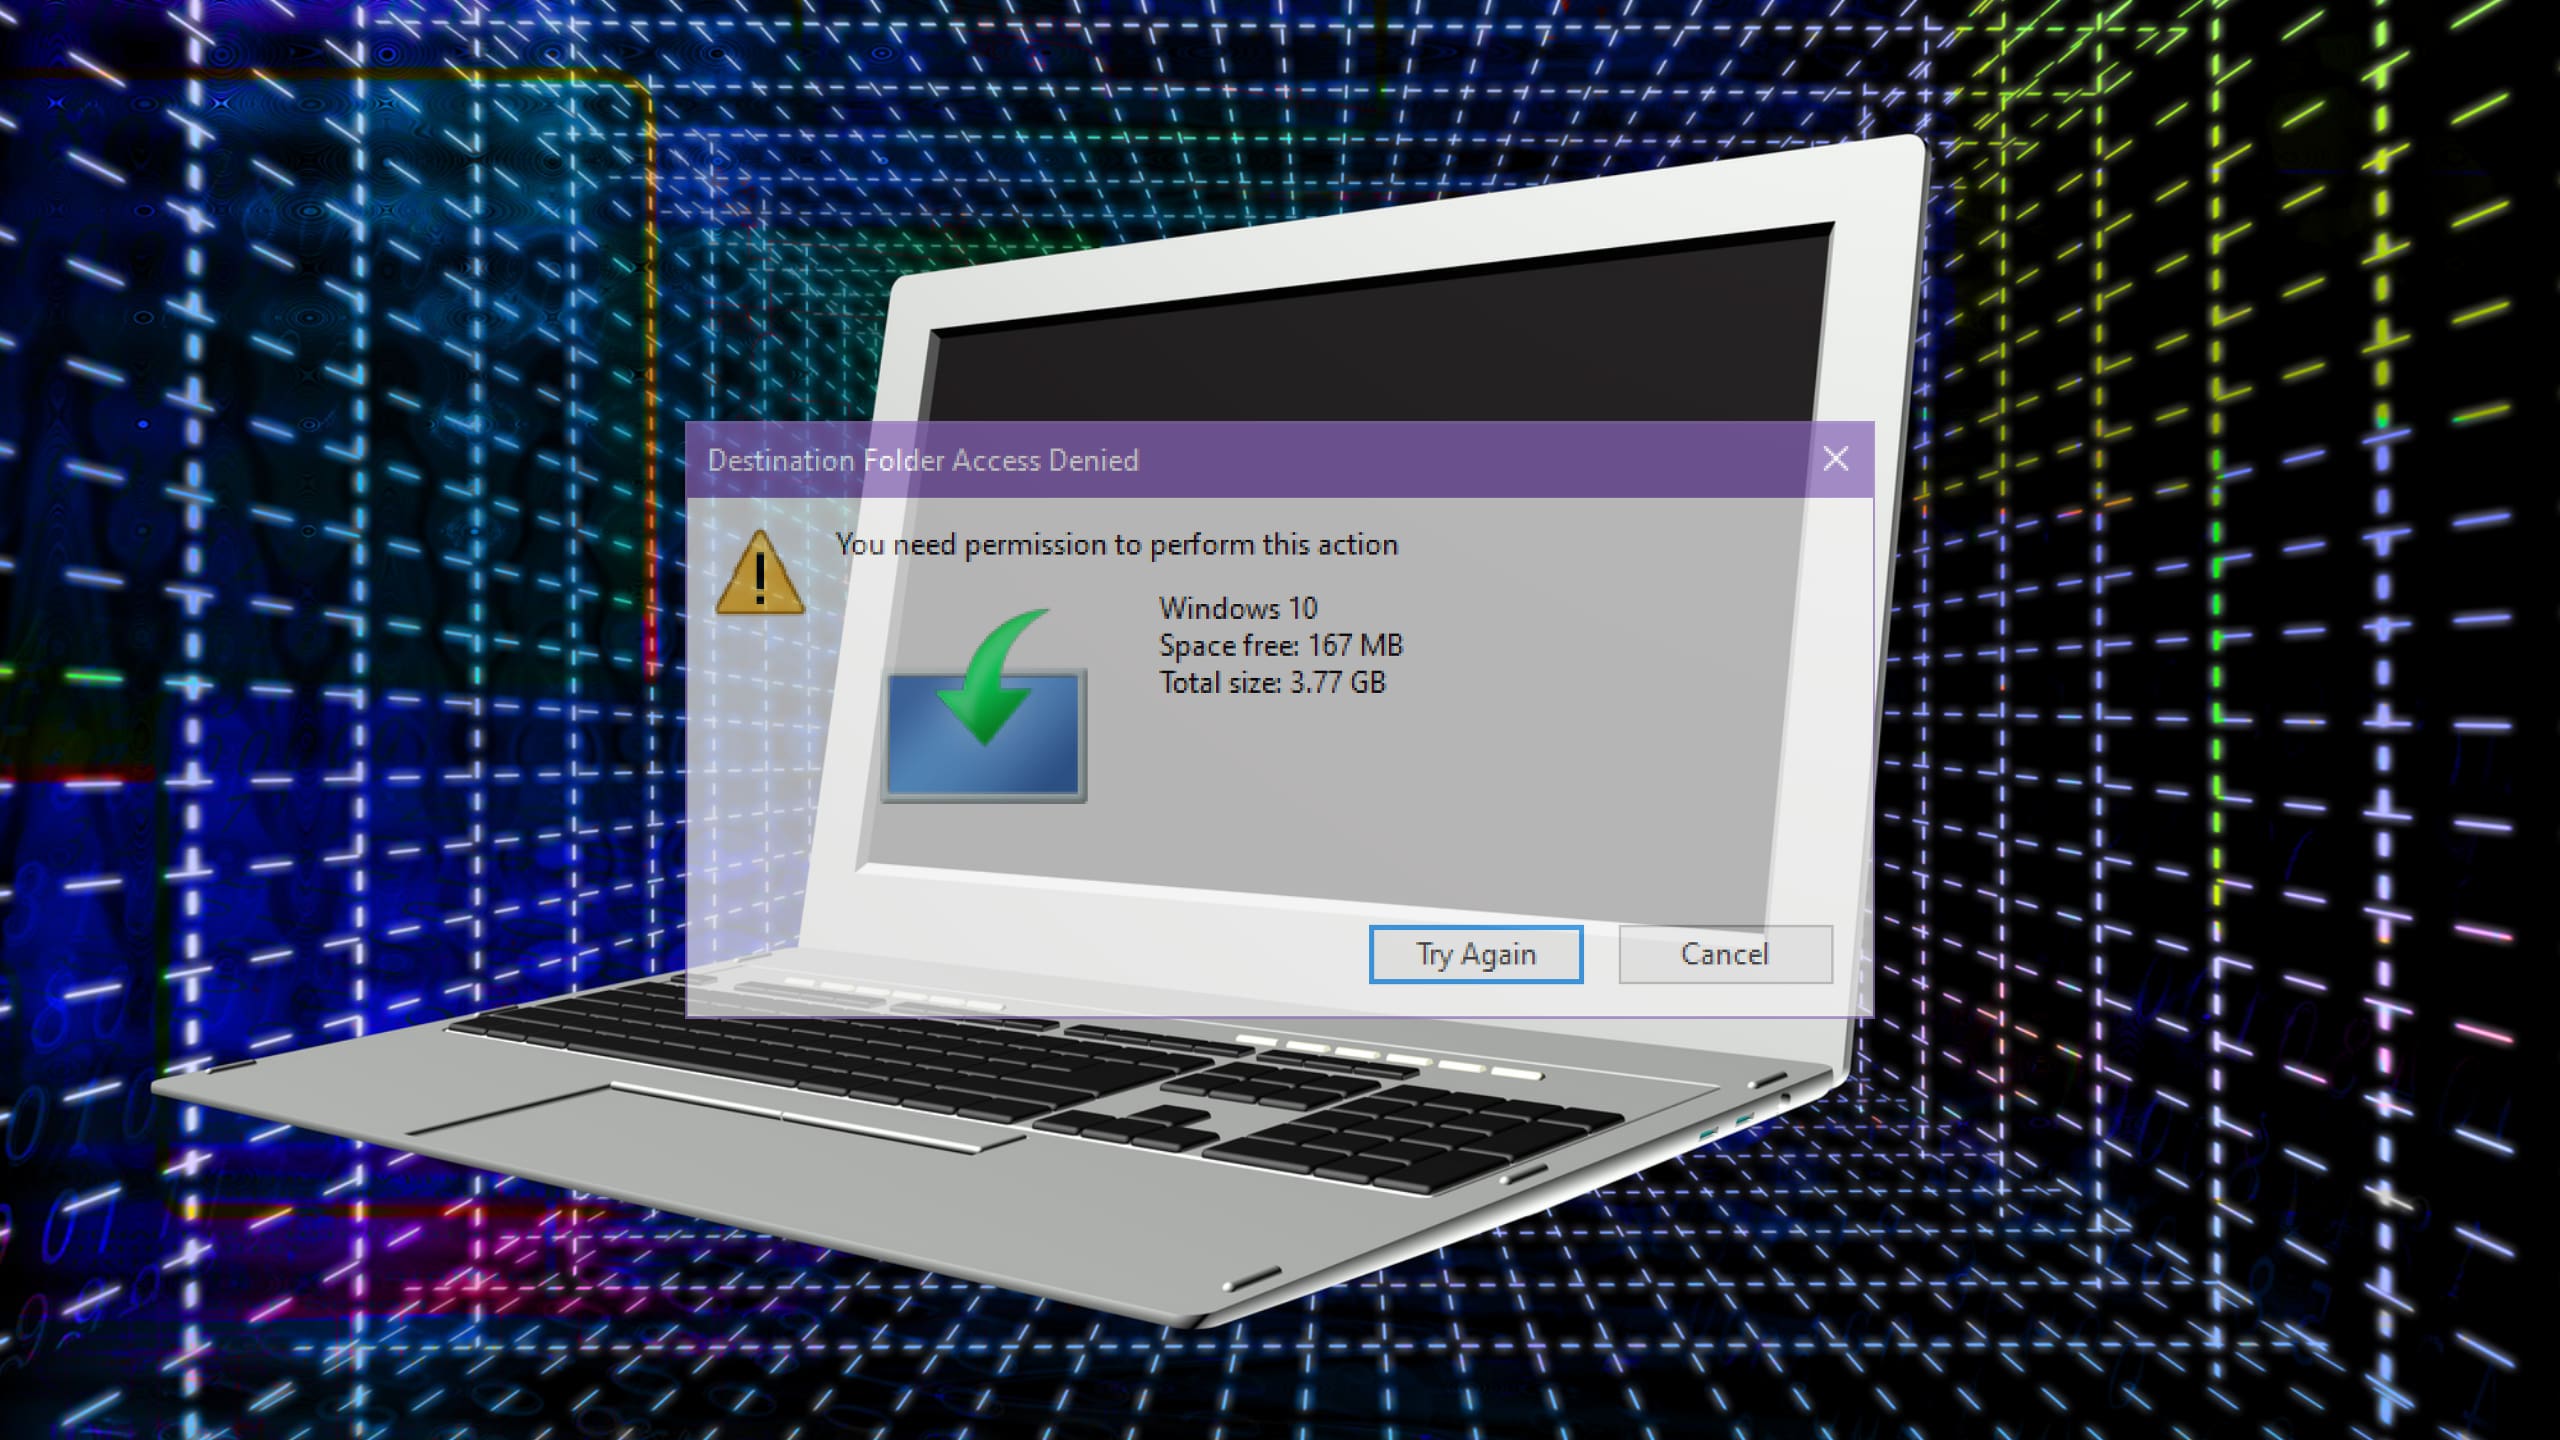
The “Could not find this item” error is a frustrating one for Windows users to deal with. It occurs when you’re trying to delete copy, cut, or delete a folder or file. Even though you may be able to see the file clearly in File Explorer, Windows will claim it can’t find it and refuse to execute your command.
This “file can’t be found” error can occur in all modern versions of Windows, from Windows 7 onward, and can have quite complicated root causes. Fortunately, there are several straightforward fixes you can try to resolve it.
Contents
“Could Not Find This Item” Fix 1. Reset File Explorer
One reason you may find you can’t delete files on a Windows device is because File Explorer has encountered some sort of bug or technical issue. Resetting the program may be all that’s needed to resolve the problem.
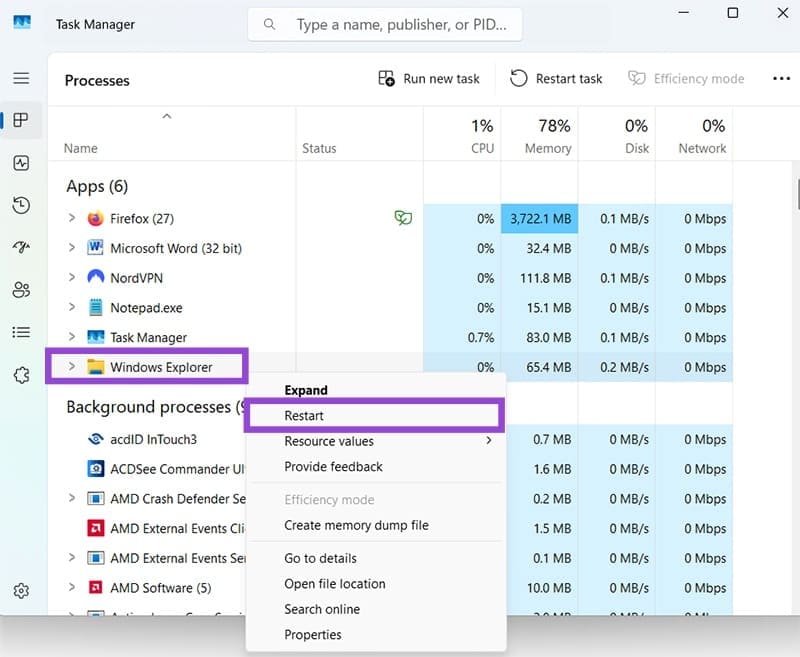
Step 1. Press the “Ctrl,” “Alt,” and “Delete” keys at the same time and open the “Task Manager.”
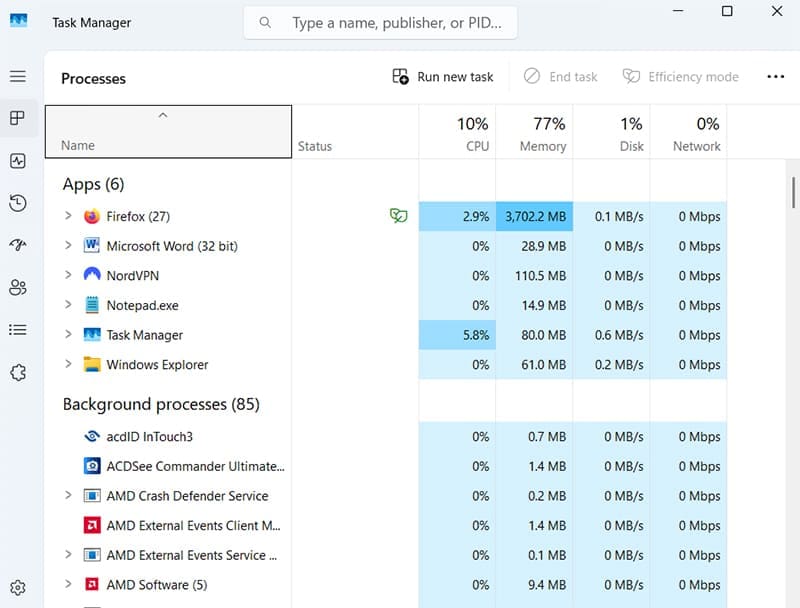
Step 2. Find “Windows Explorer” or “File Explorer” in the list of apps and right-click it. Then select “Restart.” After that, try deleting or copying the problematic file or folder again.
Fix 2. Use the Command Prompt
If you’re unable to delete or copy files the conventional way, there is an alternative method. You can use the Command Prompt utility to delete any file or folder, bypassing the need to use File Explorer. Here’s how.
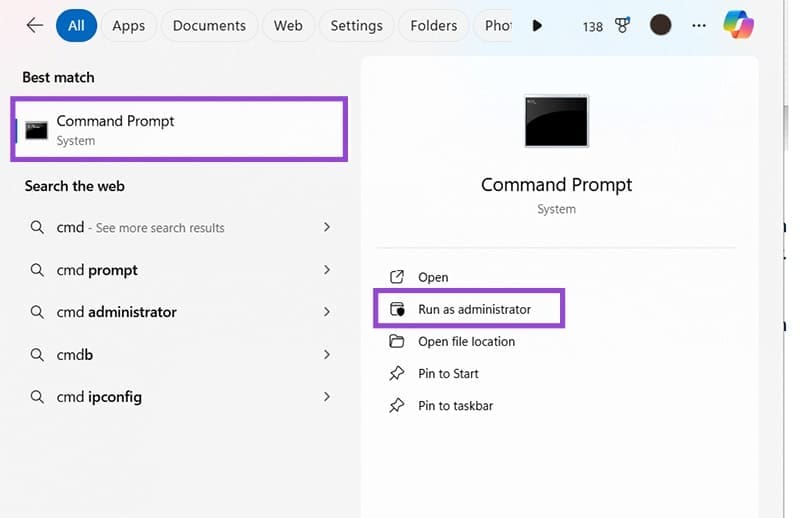
Step 1. Run “Command Prompt” as an administrator. You can find it by typing “cmd” into the search bar.
Step 2. Type in this command, “del drive:\path\filename” but replace “drive” with the letter of the drive where your file is located, “path” with the path or directory of the file/folder in question, and “filename” with the name of whatever you want to delete. Then hit “Enter.”

Fix 3. Delete in Safe Mode
Various bugs, background processes, or compatibility issues could be causing your “Could not find this item” error. Rebooting your computer into safe mode is usually an effective way to eliminate those kinds of issues, letting you delete and manage your files without interruptions.
Step 1. Press the “Windows” and “I” keys to open the Settings.

Step 2. Go to “System” and then “Recovery.”
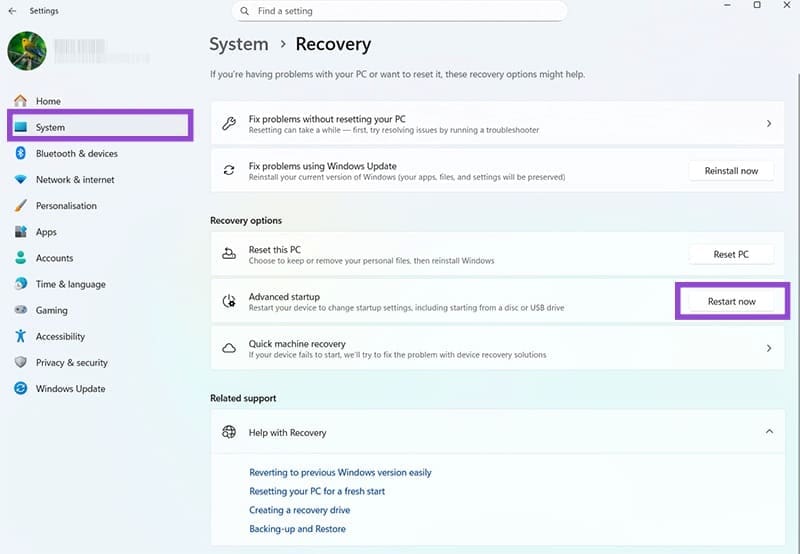
Step 3. Next to “Advanced Startup,” click the “Restart now” button. Your computer will then restart and should present a menu of startup options. Select the option to launch into safe mode. Then try deleting your files before rebooting back into normal mode.
Fix 4. Try Renaming the File
Sometimes, the reason why the file can’t be found error happens is due to some sort of issue with the name of the file or folder you’re working with. It might be too long or have hidden symbols or incompatible characters. Renaming it the usual way won’t work, but you may be able to rename it and then delete it with the help of Command Prompt.
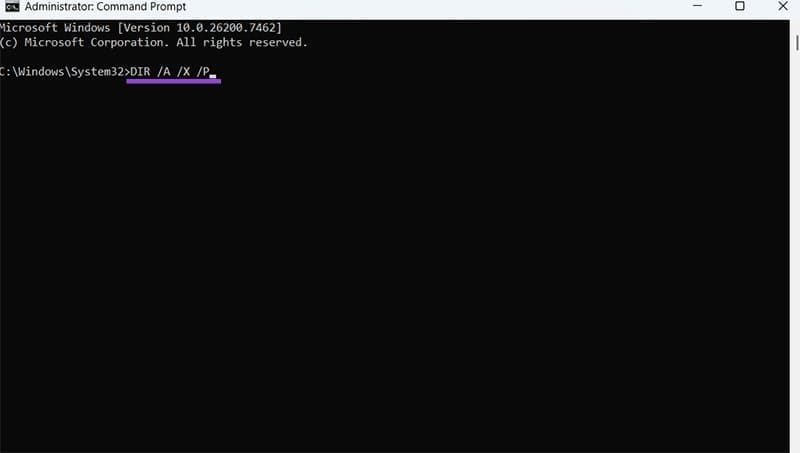
Step 1. Open Command Prompt as an administrator.
Step 2. Enter this command “DIR /A /X /P” and press the “Enter” key.
Step 3. Enter this command: “RENAME (original file name) (destination file name)” Then try deleting or copying the file, once it has been renamed.