Windows 11 doesn’t have the best reputation for being easy on laptops and PCs. Besides the increased demands on RAM and CPUs, your update might also create a host of other issues, one of them being your battery. If you’re dealing with battery issues after Windows 11 update, we’re here to help with some potential fixes.
Contents
Battery Issues After Windows 11 Update – Fixes to Try
A new operating system means a lot of settings and issues that can quickly drain your battery. That’s why we’ve got a few troubleshooting solutions to cover as many as possible.
Turn On Battery Saver
Your laptop might begin life with Windows 11 without many of the previous settings enabled, like battery saver. Here’s how to enable it:
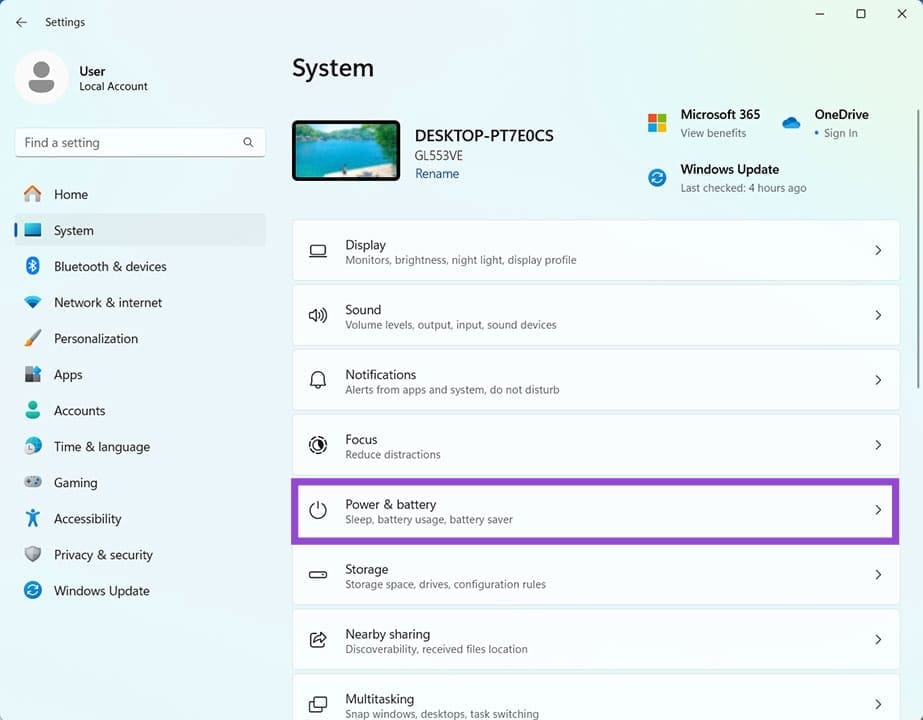
Step 1. Open Settings (Win + I) and click “System” in the sidebar.
Step 2. Click “Power & battery” in the main window.
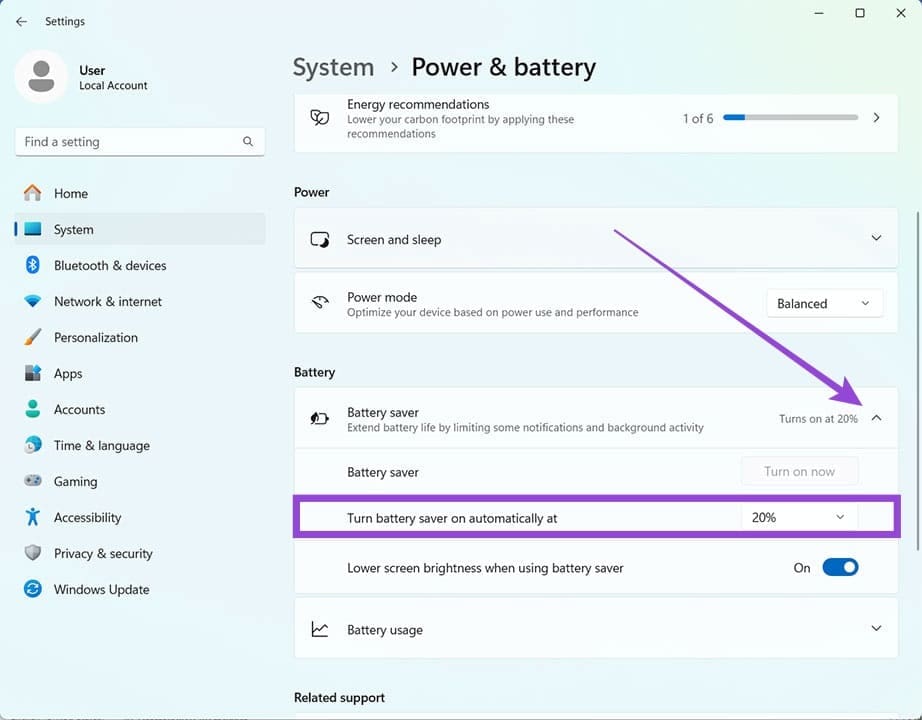
Step 3. Under the “Battery” subsection, click the drop-down list of when to turn on battery saver.
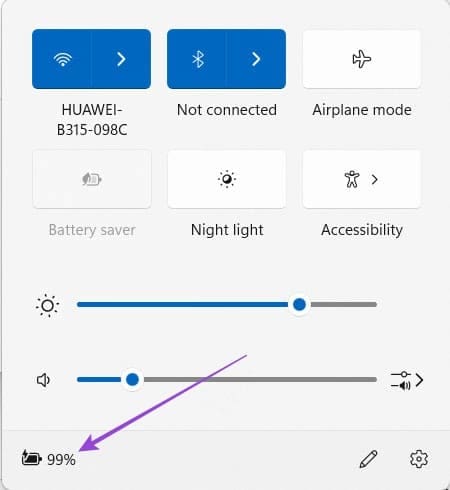
You can also turn on Battery Saver whenever you want via the System Tray. Simply click the battery icon and choose “Battery Saver” from the pop-up.
Check App Usage
Certain apps can be a huge drain on your battery. It’s a good idea to check the major offenders. Here’s how:
Step 1. Open Settings and navigate to “Power & battery” like the section above.
Step 2. Under the “Battery” subsection, click “Battery usage.”
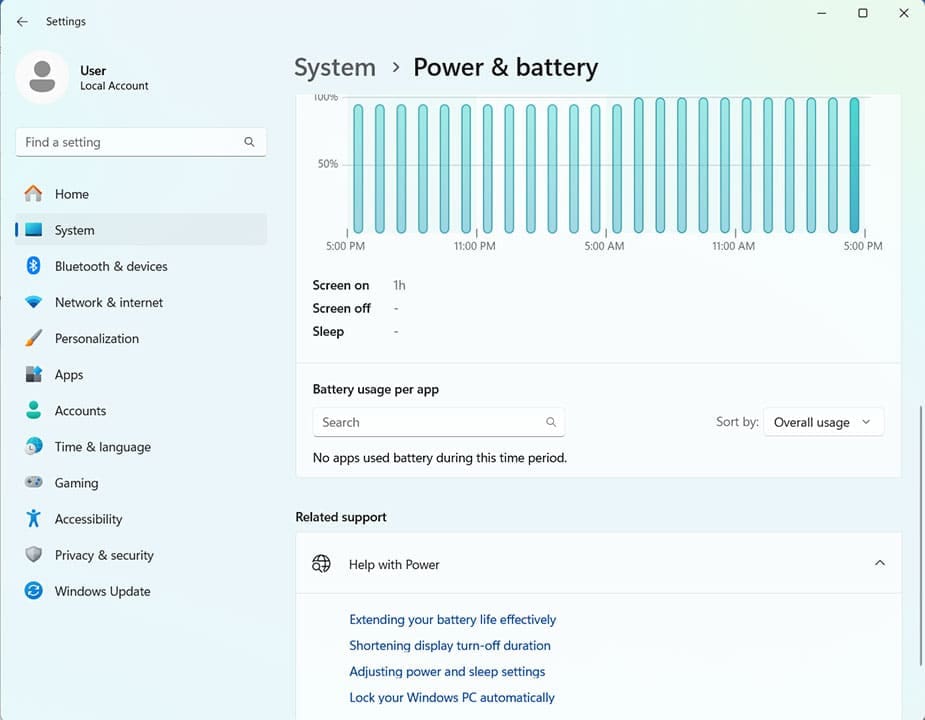
Step 3. Select the time and see either the apps, or (more importantly in Windows 11’s case) the Background apps in the “Sort by” dropdown.
Check Power Mode
The third basic check is your Power Mode, which dictates how many resources and how much battery power your laptop uses. Here’s how to check and change:
Step 1. Navigate to “Power & battery” in Settings, as above.
Step 2. In the “Power” subsection, click the dropdown in “Power mode.”

Step 3. Choose “Best power efficiency” for the longest battery life. This will stop all but the most important background processes and apps from running.
Change the Power Plan
A good way to control battery usage is to adjust when the screen turns off and the laptop goes to sleep. You can do both in the Power Plan Settings:
Step 1. Type “Edit Power Plan” in the search bar.
Step 2. In the window, change the period of time when the screen turns off and the sleep timer.
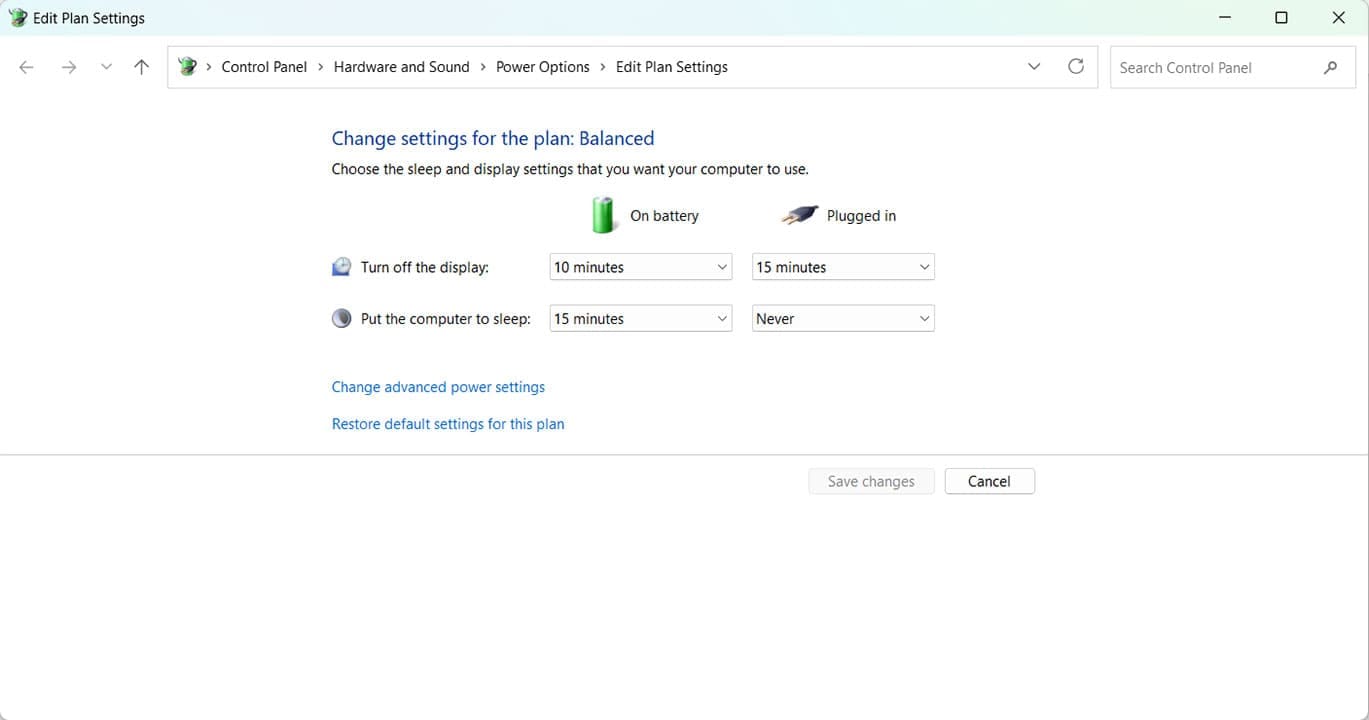
Step 3. Click “Save Changes” when done.
Disable Startup Apps
You’d be surprised how many apps start running automatically when your laptop boots up. You can also control these and free up resource use in Task Manager:
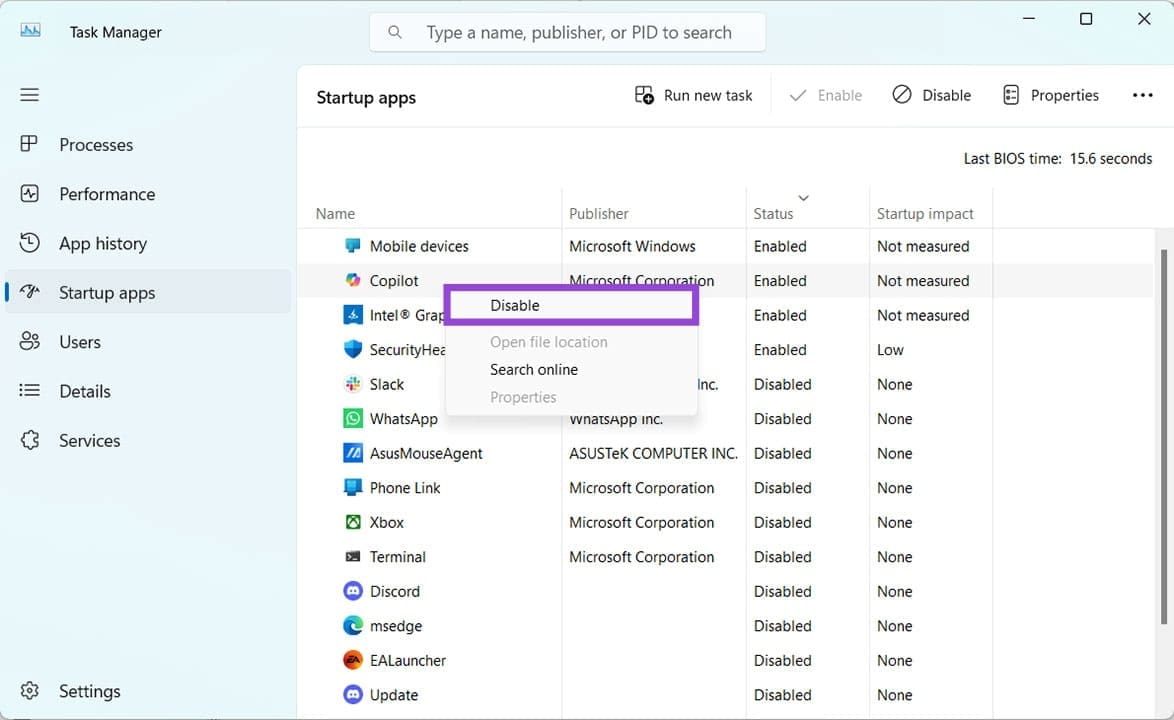
Step 1. Open Task Manager (Ctrl + Shift + Esc).
Step 2. In Task Manager, click the “Startup apps” tab in the sidebar.
Step 3. Right-click the apps you don’t need on startup and select “Disable” from the dropdown menu.
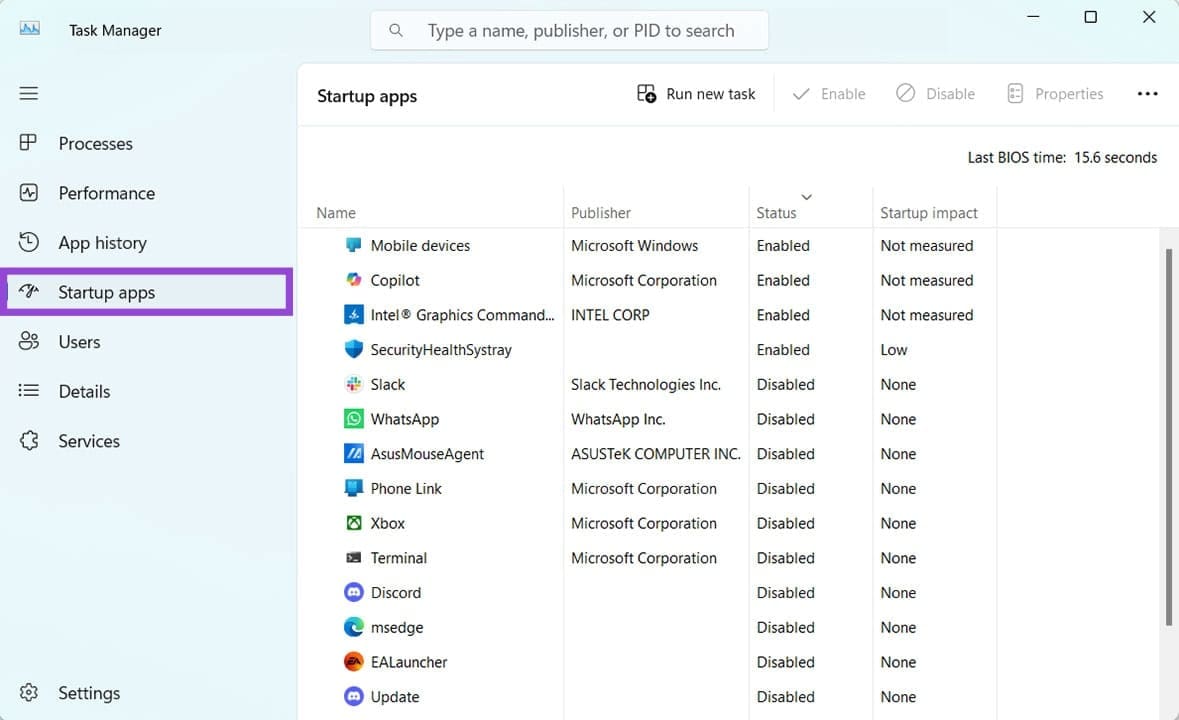
Step 4. Exit Task Manager when done and restart your computer.
You can also disable apps on startup via Settings in the “Startup” subsection of “Apps.”
Disable Background Apps
Startup apps take up resources, but background apps do, and you may not be aware of it. You can disable these in Settings:
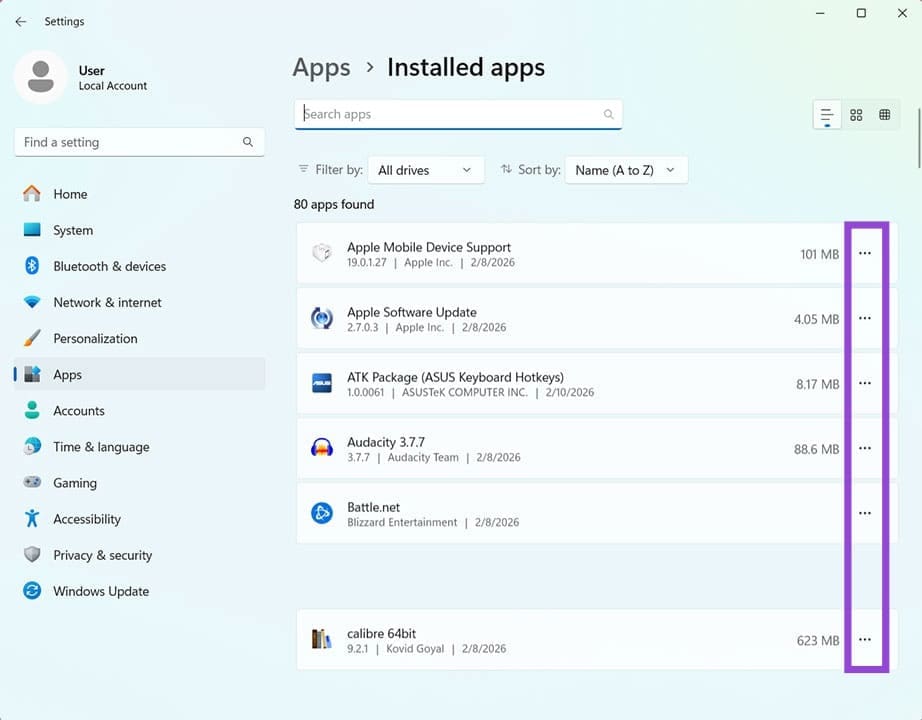
Step 1. Open Settings and click “Apps” in the sidebar.

Step 2. Select “Installed apps” and click the three dots at the side of a resource-intensive app. Click “Advanced options.”
Step 3. Check the “Background app permissions” subsection. You can change the option to “Never” to stop any background processes running or to “Power optimized” to work in line with the power plan.