If you’re testing a website with Burp Suite there are many changes that you can make to your requests and to the webpages you see. You can configure a number of automatic changes to be made to the responses you receive. The options can be found in the “Response Modification” section of the “Options” sub-tab of the “Proxy” tab. All of the automatic response modifications are designed to be useful for people testing websites.
Note: Burp Suite has legitimate uses, as a security tool. You need to ensure you have permission from the owner of a website to test the website before you try doing anything though, as you could be breaking the law if you don’t, even if you only use your own account on a website.

The first option is “Unhide hidden form fields” and comes with the sub-option “Prominently highlight unhidden form fields”. Hidden form fields generally contain a preconfigured data value, such as a user ID. This data needs to be submitted with the request, but the user doesn’t need to see or edit it. By unhiding the fields, you can more easily see what happens if you edit their values, these options automate the process so you can easily find the hidden form fields.
“Enable disabled form fields” automatically enables any form fields that have been disabled to prevent the user from editing their values. “Remove input field length limits” removes any restrictions on how many characters can be submitted via a form field. This may cause unexpected behaviour in websites that expect only a certain length of input.
“Remove JavaScript form validation” deletes any JavaScript that validates form data as it’s being submitted, allowing invalid data submissions. “Remove all JavaScript” deletes all JavaScript from the webpage. This option is intended to disable client-side logic. “Remove <object> tags” deletes containers of external resources, like removing JavaScript, this is also intended to disable client-side logic.
“Convert HTTPS links to HTTP” automatically downgrades encrypted links to plaintext ones. This can be useful for testing SSLStrip-type attacks and verifying that the website upgrades plaintext requests. “Remove secure flag from cookies” automatically removes the secure flag from cookies that prevent them from being transmitted over plaintext connections. This could assist with leaking authentication tokens and other sensitive cookies when performing SSLStrip-type attacks.
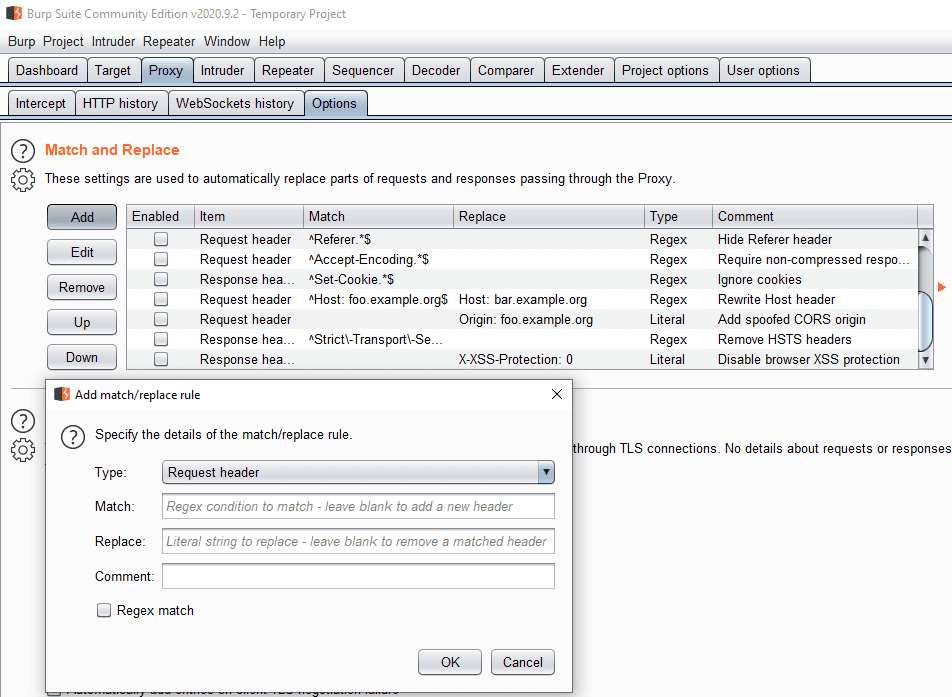
The “Match and Replace” section, just below the “Response modification” section allows you to configure custom rules for both requests and responses using Regex. You can replace the headers or the body of both the request and response, parameter names and values, and the first line of the request.