

Any antivirus product can generate false-positive results. A false-positive is where the antivirus software positively identifies something as a virus but is wrong. When this happens the antivirus software will treat the detection as if it were real. The only way to change this is to correctly identify the detection as a false-positive and then to instruct the antivirus software to exclude the file. This may sound complicated but is ultimately not as hard as you may think!
Excluding a file from and antivirus scanner instructs it to skip testing that file. This means that if you’ve got a file that is being flagged incorrectly you can resolve the issue by instructing the antivirus software to ignore that file. This guide will walk you through the process of excluding a file from being scanned with Windows Defender.
Tip: Be careful excluding files. Only exclude files you are absolutely confident are safe. You should also keep the number of excluded files to a minimum. If a virus does manage to infect your computer, it could infect any excluded files or directories to evade further detection.
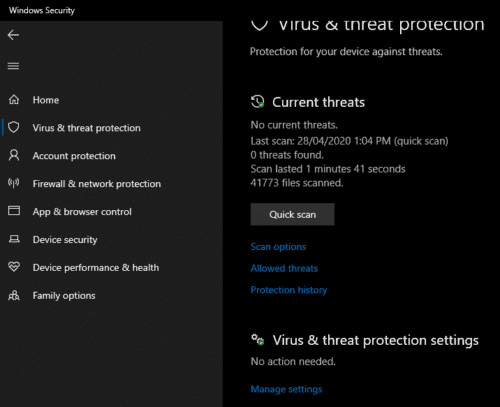
To open Windows Defender and its settings, press the Windows key, type “Windows Security” and hit enter. In the Windows Security app, click on the “Virus and threat protection” tab, then click “Manage settings” under the “Virus & threat protection settings” header.
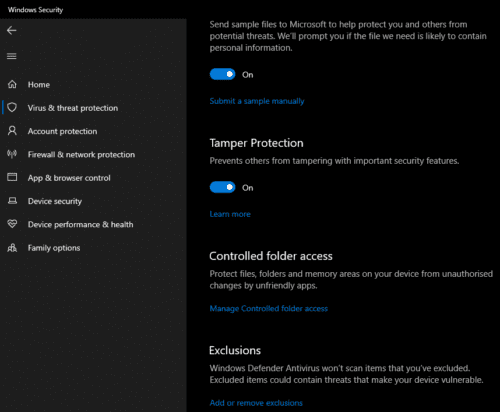
Click the link to “Add or remove exclusions” under the “Exclusions” header. It’s located near the bottom of the Virus & threat protection settings page.
Click the “Add an exclusion” button, then choose which type of exclusion you want to add. You can exclude an individual file or a whole folder and its contents including subdirectories. You can also exclude all files of a certain file type or a specific process.
Tip: When excluding files, be as specific as possible, and try to exclude as little as possible – get the smallest possible folder and exclude files rather than folders wherever possible.
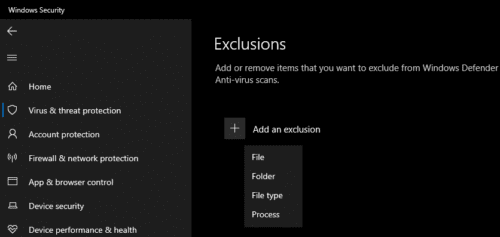
To exclude a file, select “File” from the dropdown list and then select from your hard drive the file you want to exclude from being scanned. Applying the exclusion will require administrative permissions and may require you to click “Yes” on User Account Control (UAC) prompt.
Once a file has been excluded it will appear under the “Add an exclusion” button.


WOW
Hi All,
How do I manage the exclusion list centrally using Intune? Basically users have local admin access on the device and can amend, update the exclusion list on the local device. Do we have an option to restrict the access with a configuration profile?
Cheers
Kiran
Important note for issues with high network usage by Windows Defender:
When excluding a network path you should not use the file browser to select the (mapped) network location!
Referring to _> https://docs.microsoft.com/en-us/microsoft-365/security/defender-endpoint/configure-extension-file-exclusions-microsoft-defender-antivirus?view=o365-worldwide
Example:
– (Real) Network location (for access via any compatible client): \\fritz.box\nas\TestFolder
– Mapped network location (as shown in Windows Explorer): F:\TestFolder
Now trying to exclude the mapped location will not stop the Antimalware Service Executable from accessing the (real) network location! Which means excluding it won’t help with the high network usage. Try to exclude the (real) network path instead.
Either you know the real network path, or you might want to ask an admin for help.
Usually the (real) network path consists of the target device’s IP-address as well as it’s share name and folder path.
For instance 192.168.178.1 (or FQDN) as the device’s IP, \nas as the determined device’s share name and \TestFolder as the folder path.