Learn how to get music from your computer to your Apple iPhone, iPad, or iPod music player using iTunes with this tutorial.
Getting Set up With iTunes
- Download and install the latest version of iTunes.
- If the music you wish to copy to your device is not yet listed in iTunes, you can drag and drop the song files or folders with the music files to the iTunes window. The music files will then be added to the iTunes library.

- Connect your Apple device to a USB port on your computer using the USB cable included with your device. An area labeled “Devices” should appear, along with your device name.
Note: The first time you connect an Apple device to a computer, it may ask you to setup the device with a name and a few other preferences.
Transferring Music – Option 1
- In iTunes, select the Apple device icon, located toward the upper-right portion of the screen.

- Select “Music” in the left pane. Ensure the “Sync Music” box is checked, then make selections based on what you want transferred to your Apple device. You can choose to sync the “Entire music library“, or just “Selected playlists, artists, albums and genres“.
 If you choose “Entire music library“, iTunes will sync as much of your music as will fit on the device. If you choose “Selected playlists, artists, albums, and genres“, you can check items you wish to transfer.
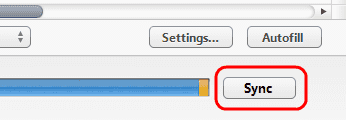
 - Once you have everything set as desired, select the “Sync” button at the bottom of the screen, and your music will be transferred to your Apple device.

Transferring Music – Option 2
- In iTunes, select the Apple device icon, located toward the upper-right portion of the screen.

- Select “Music” in the left pane and ensure “Sync Music” and “Selected playlists, artists, albums, and genre” is selected.

- Select the “Back” button at the upper-left corner of the screen.

- Choose the view you wish to see your music in under the “Library” section in the left pane (“Artists“, “Albums“, “Songs“, “Genres“).

- Drag the music items you want on your device to your iPhone, iPad, or iPod listed on the right pane.

- Select the button for your device in the upper-right corner, then select the “Sync” button in the lower-right corner.

It can take a while for music files to sync. You can see the progress of the file transfer at the top of the iTunes screen. When you are done moving files to the Apple device, you can eject it by pressing the eject icon next to the device on the left side.


 If you choose “Entire music library“, iTunes will sync as much of your music as will fit on the device. If you choose “Selected playlists, artists, albums, and genres“, you can check items you wish to transfer.


