Configuring your Slack workspace to be exactly the way you want can take time. To prevent that time from being wasted, you want the workspace to stay the way it is supposed to be. Part of that protection generally includes minimising the number of people that can change things and mess things up.
Admin users are generally more trusted and reliable than normal users, otherwise, they wouldn’t have been given administrative permissions. Unfortunately, the default Slack channel management permissions are pretty lax and allow workspace members and even multi-channel guests, some channel management permissions that should likely be restricted to trusted admin users.
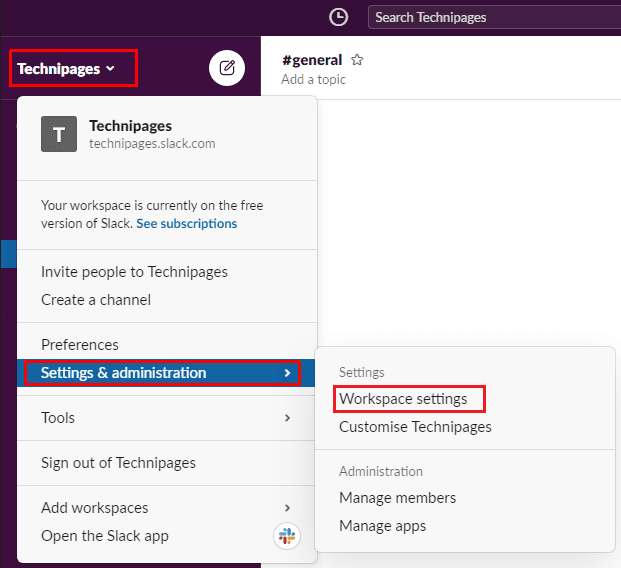
To be able to access Slack’s channel management permission settings, you need to get to your workspace’s permissions settings. To get there, you first need to click on the workspace name in the top-right corner. Next, in the dropdown menu, select “Settings & administration”, then “Workspace settings” to open the workspace settings in a new tab.
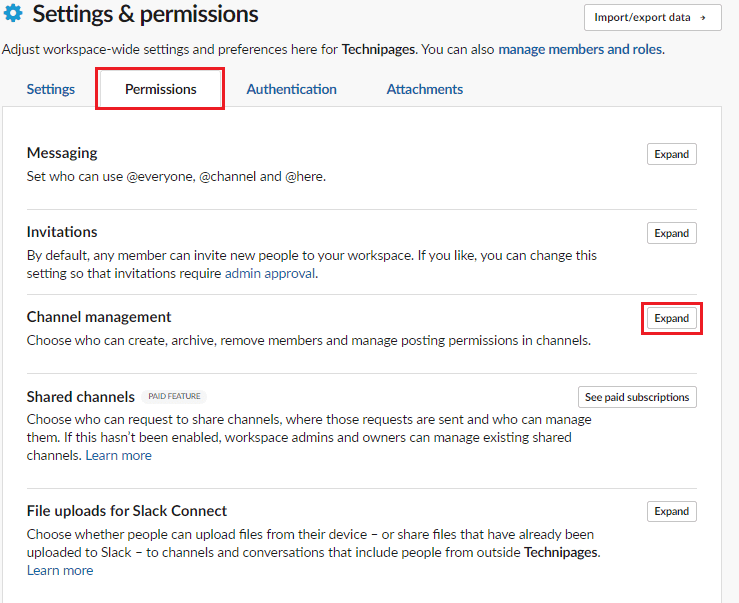
Switch to the “Permissions” tab at the top of the page, then click on the “Expand” button for the “Channel management” permissions.
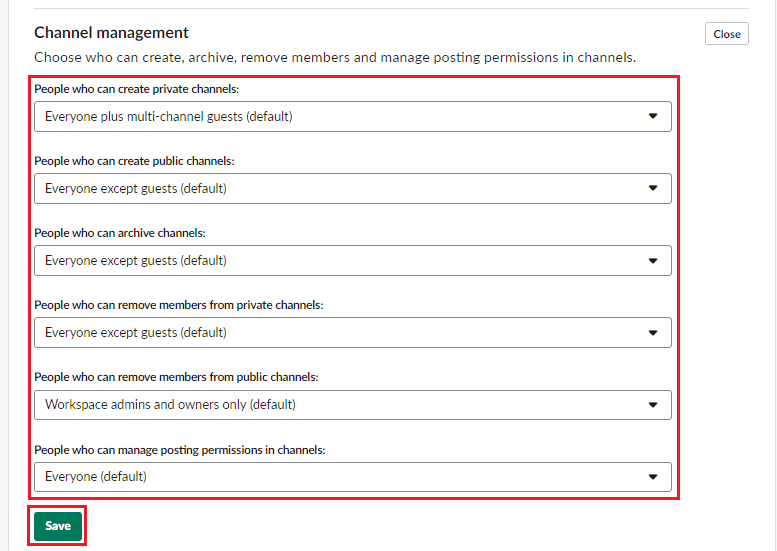
In the channel management permissions, there are six dropdown boxes allowing you to configure which user groups have certain permissions. The first dropdown box lets you configure “who can create private channels”. This defaults to everyone including multi-channel guests, you may want to at least limit this ability to full members, if not to admins.
The next dropdown box allows you to configure “who can create public channels”. This defaults to everyone except guests, although you may want to restrict this to admin users too. The third dropdown box allows you to configure “who can archive channels”. This defaults to everyone except guests and should definitely be limited to admin users.
The fourth dropdown box allows you to configure who can “remove members from private channels”. This defaults to everyone except guests, you would likely want to change this to require admin permissions, especially if you require admin permissions to create private channels. The fifth dropdown box allows you to configure “who can remove members from public channels”. This setting defaults to workspace admins and owners only and should stay that way.
The last dropdown box configures “who can manage posting permissions in channels”. This defaults to everyone and should be changed to admins and workspace owners only, to prevent users from being able to arbitrarily restrict or relax posting permissions in channels. Once you’re happy with all of the channel management settings, click “Save” to apply the changes.
Slack permissions are an important part of ensuring that everyone can do what they are supposed to but can’t abuse the system and ruin it for everyone. By following the steps in this guide, you can edit the channel management permissions for your workspace.