Skip to content
LogoTechnipages
LogoTechnipages
  • Topics
        • Android
        • Browsers
        • Gaming
        • Hardware
        • Internet
        • iPhone
        • Linux
        • macOS
        • Office
        • Reviews
        • Software
        • Windows
        • Definitions
        • All Recent Posts
  • Product Reviews
  • About

Samsung Galaxy Tab A: How to Take Screenshot

Mitch BartlettDecember 21, 2016 Comments (4)

If you want to capture the screen of your Samsung Galaxy Tab A tablet, you can take a screenshot easily with these steps.

Contents

  • 1 Option 1 – Palm Swipe
  • 2 Option 2 – Button Combo
  • 3 Option 3 – S-Pen
  • 4 FAQ

Option 1 – Palm Swipe

  1. Under “Settings” > “Advanced features” and set “Smart capture” to “On“.
  2. Slide the side of your hand across the screen from right to left.

Option 2 – Button Combo

  1. Navigate to the screen you wish to capture and get it looking just right.
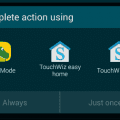
  2. Press and hold the “Power” (–) and “Home” buttons simultaneously for about 1.5 seconds.
  3. Once you release the buttons, the screen should flash. If sound is on, you will also hear a camera shutter. The notification area will say “Saving screenshot…“

Galaxy Tab 3 Saving Screenshot

Once the notification message disappears, your screenshot is saved to the device. The image is also copied to the clipboard, so you can tap and hold a field and paste it anywhere.

Option 3 – S-Pen

  1. Eject the S-Pen from the device.
  2. Select the “Smart Select” option.
  3. Select a shape at the top of the screen.
  4. Use the S-Pen, select an area of the screen you would like to capture.
  5. Choose the desired option:
    • Auto-select
    • Extract text
    • Draw
    • Share
    • Save

FAQ

What location are the screenshots saved?

  • When connected to a PC, it should be under Tablet > Pictures > Screenshots.
  • On the device, open the Gallery app. You’ll have an album labeled “Screenshots” where you can view or share them.

Why doesn’t the Power + Volume Down shortcut work for me?

Many users struggle with getting the screenshot functionality. Be sure you press both buttons together to start, then hold them both down long enough. You also want to release both buttons at the same time. With practice you’ll get it right.


Categories: Android

Author Mitch Bartlett

Through my career that spans over 20 years I have become an expert in Microsoft Systems Administration, Android, and macOS. I started this site as a technical guide for myself and it has grown into what I hope is a useful knowledgebase for everyone.

You Might Also Like

  • Android: Restore Prompt For Default Application

    Mitch BartlettAndroid
  • Block Text Header

    Galaxy S23: Block Text Messages & Calls

    Mitch BartlettAndroid
  • Gear Icon Header

    Fix: Android App Widgets Not Appearing

    Mitch BartlettAndroid
  • Google Releases the First Minor Pixel Update in 2021

    Andrew MyrickAndroid

Comments

  1. Philip says:
    February 3, 2021 at 7:31 am

    There used to be a button on my galaxy tablet s4 which allowed me to take a screen shot, switch ot my tablet etc.
    How ca I get it back?

  2. Sheila Clasper says:
    January 4, 2021 at 8:23 am

    My galaxy tab a will not take a screenshot using the 2 buttons although this method worked until about 2 months ago. As I take many screenshots this is very enjoying. Any advice would be appreciated

  3. Terry says:
    December 26, 2019 at 4:14 am

    How the eff do you adjust the flash on a Tab A? There is no buttons for it anywhere…… WTF?

  4. Pia Alicia Pilar Mogollón says:
    January 25, 2017 at 10:58 am

    Hi, thanks so much. This is great info. I’m trying to figure out how to delete screenshots from clipboard without having to clear all of the contents. Each time I make a screenshot it is automatically saved to clipboard, and when i go in via keyboard they are greyed out and no option to delete them. So, can you, please, tell me how can i delete and for future reference how can i stop them being auto saved in the clipboard?

Leave a Reply

Your email address will not be published. Required fields are marked *

  • browser screen goes black

    Browser Screen Goes Black Intermittently 

  • computer heating up in hyper v

    Computer Heating Up When Using Hyper-V – How to Fix 

  • clipchamp unexpected application error

    Clipchamp Unexpected Application Error: Here’s the Solution 

  • winload.efi file missing error

    Winload.EFI File Missing Error on Boot – How to Fix

  • fix error 0x9cfc7550

    How to Fix Error 0x9cfc7550 (We Couldn’t Create a New Partition) in Windows 

profile pic

The Experts Behind Technipages

My name is Mitch Bartlett. I've been working in technology for over 20 years in a wide range of tech jobs from Tech Support to Software Testing. I started this site as a technical guide for myself and it has grown into what I hope is a useful reference for all.

Learn More

technipages logo white
linkedin icon

Technipages is part of Guiding Tech Media, a leading digital media publisher focused on helping people figure out technology. Learn more about our mission and team here.

© 2025 Guiding Tech Media All Rights Reserved

  • About Us
  • Contact
  • Terms of Use
  • Privacy Policy

© 2025 Guiding Tech Media All Rights Reserved

Information from your device can be used to personalize your ad experience.
Do not sell my personal information.

Last Updated on December 21, 2016 by Mitch Bartlett