
The frequently visited section on the Safari start page is very useful. You can easily access your favorite sites without typing the addy manually. But, for whatever reason, you might not want those sites showing up on the Safari start page if it’s something you wouldn’t want others to see. So, if you don’t feel like dealing with the jokes to come, you can always remove a site or the entire section.
Contents
How to Erase Specific Sites from the Frequently Visited Section on Safari Start Page
If you only want to remove a few sites from the Frequently Visited Section on the Safari start page, then all you need to do is the following. Once the start page opens, long-press on the site’s icon, the one you want to erase. If you tried this and nothing happens, try long-pressing a little longer before you stop.
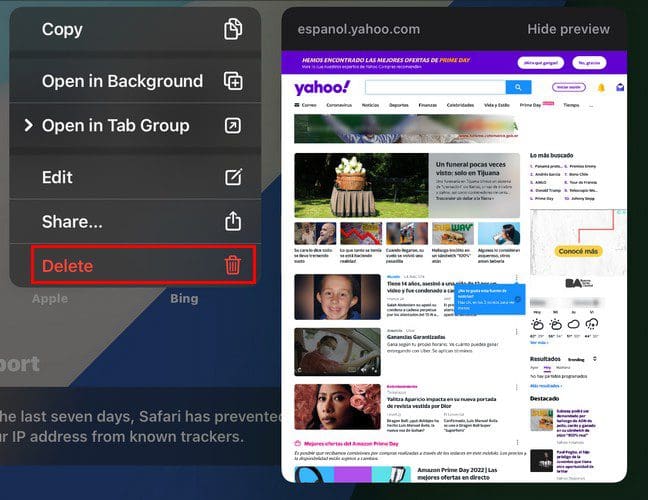
To erase, tap on the Delete option at the bottom. But, if you want to replace it for another site, you can tap on the Edit option and change the address in the next window. As long as we’re on the subject of favorites, if at any point you want to add a site to the list while you’re reading the site, you can add it to your favorites by tapping on the Share icon at the top (an icon that looks like a box with an arrow pointing up). When the window appears, tap the Add to Favorites option.

How to Remove the Entire Frequently Visited Section on Safari Start Page for iPad
You don’t see a reason why the Frequently Visited section should even be there in the first place. The good news is that you can get rid of the entire section too. To do this, you’ll need to open a new start page and tap on the Edit option.

When the Customize Start Page opens, the Frequently Visited option should be the second one on the list. If you want to move it to the top of the list, tap on the three lines to the right and drag it to the position where you want it to be.
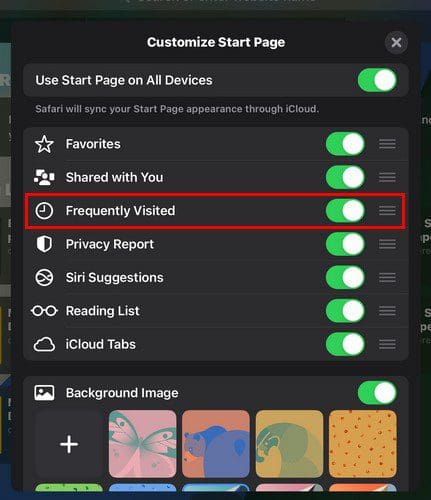
To add style to your start page, you can choose a background image or change the one you currently have. You can choose from the available options, but tap on the plus option to add an image from your iPad. The image you add will be applied immediately and added to the rest of the options.
Clear Visited Sites from Safari’s History
Don’t forget that someone can know what sites you’ve visited if they take a look at the history. Stay one step ahead and erase it by doing the following. Once you’re at the Safari start page, tap on the side menu icon that’s on the top left corner. When the side menu appears, tap on the History option at the bottom.
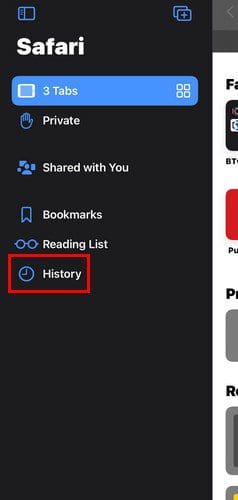
Your history will be listed and separated into sections. The first thing you’ll see is what you saw this afternoon, and so on. Tap on the Clear button at the bottom right. You can choose from options such as:

- All-time
- Today and yesterday
- Today
- The last hour
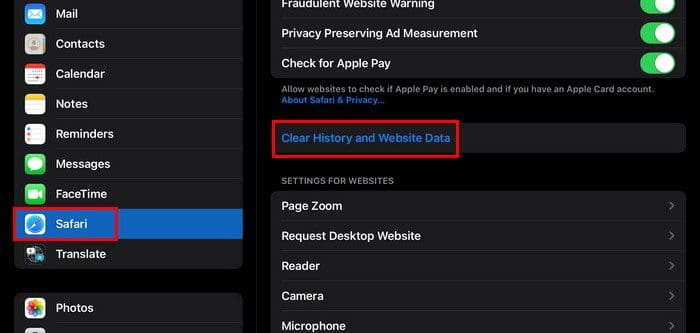
You can also clear the history by going to the Settings app. Once you’re there, tap on Safari, swipe down, and look for the Clear History and Website Data, the option will be in blue.
Conclusion
When it comes to clearing the frequently visited sites from your iPad, there are different options to choose from. If you only want to erase one, you only need to long-press on it and delete it. If you want to erase the whole section, there are a few more steps to follow. Did you erase only one or the entire section? Let me know in the comments below, and don’t forget to share the article with others on social media.


I did the long press action, and just like the other responder the site shows up again immediately. It did not work for me. I am talking about the frequently visit on my iPad.
I do the long press thing to get rid of what I don’t want anymore,but the next time I open up the page all the icons are back…wth…