The primary purpose of Burp Suite is to intercept and modify web traffic as part of a penetration test. To be able to do intercept web traffic you need to configure your browser or operating system to redirect traffic through the Burp proxy. By default, the proxy starts with Burp and binds to the loopback address on port 8080 “127.0.0.1:8080” but there are plenty of options for you to configure.
How to configure a proxy listener in Burp
To configure the proxy settings, you want to go to the “Options” sub-tab in the “Proxy” tab. In the “Proxy Listeners” section you can edit the current proxy listener, by selecting a listener and clicking “Edit”, or set up a second one by clicking “Add”.
Tip: To be operational the proxy listener must have the “running” checkbox on the left ticked.

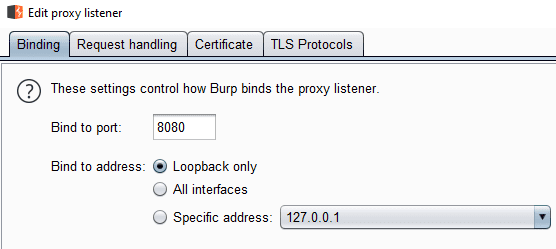
When editing the proxy listener, the “Binding” tab allows you to configure which port number and which interface it binds to in the binding tab. You should use a port number should be between 1001 and 65535 as port numbers below 1000 can require extra permissions.
Binding to the loopback address means that the proxy is only available to the local computer. Alternatively, you can bind it to another IP address your computer has via the drop-down box, although it won’t explain what physical interface this relates to and whether other devices will be able to access it. Selecting “All interfaces” will make the proxy visible on all of the IP addresses your computer has.
Tip: Using IP addresses other than the loopback can allow you to configure other devices to proxy their traffic through your Burp instance. Remember that you’ll have to install the Burp certificate on those devices to monitor their HTTPS traffic. Please note that you need permission from the owner of the device to legally be able to do this and any users should be aware that you’re monitoring their network usage and will be able to see their passwords etc.
Other proxies, custom certificates, and TLS protocols
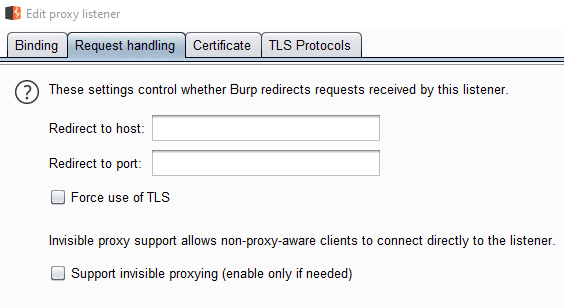
The “Request handling” tab allows you to configure a host and port number to where all requests will be redirected to the specified location regardless of what resource they requested. This option is used to forward traffic through another proxy.
“Force TLS” automatically upgrades all web requests to use HTTPS. This option can break some websites if they don’t support HTTPS. “Invisible proxying” enables support for devices that don’t support traditional proxy settings.
The “Certificate” tab allows you to configure how the HTTPS certificate works. “Generate CA-signed per-host certificates” is the default setting and should generally be used. “Self-signed” certificates will always generate certificate error messages. Specifying a “specific hostname” is only useful when performing invisible proxying to a single domain. If a specific certificate is required, you can import it with the “custom certificate” option.

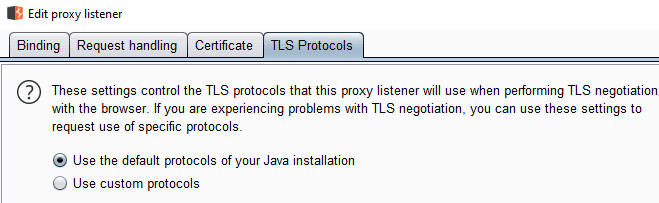
The “TLS Protocols” tab allows you to specify which TLS protocols you want Burp to support. By default, TLSv1-1.3 is supported. You can choose to disable any of those options or enable SSLv2 or SSLv3 if you manually specify the protocols. This should only be used if you want to specifically test a single protocol or can’t connect to a legacy device.