

Sharing calendars in Office 365 helps companies to make sure no tasks are being forgotten or overlooked and deadlines are met.
But creating a shared calendar is not a straightforward process. If you want to create one but you don’t know how to do that, follow the steps listed in this guide.
Steps to Create a Shared Calendar in Office 365
- Log in to Office 365 and click on Calendar
- Right-click on My Calendars or click directly on Add Calendar and then on Create a blank calendar

- Name the calendar and hit the Save button
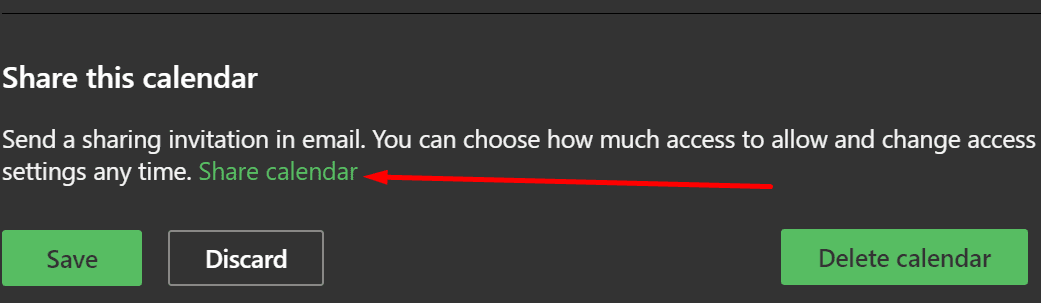
- Select the new calendar you just created → click on Share Calendar

- Enter the email of the user you want to share the new calendar with and customize the permission settings
- Hit the Send button and you’re done.

Alternatively, you can simply go back to My Calendars, right-click the calendar you want to share, and then select the Sharing and Permissions option.

You can then enter the email address of the person you want to share the calendar with the customize the permissions settings.
Learn More About Calendar Permissions Settings
When sharing the calendar outside the organization, there are three permission levels that you can choose from:
- Availability only — use this setting to show only the time
- Limited details — shows only information related to time, subject, and location of the events
- Full details — meaning that users can view all the details in your calendar such as time, subject, location, and more.
You can always change the access levels of the calendar by right-clicking the respective calendar and then selecting Permissions. You can then use the drop-down menu to edit the permission level of the users you’re sharing the calendar with.
Useful Tip: If you’re sharing the calendar with a person outside your organization and both organizations are federated through Office 365 or Exchange, when they get your invitation, they can add your calendar to their calendar view, as well as share their calendar with you. That’s a useful feature that allows companies to better synchronize their actions.
And this is how you can create and share a calendar in Office 365.


This is not accurate for people who have to sign into office.com. how about adding instruction on how to add a shared calendar on Office.com?
Title of the article is how to ADD a shared calendar, but the directions are for how to CREATE a shared calendar. WTF?
It did not help. I’m looking to add a company calendar that everyone in the company can view and set permissions for certain people to make changes. I should not have to assign each individual email address to the calendar. Must be a way to grab all employees and add them to the shared calendar.
Did not really show how I add a shared cal from someone else..