• Skip to main content
  • Skip to primary sidebar

Technipages

Tutorials and fixes for smartphone, gadget, and computer problems

  • Topics
    • Android
    • Browsers
    • Gaming
    • Hardware
    • Internet
    • iPhone
    • Linux
    • macOS
    • Office
    • Reviews
    • Software
    • Windows
    • Definitions
  • Product Reviews
  • Downloads
  • About
Linux Mint: How to Add a New User

Linux Mint: How to Add a New User

December 11, 2020 by Mel Hawthorne 1 Comment

Having multiple people using a single computer can cause some potential issues. For example, if your family is all using a single home computer and sharing a single user account, then someone might delete someone else’s file when they’re trying to clear some space on the hard drive. It’s also entirely possible that you don’t want everyone to have the administrative powers required to perform certain actions, such as installing software.

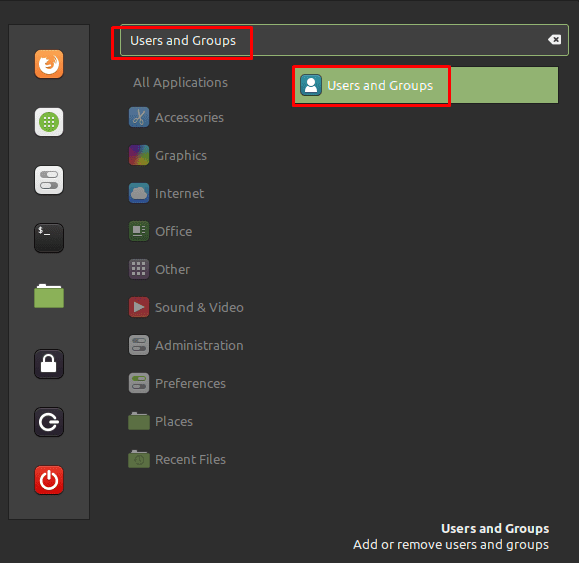
The way to manage these risks and give people different permissions sets is to create multiple user accounts. Creating a new account in Linux Mint is easy; to be able to do so, press the Super key, then type “User and Groups” and hit enter.

Tip: The “Super” key is the name that many Linux distributions use to refer to the Windows key or the Apple “Command” key while avoiding any risk of trademark issues.

Press the Super key, then type “User and Groups” and hit enter.

How to Create a New User

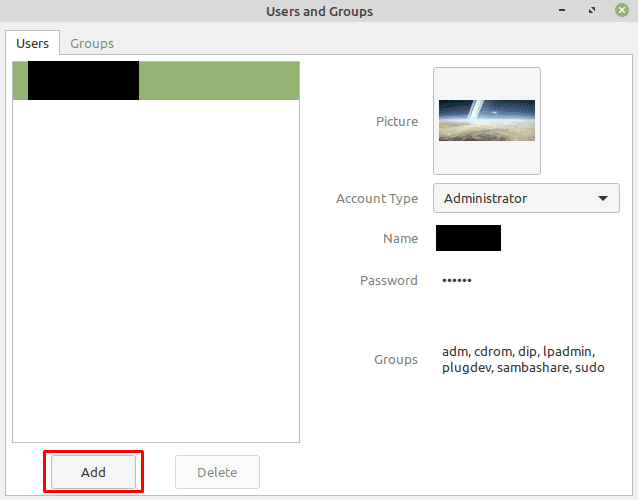
As managing the list of users is a sensitive task, only administrative users with Sudo permissions will do so. You will need to immediately provide your account password to gain access. Once you’ve authenticated successfully, you’ll see the current list of users. To add a new user, click the “Add” button in the bottom-left corner.

Once you’ve authenticated, click “Add” in the bottom-left corner to add a new user.

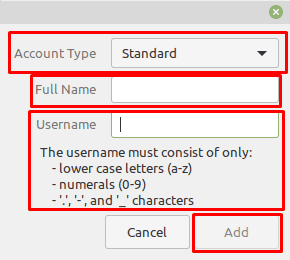
In the account creation screen, there are three fields you need to complete. The first is “Account Type,” “Standard” is a normal user account, whereas “Administrator” has Sudo permissions. “Full Name” is where you set the account’s vanity name; this is seen primarily on the user selection list of the login screen. The “Username” is your actual account name that will be used for creating your user directory.  Once you’ve set all three values, click “Add” in the bottom-right to create the account.

Set the “Account Type,” Full Name,” and “Username,” then click “Add” to create an account.

Once you’ve created the account, you can then review it in the user list. By default, newly created user accounts don’t have a password set at all. To add a password, click on “No password set” to open the password creation window. Here you simply need to enter the password you want to use twice, then click “Change.”

To set a password, click “No password set,” then enter the password you want to use, and click “Change.”

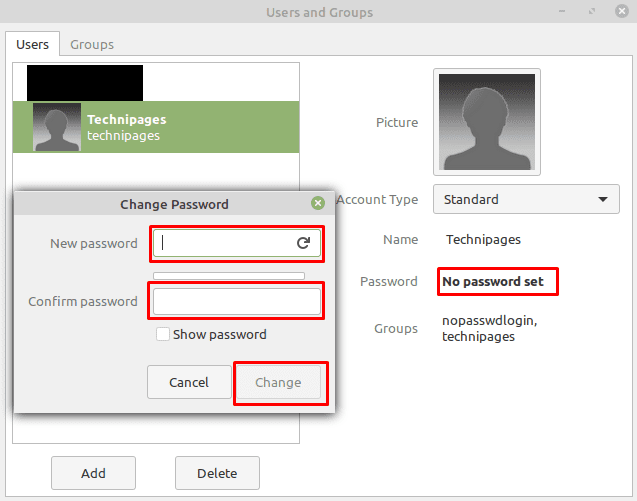
You can also change the profile picture, account type, full name, and which groups the user is a member of by clicking on the respective options.

You Might Also Like

  • Linux Passwords: How To Force a User To Reset Their Password
    Linux Passwords: How To Force a User To Reset Their Password
  • Linux Mint: How to Add New Applets
    Linux Mint: How to Add New Applets
  • Linux Mint: How to Add New Extensions
    Linux Mint: How to Add New Extensions
  • Linux Mint: How to Use “Hot Corners”
    Linux Mint: How to Use “Hot Corners”
  • Linux Mint: How to Add New Desklets
    Linux Mint: How to Add New Desklets
  • Linux Mint: How to Change Your Password
    Linux Mint: How to Change Your Password

Filed Under: Linux

Reader Interactions

Comments

  1. Charlie says

    July 16, 2021 at 8:59 am

    Great perfect information

Did this help? Let us know!

Your email address will not be published. Required fields are marked *

This site uses Akismet to reduce spam. Learn how your comment data is processed.

Primary Sidebar

Recent Posts

  • 3 Ways to Choose All Files in a Folder – Windows 11
  • Apple TV+: How to Erase a Show From the Up Next List
  • How to Change the Profile Picture on Disney+
  • Local Security Policy: What Is It and How to Open It in Windows 11
  • How to Create and Erase an Alarm in Windows 11
  • 10 Best NAS Storage Device for Home and Professional Use
  • PS5 NVMe Requirements You Must Fulfill to Expand PS5 Storage
  • Steam Deck Won’t Turn On: 8 Possible Fixes You Can Try

Who’s Behind Technipages?

Baby and Daddy My name is Mitch Bartlett. I've been working in technology for over 20 years in a wide range of tech jobs from Tech Support to Software Testing. I started this site as a technical guide for myself and it has grown into what I hope is a useful reference for all.

You May Also Like

  • Linux

© Copyright 2023 Guiding Tech Media · All Rights Reserved · Privacy