

Access to Wi-Fi networks is typically restricted in one of three ways. The most common method is to use a password, but you can also have networks where network providers have hardcoded credentials to access their networks via a SIM card. Another method that many free Wi-Fi networks use is called a “Captive portal”.
Captive portals allow you to connect to the network with no restriction but instead capture and redirect your internet traffic to a sign-in page. From here you generally have to create an account to be able to use the service.
One of the issues with captive portals is that they can’t redirect traffic to websites encrypted with HTTPS. Given the large and increasing number of websites that use HTTPS to secure communications, this can be an issue in getting online. To help users get connected, many operating systems run regular and small automated checks to see if they’re stuck behind a captive portal and to then open the sign-in page for the user.
The intention of this is to increase usability but some users may have some privacy concerns about these checks. To support those users that may have privacy concerns, Linux Mint allows you to disable the internet connectivity check used to determine if there is a captive portal.
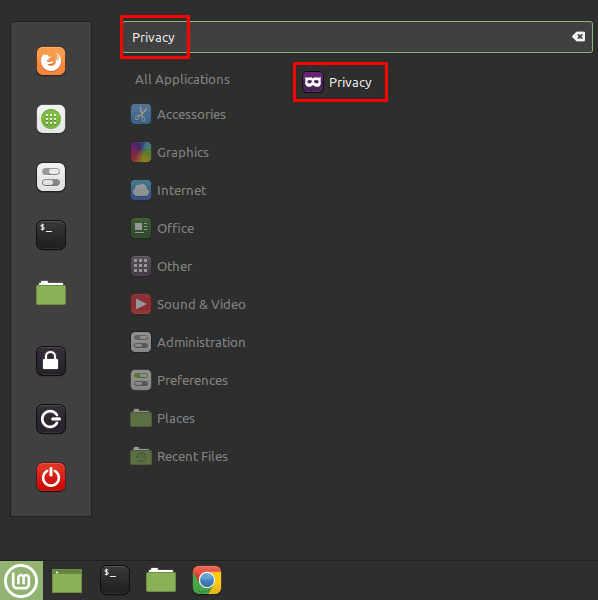
To enable or disable the connectivity checks for captive portals in Linux Mint, press the Super key, then type “Privacy” and hit enter.
Tip: The “Super” key is the name that many Linux distributions use to refer to the Windows key or the Apple “Command” key, while avoiding any risk of trademark issues.
In the privacy settings, you need to enable or disable the “Check connectivity” setting to respectively enable or disable the checks for captive portals. If you choose to disable this setting it’s possible you may struggle to connect to a captive portal network.


Same issue as Michael. Perhaps one difference, if I use Firefox it will display a narrow banner offering to open the login page. None of the other browsers do that.
No, unfortunately it doesn’t work for me. My LM laptop connects to the network with the captive portal, but nothing happens – nothing opens automatically. To connect to the page served by the captive portal, I have to get the “Default Route”-IP4 address from “Network Settings” and type that into the address bar of the browser – than it works.
For instance in Android, I only have to select the SSID of the network from the list, and everything else is automatic.
Is there something I fundamentally miss? Please help.
Thanks!