
The bottom panel in Linux Mint is analogous to the start bar in Windows. As well as being able to configure the items that are in the bottom panel, you can also configure the appearance and behaviour of the panel itself.
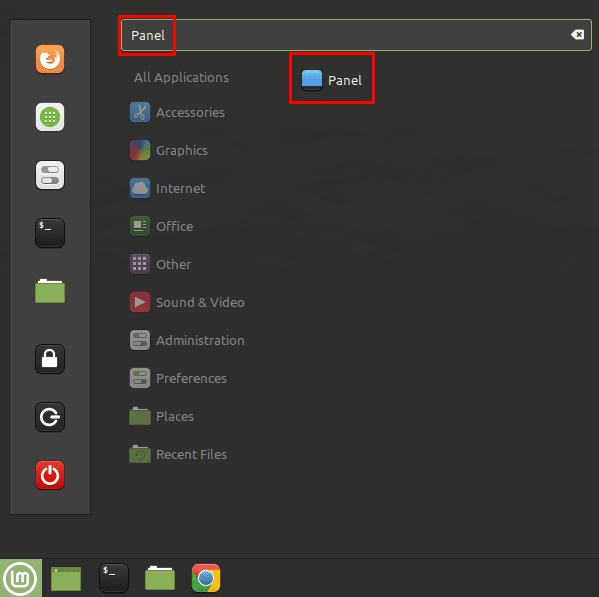
To configure the bottom panel in Linux Mint, press the Super key, then type “Panel” and hit enter. Alternatively, you can right-click on the bottom panel and click the top-option “Panel settings”.
Tip: The “Super” key is the name that many Linux distributions use to refer to the Windows key or the Apple “Command” key, while avoiding any risk of trademark issues.
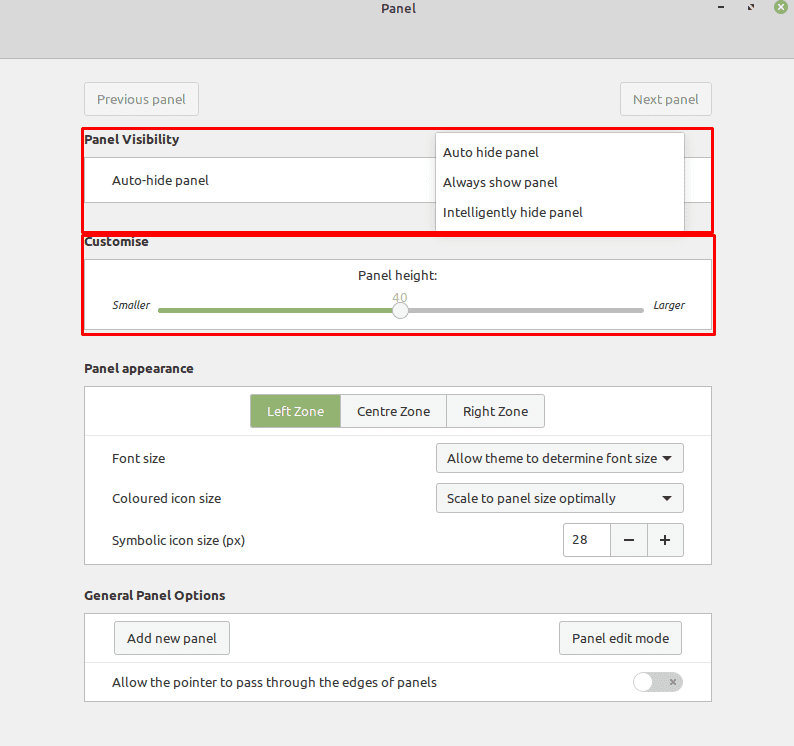
The top option “Auto-hide panel” allows you to choose if the panel is always visible or if it is automatically hidden. There is a third auto-hide setting labelled “Intelligently hide panel”, however, in our testing this option did not appear to do anything.
The “Panel height” option allows you to select how tall you want the panel to be, with options ranging from twenty to sixty pixels and defaulting to forty pixels.
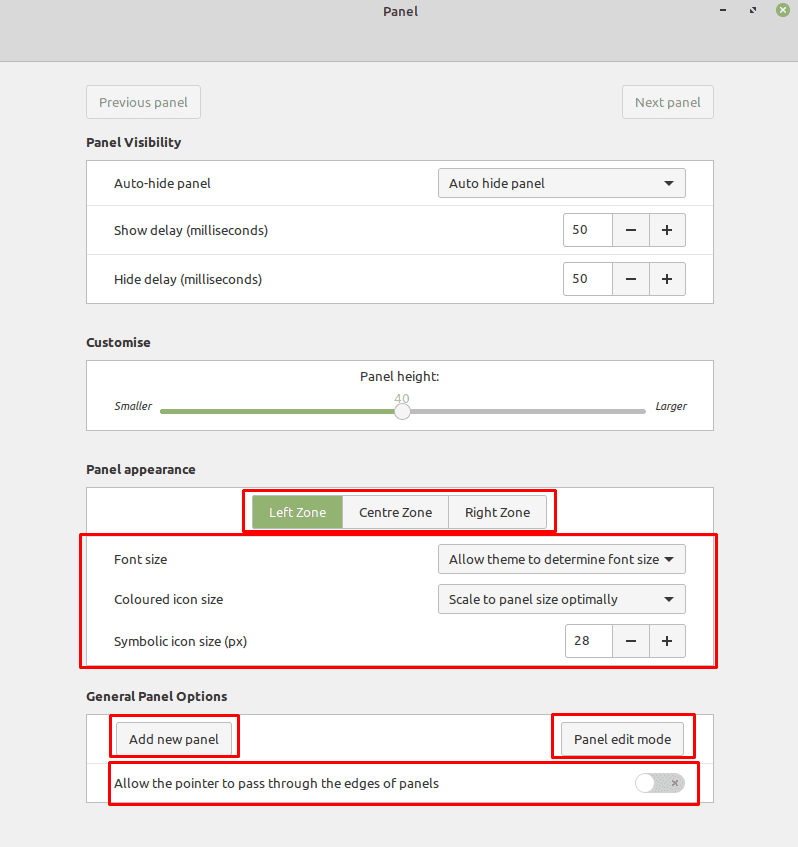
In the “Panel appearance” section, you can configure the font size, the size of full-colour icons (used by apps), and the size of the symbolic icons (such as the network status and volume indicator). At the top of this section are three options “Left Zone”, “Central Zone”, and “Right Zone”, allowing you to independently configure three sections of the bottom panel.
The “General Panel Options” section allows you to add new panels to either side and to the top of the screen as well if you want more panel space. The “Panel edit mode” button allows you to click and drag panel items. “Allow the pointer to pass through the edge of panels” is designed for multi-monitor set-ups and allows you to configure if the mouse can move to another monitor through the edge of a panel. This option is intended to make it easier to click a small icon at the edge of a panel.
These tips are well done, but they didn’t help.
In Linux Mint 19.3 how do I make the panel show the indicator of what program is being used? In some installs it shows, but in others it doesn’t show.
I just installed Mint 19.3 in an ASUS notebook. The panel doesn’t show the indicator of what program is being used. It shows only an underline under the icon. Does ASUS equipment have a problem with that? All other types of notebooks show the indicator in the panel when a program is in use.
I’m using Mate and I can just right-click the panel and select Properties to move the panel to any of the 4 sides.
This article appears to be only for Cinnamon and doesn’t work for me at all.
But, if you read ‘The “General Panel Options” section’ it indicates that you can create a panel at the top, so that is probably where you would configure a panel, as well.
My biggest question – how to have the panel at the top of the screen? The bottom is clunky and awkward for me.