

Most of the time, people using your computer will do so multiple times and so making an account for them is a reasonable use of time. Creating an account for a user gives them their own user directory and password and allows you to configure if they can run administrative commands or not.
If you have a lot of people accessing your computer, you could choose to make a shared account with either a known password or no password at all. The other alternative on Linux Mint is to allow guest sessions. A guest session is allowed to access the computer but has even more restricted permissions than a shared account.
First of all, a guest session can’t read the home directory of any other user. By default, normal user accounts can read the files in any other user’s home directory but are unable to edit them or add new files other than to their own home directory. A guest session can’t even read the home directory of other users giving you privacy. Secondly, guest sessions can’t permanently store data to your hard drive, meaning you don’t have to worry about them downloading large volumes of data and filling your storage.
Guest sessions are designed for scenarios where a user needs to access the internet through a computer or needs to edit a document on removable media. They work well for this sort of use and keep your personal data on the computer private.
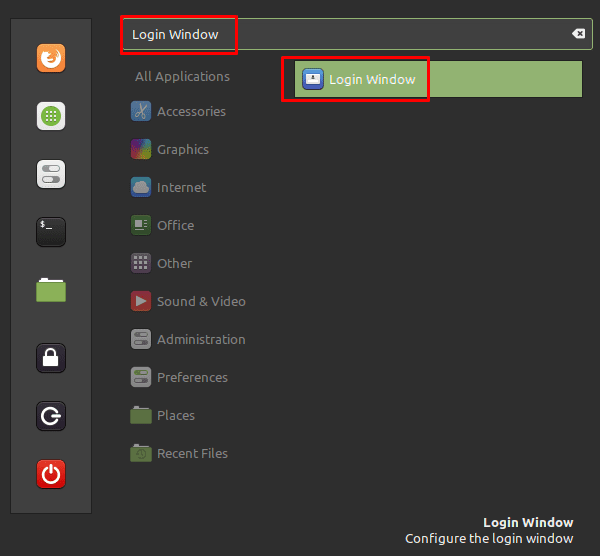
To enable the ability to use a guest session, press the Super key, then type “Login Window” and hit enter.
Tip: The “Super” key is the name that many Linux distributions use to refer to the Windows key or the Apple “Command” key, while avoiding any risk of trademark issues.
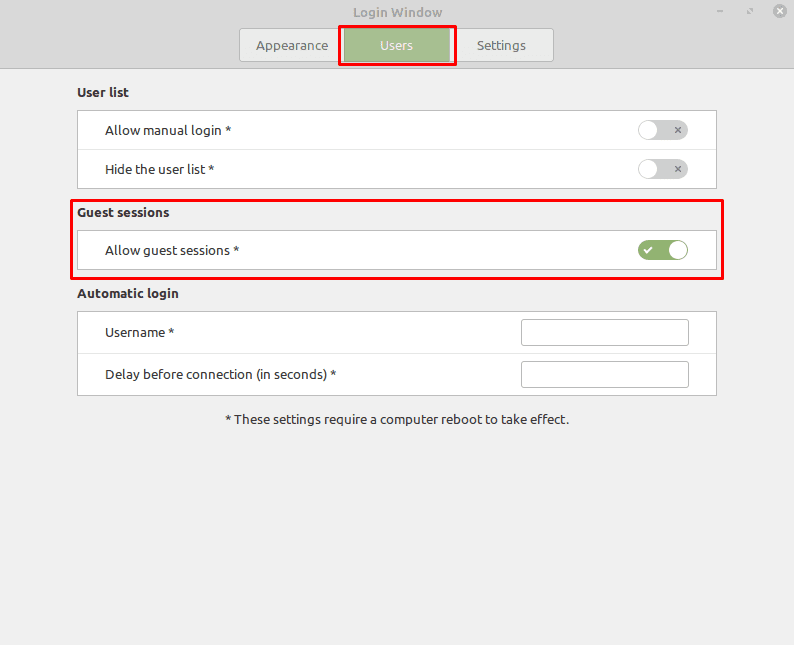
Once in the login window settings, switch to the “Users” tab and click the “Allow guest sessions” slider to the “On” position. For the setting to take effect, you will have to restart your computer. Once you’ve done so, you will be able to select “Guest Session” on the account selection screen.
This was a great help! My computer is very private to me (not that there’s anything illegal or even sensitive on it) – like a private journal, and I didn’t want to be caught in the position of a friend “just wanting to check their facebook” or whatever, and me having to refuse them access.
I was worried that adding a “guest” account would be complicated, with me having to find out e.g. how to exclude them from having access to the “sudo” command. But those nice people at Linux have done all the heavy lifting for me!
Thank you.