

The Apple iPhone doesn’t have a way to create a signature for a text message the way you can for an email. There are a few apps on iTunes that claim to do this for you, but I don’t recommend any of them. They’re pretty cheesy, cost money, and are a pain to use. You have to switch between the text and the app in order to insert the signature. Who wants to add those extra steps and time?
Thankfully, I figured out a way to add a signature of sorts to the end of all of my outgoing text messages (and iMessages) using a keyboard shortcut. It only takes a moment to set one of these up and you can easily insert it at the end of every text message.
NOTE – This method can be used for any and all phrases you find yourself typing regularly into a message such as a URL, phone number, address or anything else you use often. Just follow the steps below to create a new keyboard shortcut and then use it while you type!
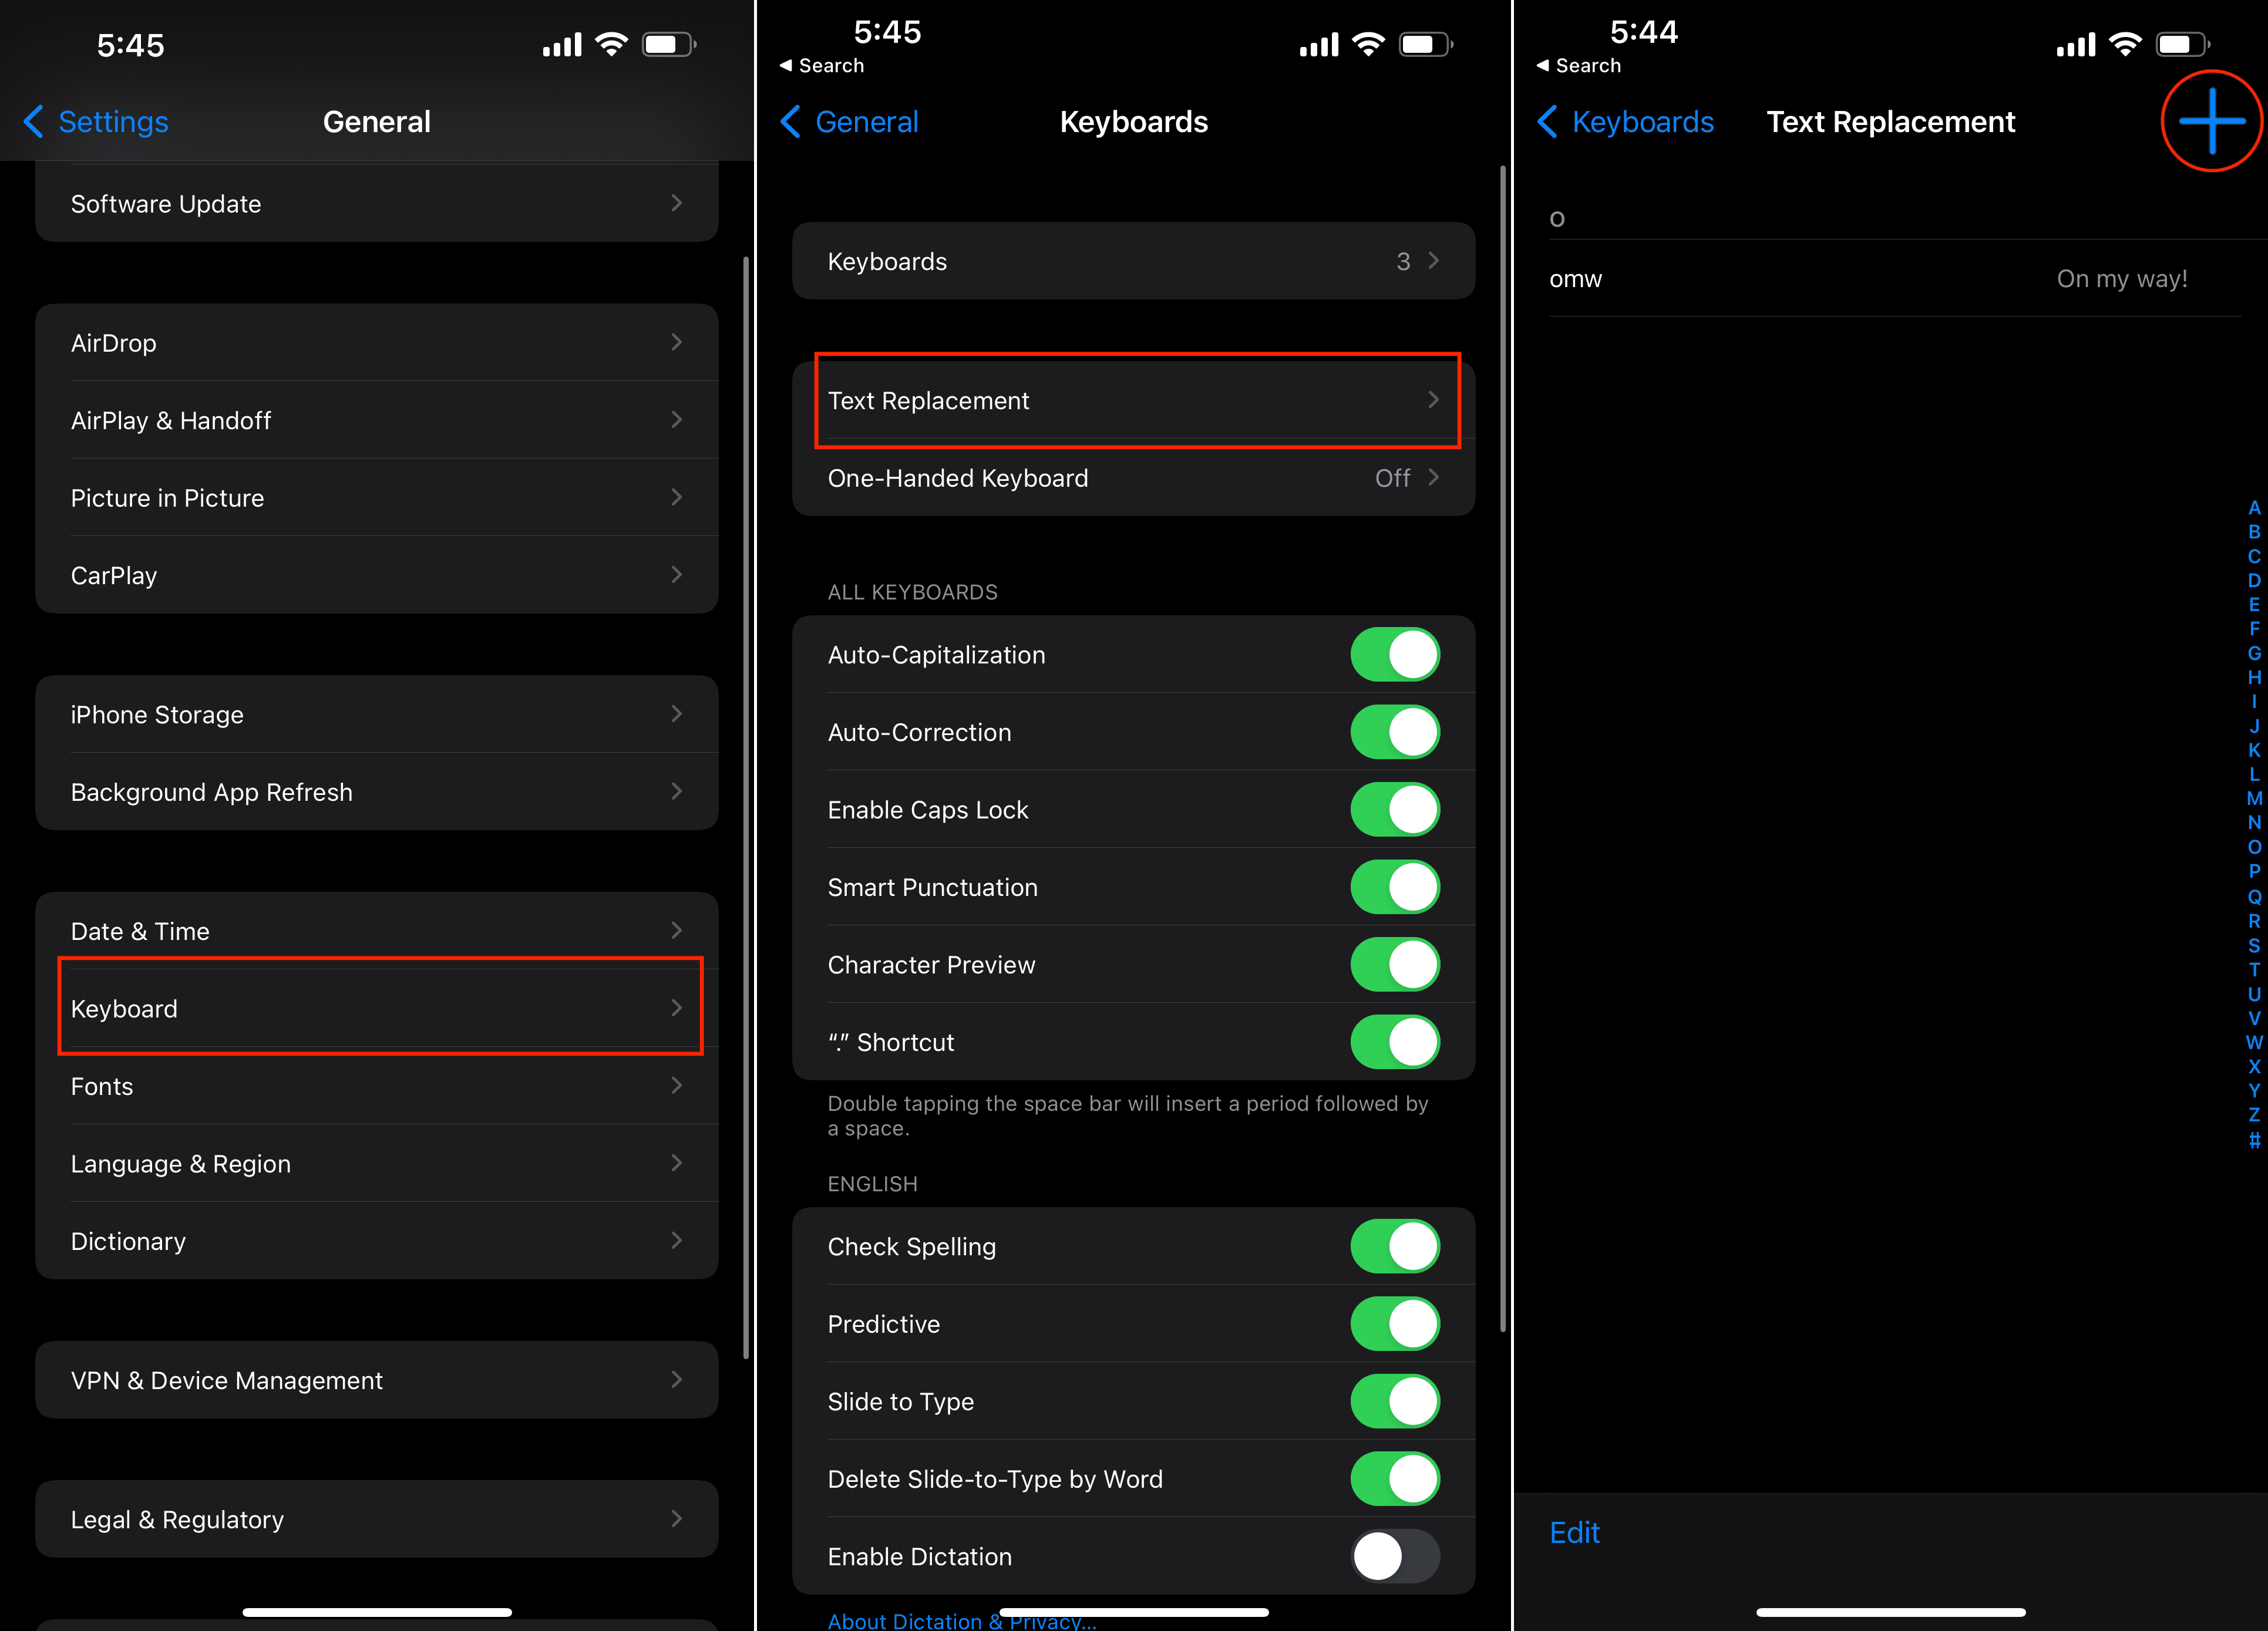
To create a keyboard shortcut:
- From the Home screen, open “Settings“.
- Choose “General“.
- Scroll down to find the “Keyboards” field and tap on it.
- Select “Text Replacement“.
- Select the + at the upper-right corner to add a new shortcut.
- In the “Phrase” field, type whatever it is you want to use as a shortcut or signature within text messages. Keep in mind that texts are supposed to be on the short side, so don’t create something insanely long here.
- In the “Shortcut” field, type the 2-3 letter shortcut you will use to bring this signature up within a text. When you are finished, tap the “Save” button in the upper-right corner of the screen.
Using the Shortcut as your Signature
In my example photo above, I chose to have the short phrase “- Andrew” show up at the end of my text messages. When I am finishing up a text message, I just type “sig” at the end and my shortcut will pop up. I then simply tap the space bar and iOS places the shortcut/signature within the message for me.

Be creative – if you want to end your texts with something like: ~ Andrew Myrick – https://andrewmyrick.blog ~. You would type this into the Phrase field in the screen to create the shortcut. For the shortcut trigger, you could then use something such as “blog” to trigger it.
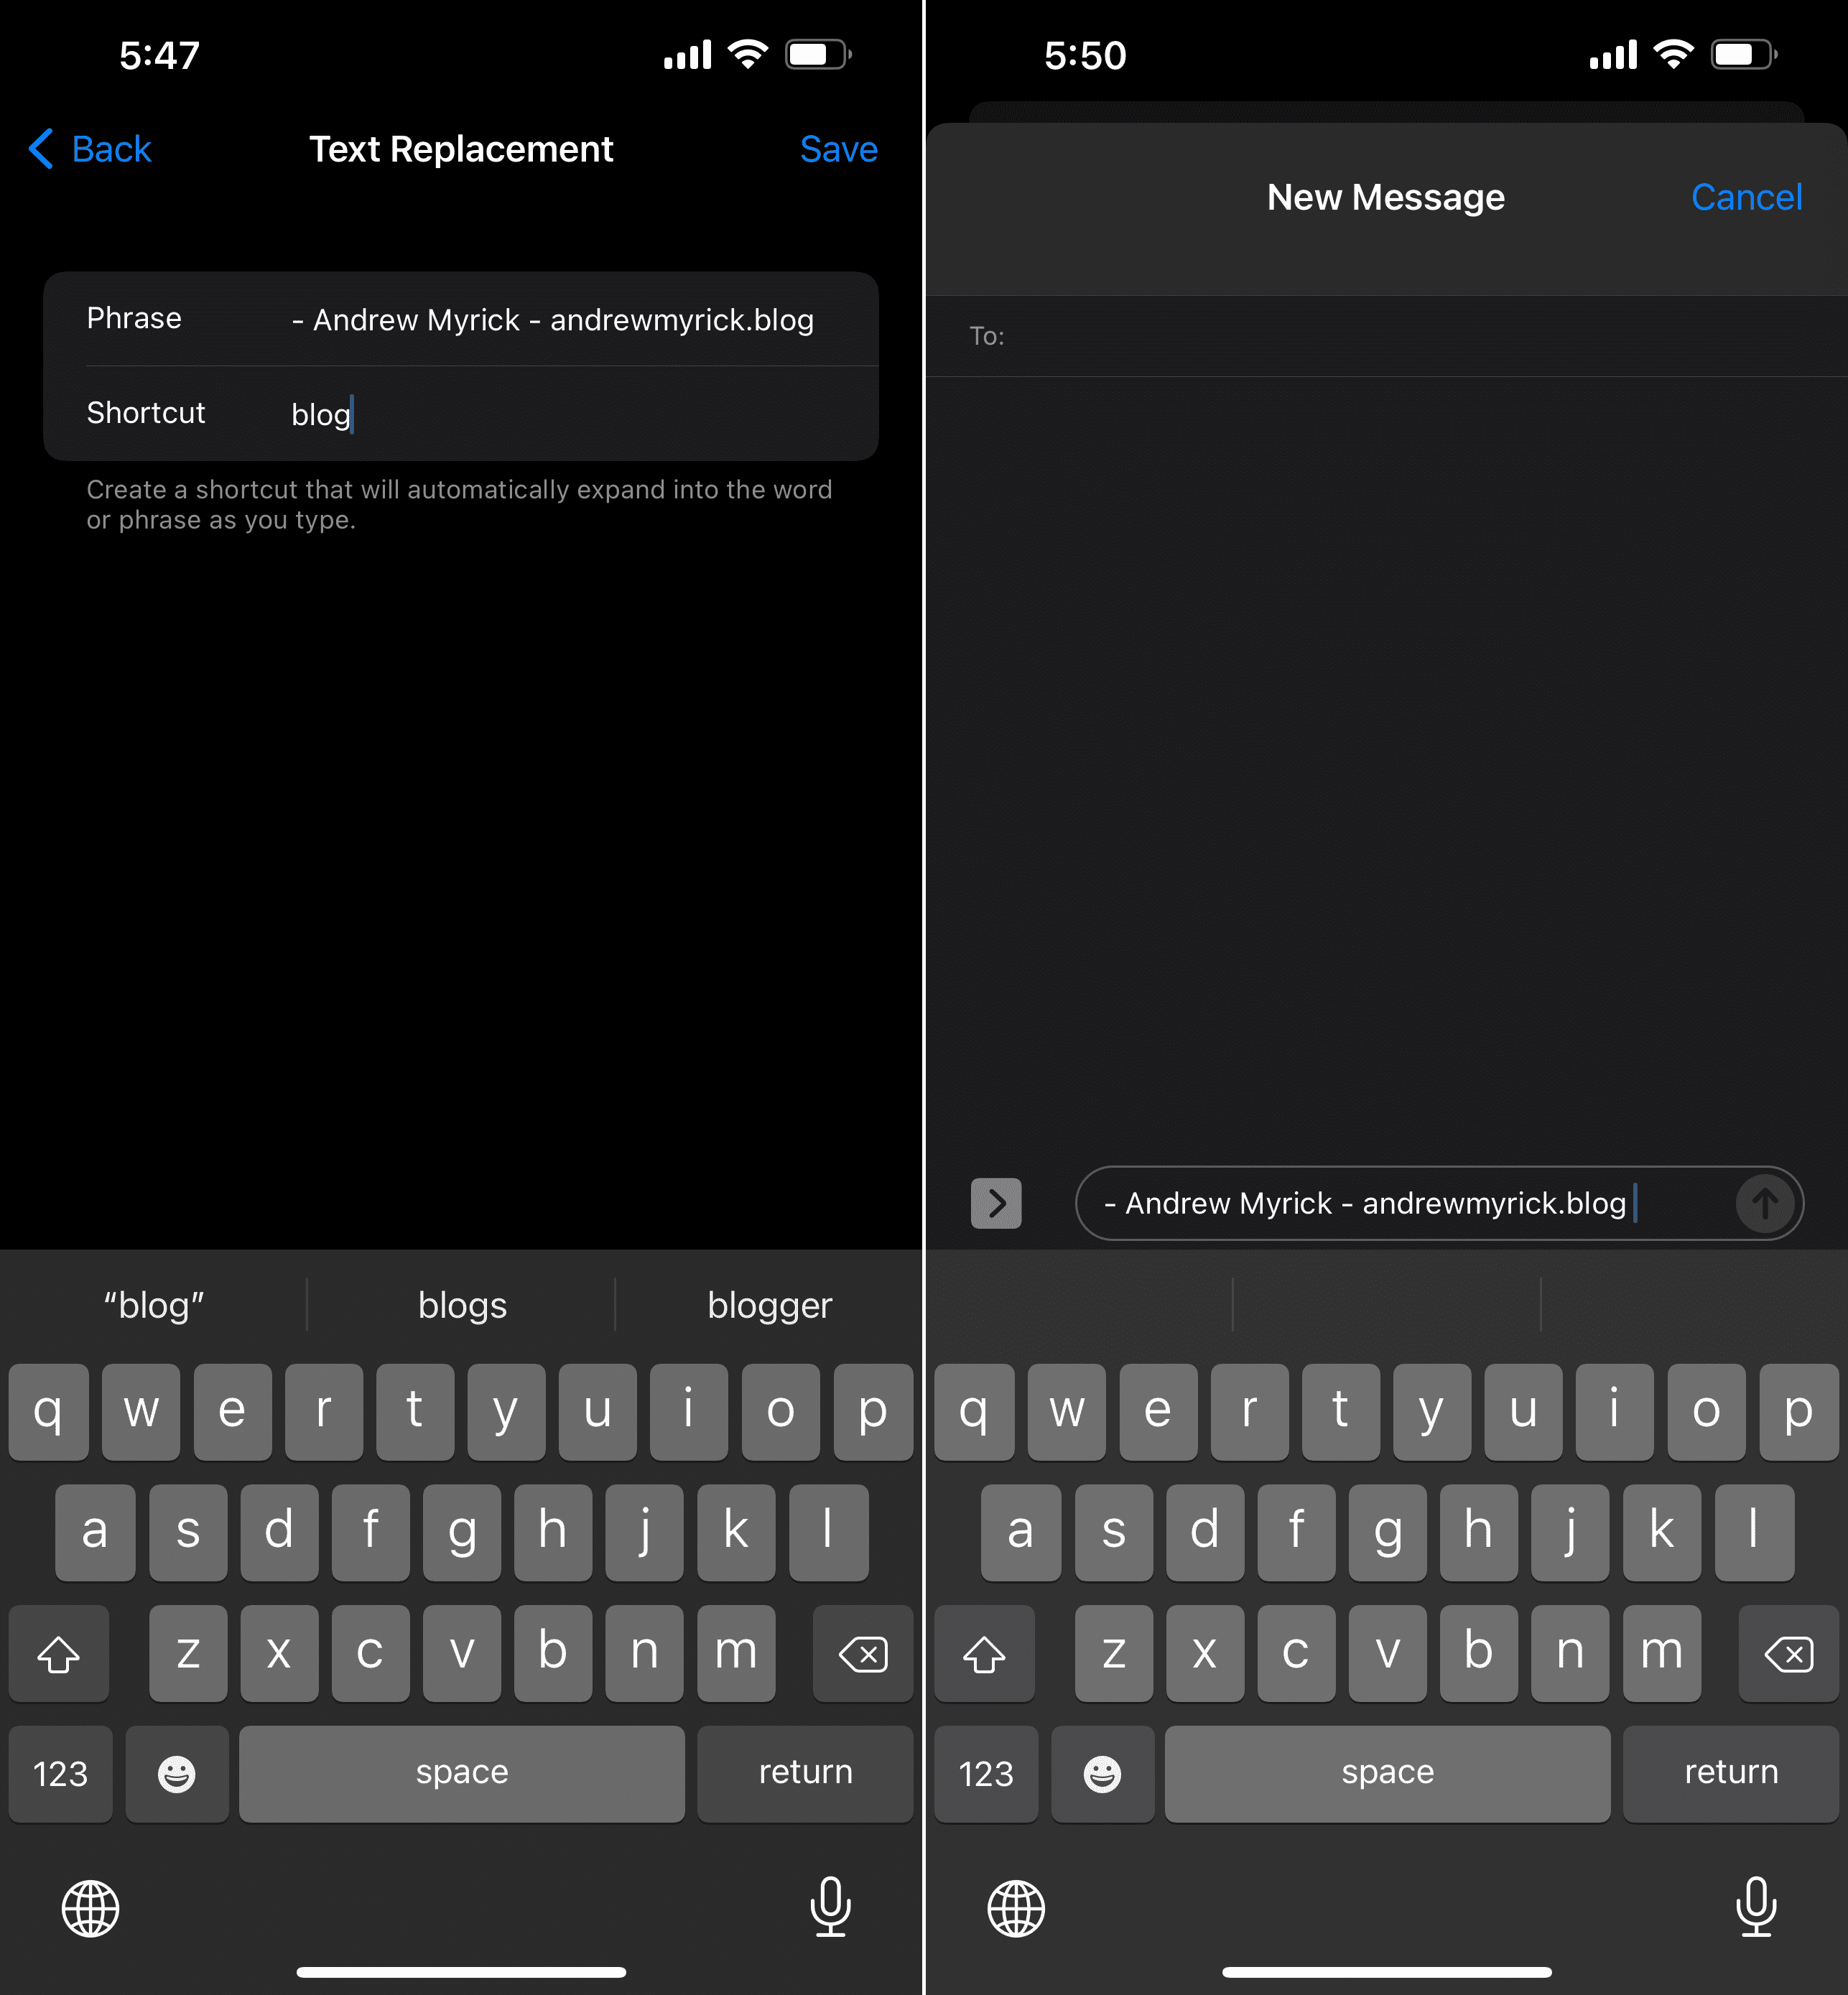
You can choose to use whatever you’d like as your shortcut “signature” – short is usually always better when sending an SMS. Likewise, the trigger shortcut should be something around 2-3 letters for the most part and easy to remember. You’re trying to save yourself time, not add to your troubles.

This is great! Thank you!
Great! Thank you.
Very helpful! Thank you so much. I send dozens of texts every day in my real estate business and this is saving me loads of time!
yes it helped, however one question. when i create the shortcut i added my email address. when i send it to my personal iphone 13 the email link is not useable. if I send it to my own cell phone iphone 14 the email link is active. any thoughts?
Yes it did…just what I was looking for!!! Thanks
How do you start a new line of text for adding a signature to texts?
its one of the better phone pranks, but the shortcut in iphone is unreliable unless you know how a person ends every text. Android I believe has an actual signature setting
Three people in our household thank you for this shortcut!
Appreciate the time your tip will save me
yes it did thank you so much
Thanks so much for this tip. It works wonderfully!
I have been wondering forever how to create the auto signature on an iPhone.
???? Victory 2022…Delphine