Backing up your iPhone is crucial if you want to avoid accidental data loss. If you lose or severely damage your iOS device, you’ll be able to restore the data using the backup folder. Basically, that’s a copy of the information stored on your device.
There are two main ways to backup your iPhone: via iCloud or via your computer. But the backup process may sometimes fail to complete on Windows 10 computers.
So, if your iPhone backup session failed on PC, use the solutions below.
Contents
Cannot Backup iPhone because Backup Session Failed
Check Your Hard Disk Space
Make sure there’s enough free space on your drive to store the backup files. If your drive is full, no wonder the backup failed. Go ahead and delete all the unnecessary files and programs.
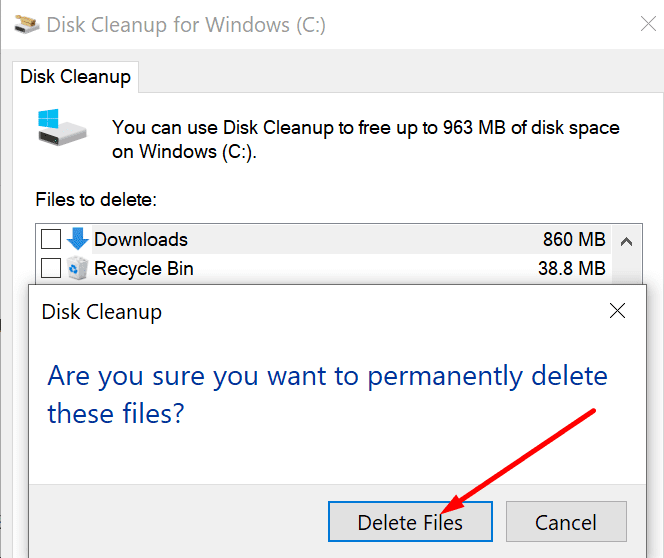
You can use the Disk Cleanup tool as well.
- Go to Start, type ‘disk cleanup‘, and launch the tool.
- Then select the drive you use for storing the backup files.

- Select the files you want to clean (temporary files, old update folders, etc).
- Hit the OK button to launch the cleanup process.

- Then restart the iPhone backup process.

Restart Your iPhone and Computer
Disconnect your iPhone from your computer. Then restart both your iOS device and your Windows 10 computer.
If some temporary files blocked the backup, you should be able to solve the problem by restarting your devices.
Reconnect your devices and check if you can backup your data now.
Update Windows 10, iOS, and iTunes
Make sure you’re running the latest OS version on your computer and iPhone. Check if there are any updates available for iTunes.
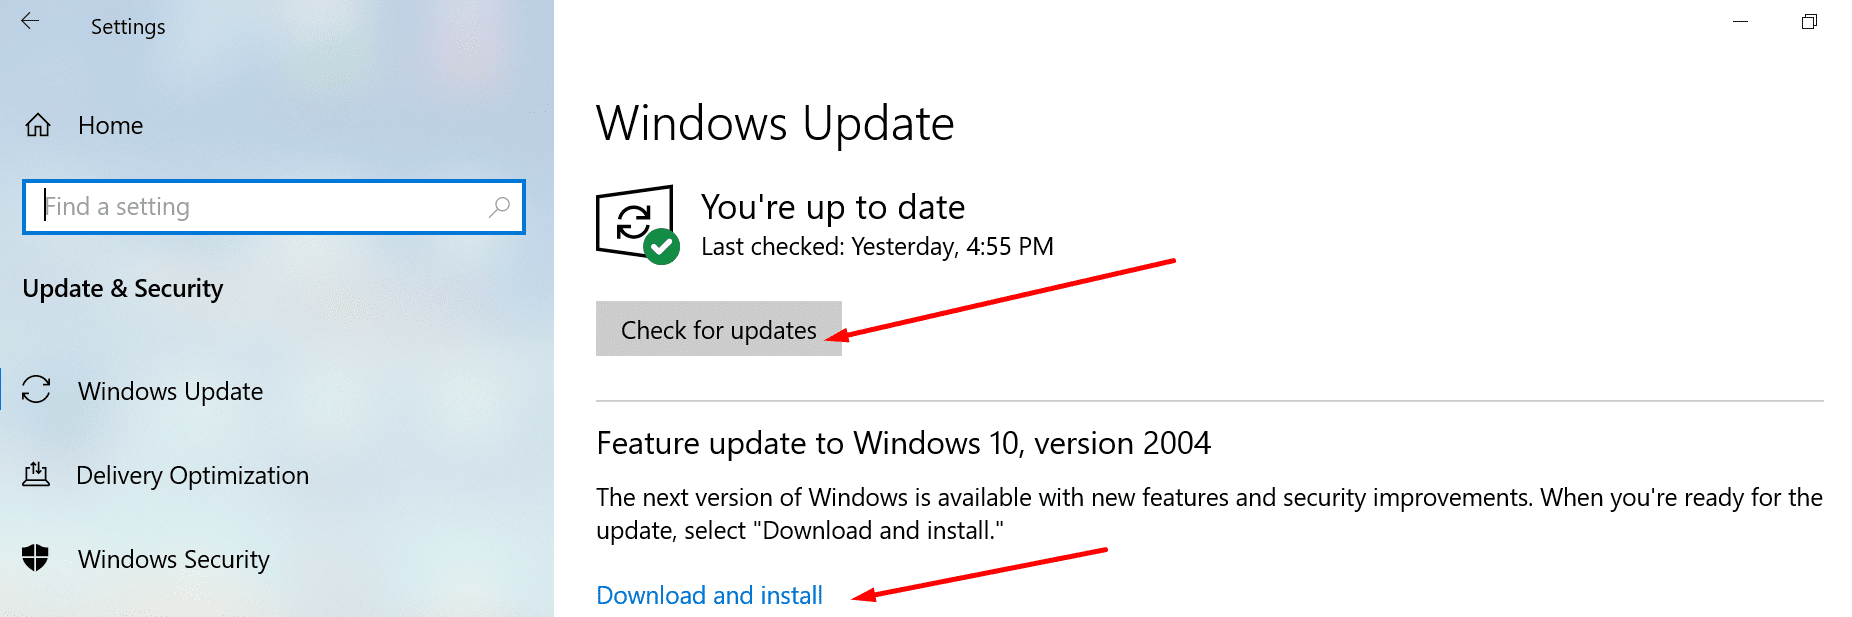
To update Windows, go to Settings → Update & Security → Windows Update → Check for Updates.
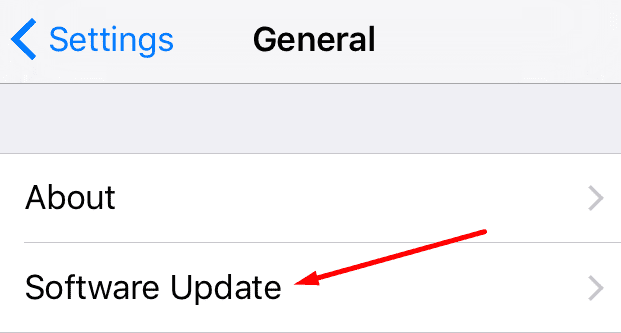
To update your iPhone, go to Settings → General → Software Update.
If you want to get the latest iTunes version, launch the Apple Software Update tool and check for updates.
Unplug other Peripherals
If your iPhone is not the only device connected to your computer, make sure to disconnect all the other peripherals. They might interfere with your iOS device.
- Disconnect all your external devices, your iPhone included.
- Then restart your Windows 10 computer. If you’re on a laptop, don’t plug in your USB mouse and keyboard. Use the trackpad instead.
- Connect your iPhone to your computer. Check if you can backup your data with your peripherals unplugged.
Close Background Programs
The programs running in the background on your Windows 10 computer might also interfere with your iPhone’s backup process.
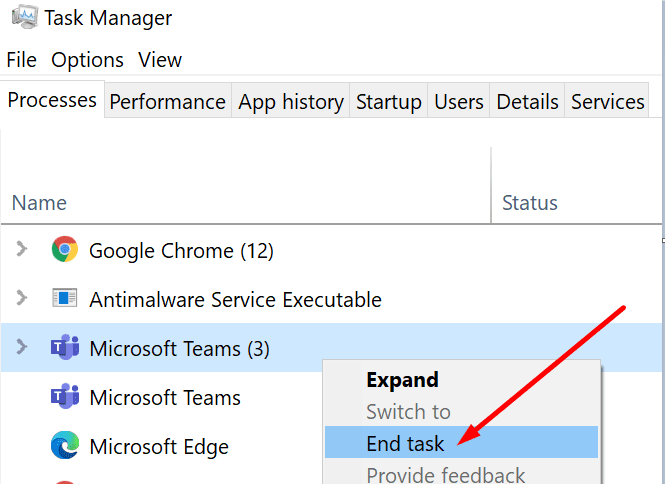
- Launch the Task Manager and click on the Processes tab.
- Right-click on the programs you don’t need during the backup.
- Select End Task to close then.
Then turn off your antivirus and firewall. Your security tools actively analyze all the files and processes running on your device.
And they might flag certain iPhone-related processes or files as suspicious. As a result, the respective files or processes will get blocked. This may cause backup errors.
If you’re using Windows 10’s native security tools:
- Navigate to Settings → Update & Security → Windows Security.
- Then click on Virus & threat protection → Manage settings.
- Switch off Real-time protection.

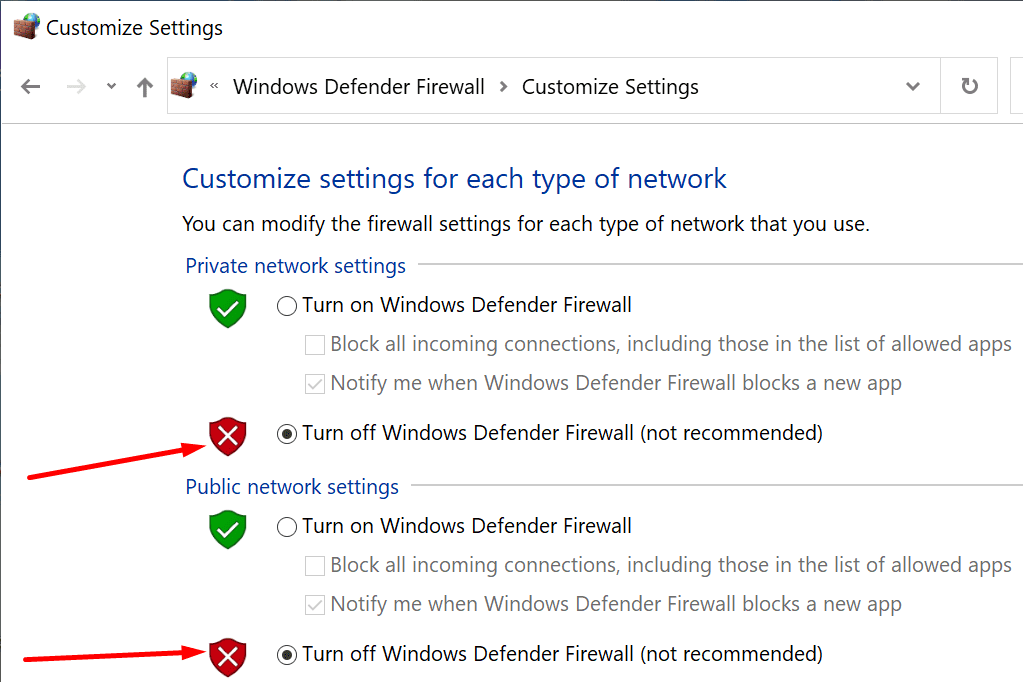
- Open the Control Panel and type ‘firewall‘ in the search bar.
- Click on Windows Defender Firewall.
- In the left-hand pane, click on Turn Windows Defender Firewall on or off.

- Turn off the firewall for both private and public networks.
- Try to backup your iPhone again.

Delete the Lockdown Folder Content
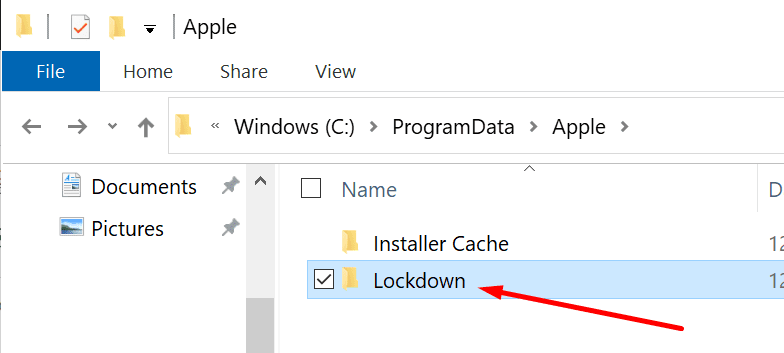
- Close iTunes and remove your iPhone from your PC.
- Navigate to C:\ProgramData\Apple\Lockdown.

- Open the folder and locate the iTunes lockdown folder.
- Delete all the files and folders but keep the Lockdown folder. Delete only the content, not the folder itself.
- Launch iTunes again and connect your iPhone. Try to back it up again.
Rename Old Backup Folders
This will help you to get rid of any potential conflicts between the old backup folders and the new one.
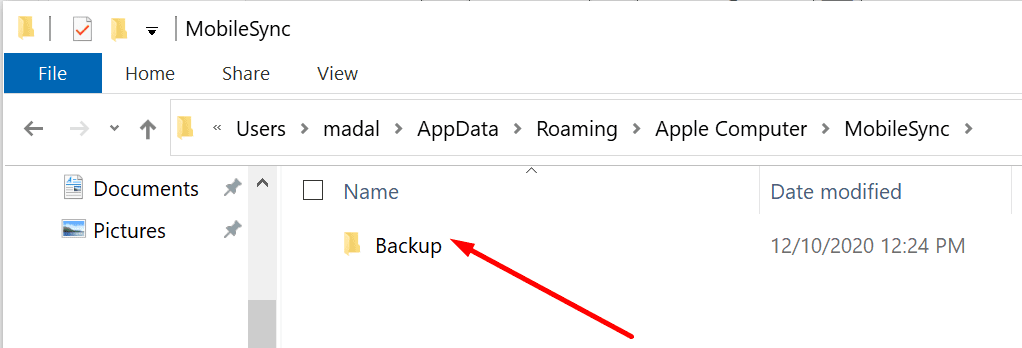
- Click on This PC and follow this path:
- C:\Users\YourUserName\AppData\Roaming\Apple Computer\MobileSync\Backup.
- Or C:\Users\YourUserName\Apple\MobileSync\Backup (if you installed iTunes from the Microsoft Store).

- Right-click on the backup folders and rename them adding old1, old2 at the end.
There you go, we hope one of these solutions worked for you.