Windows Update will provide a litany of error codes if it fails to download one or more updates. In this case, the error code 0x800f0922 seems to be connected to checking storage space or cache folders. In some cases, restarting Windows can clear cache files and allow Windows Update to work with slightly more memory to download updates.
But if that doesn’t work, here’s how to fix error code 0x800f0922 Windows 11 might throw at you at the Update screen.
Contents
Fix 1: Fix Error Code 0x800f0922 Windows 11 by Removing Large Files
In most cases, the error happens because your system ran out of storage space to keep the installation and temporary files. Once this occurs, chances are Windows will keep failing to download updates.
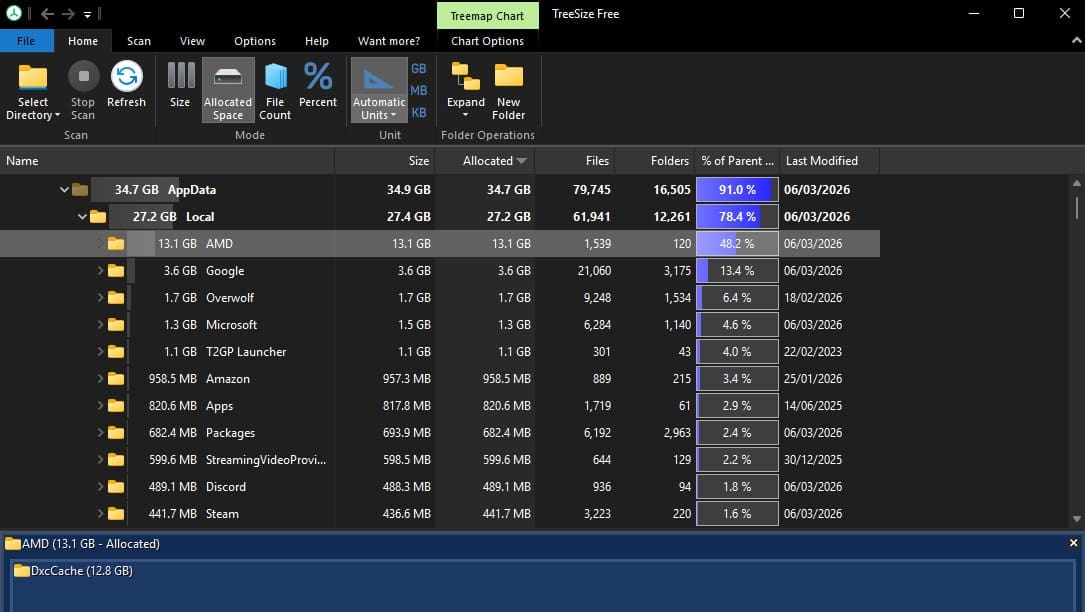
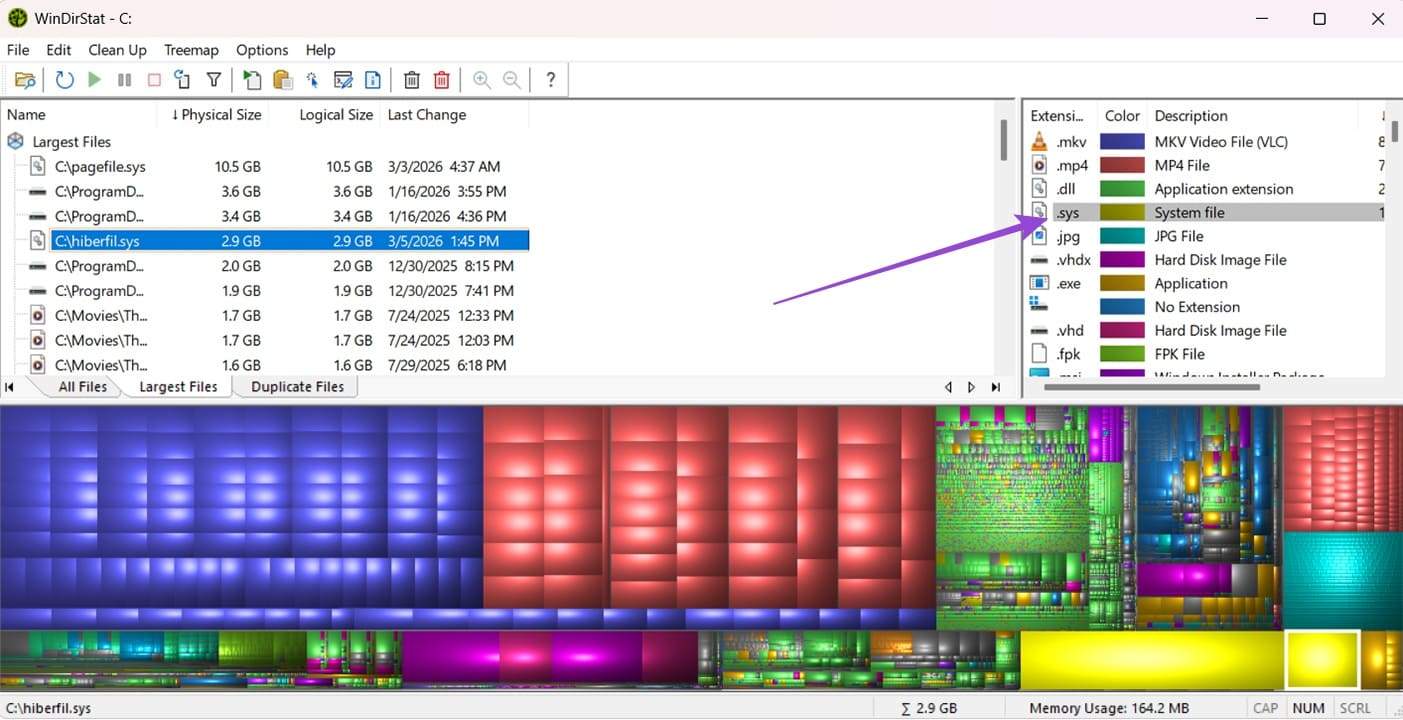
You can use a third-party program like WinDirStat or TreeSize to check which files are taking up the most space.
In some cases, you can directly remove large files, especially if they’re cache files (which will get regenerated after a restart anyway). This allows Windows Update to download and run the update before deleting the leftovers. In particular, graphics apps can have enormous DirectX cache files, which can be safely removed.
Otherwise, move out large files that you’ve downloaded (or move the Downloads folder to another disk drive entirely to prevent the problem in the future).
However, make sure to leave system files (.sys) alone, as they’re vital for the PC to work.
Clean Up Disk Space for Windows Update
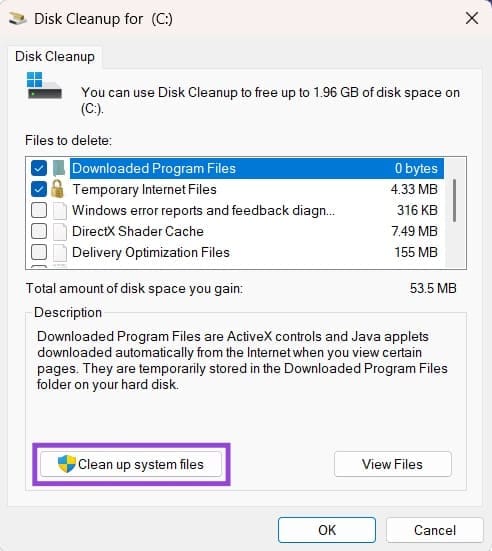
You can also use the built-in Storage Sense and Disk Cleanup options to remove cache files.
Step 1. Open Disk Cleanup from the search bar. You may need to select a drive to analyze, so choose the one where Windows is stored (usually C).
Step 2. Click on “Clean up system files.”
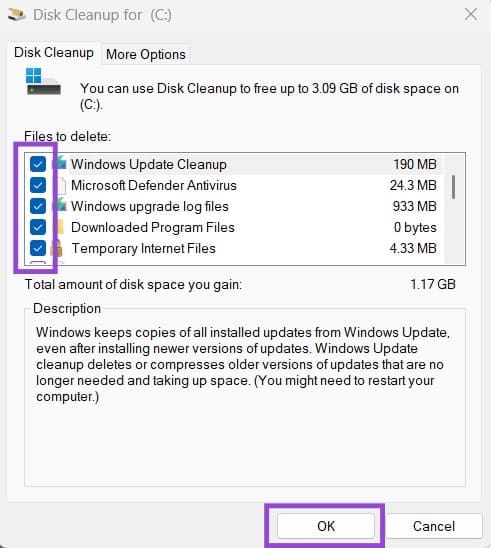
Step 3. Check all the boxes, particularly “Windows upgrade log files” and “Windows Update Cleanup.”
Step 4. Click on “OK” and wait for the process to finish.
Step 5. Go back to Windows Update and try to redownload the update.
Fix 2: How to Fix Error Code 0x800f0922 Windows 11 by Updating Windows Services
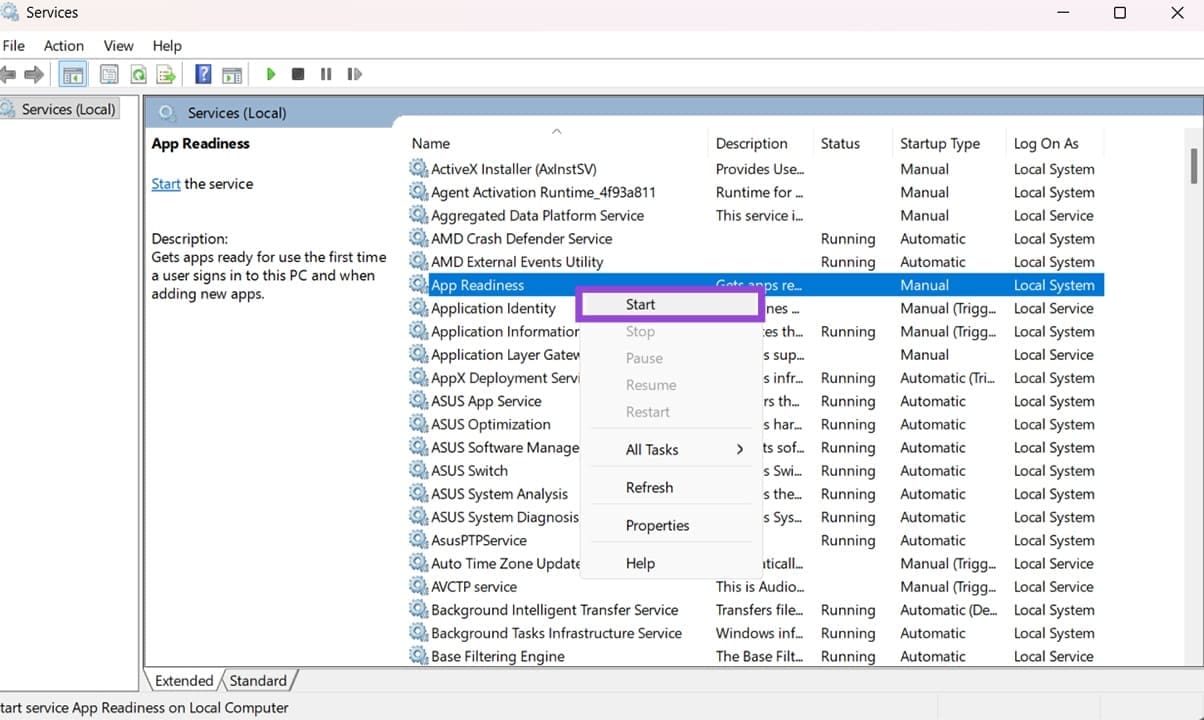
In some cases, various Windows services such as the Update and the App Readiness might turn off and cause the error. You’ll need to re-enable them manually.
Step 1. Hit “Win + R” to open the Run utility.
Step 2. Enter “services.msc” and hit “Enter.”
Step 3. Right-click on “App Readiness” and select “Start.”
Step 4. Scroll down and find Windows Update.
Step 5. Right-click on it and hit “Restart” if possible.
Step 6. Restart Windows.
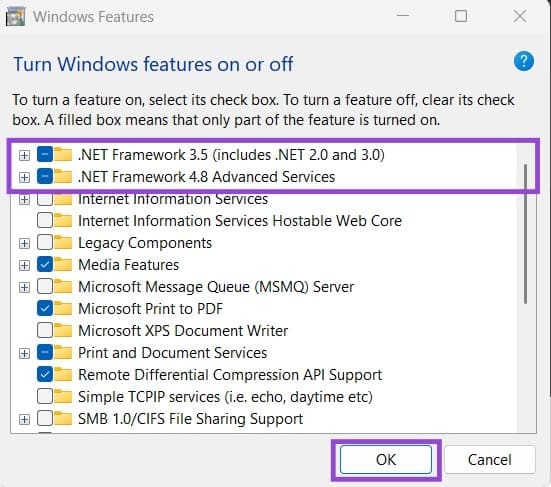
Fix 3: Check Additional Features and .NET Frameworks
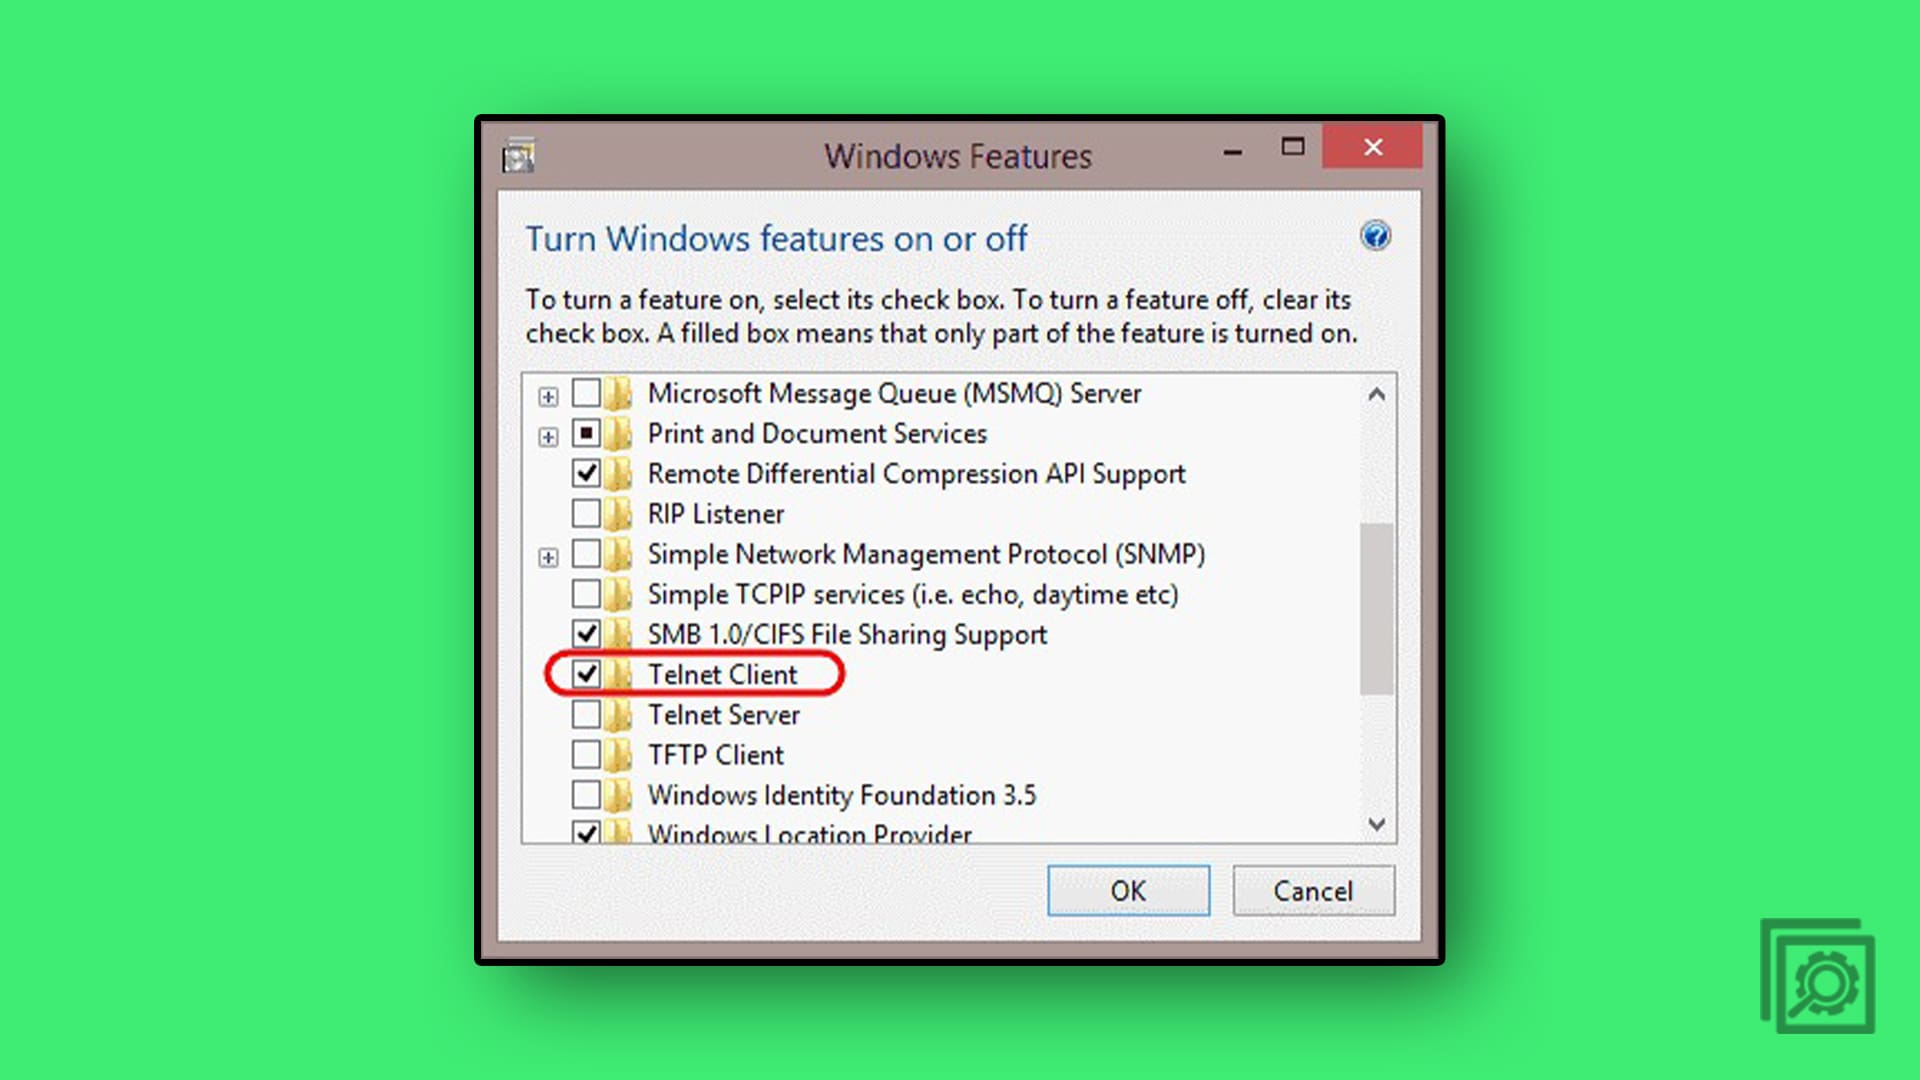
Additional features are needed for some updates, which can be accessed through a special built-in utility.
Step 1. Search “Optional Features” and open the result. You’ll be redirected to Settings.
Step 2. Click on “More Windows features.”

Step 3. Check both options for “NET Framework” at the top. If you see entries for “HyperV” or “Windows Sandbox,” uncheck them. Then click “OK.”
Fix 4: Redownload Edge and the Update Manually
Windows Update technically uses Edge to download them, so it can run into issues if you manage to completely remove it from the system. Then, you can try to download the update manually.
Step 1. Go to the Edge homepage on your browser and download it.
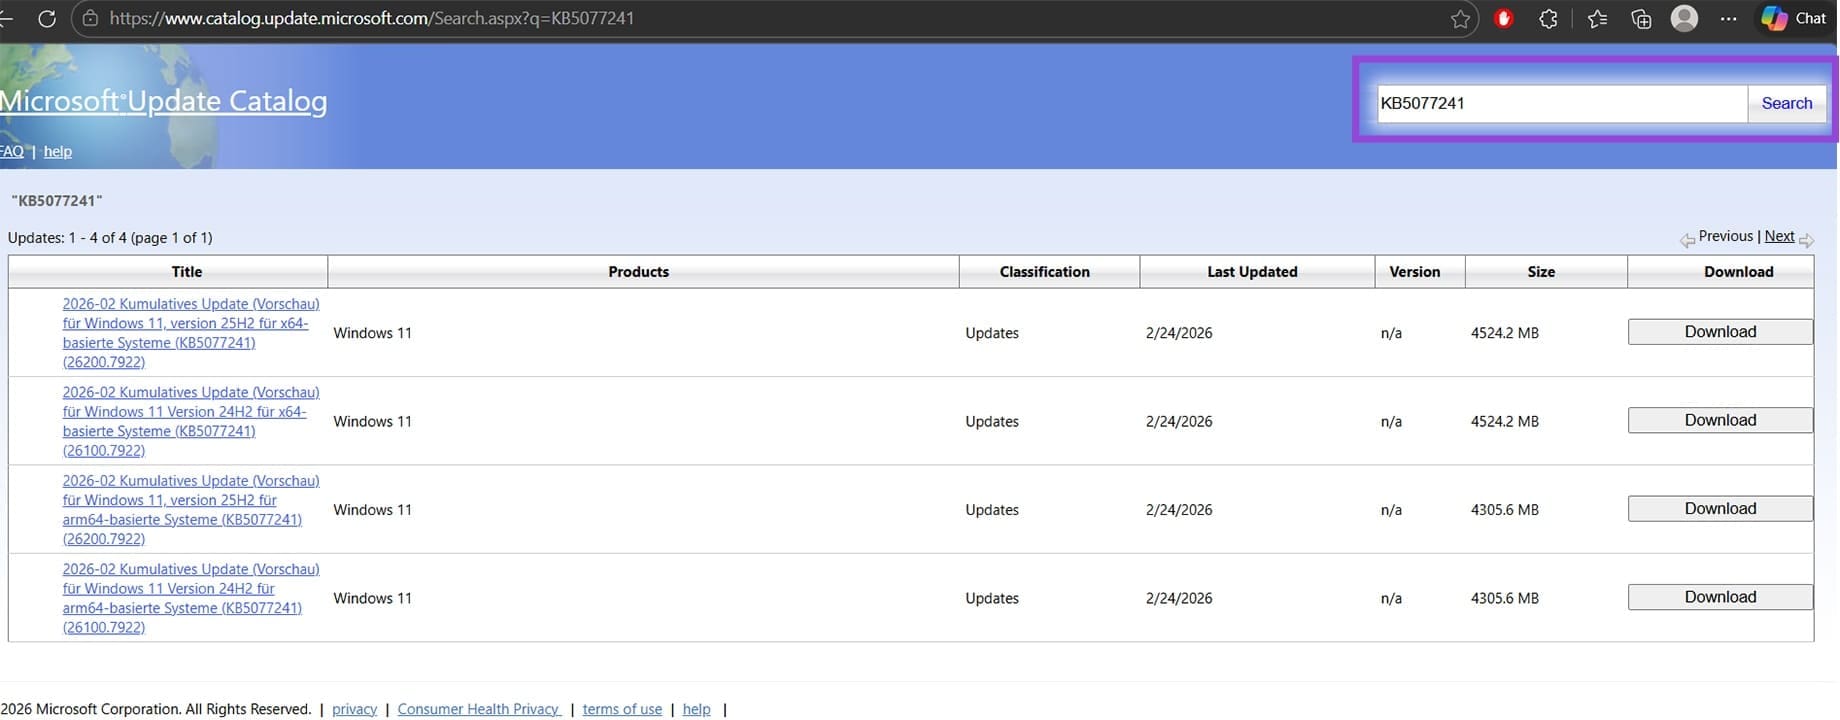
Step 2. Go to Windows Update and note the exact name of the update that failed to download.
Step 3. Open the browser and go to the Microsoft Update catalog site.
Step 4. In the search bar, enter the code of the update (KB followed by seven digits).
Step 5. Find the result for your specific Windows version and download it, then run the executable.