
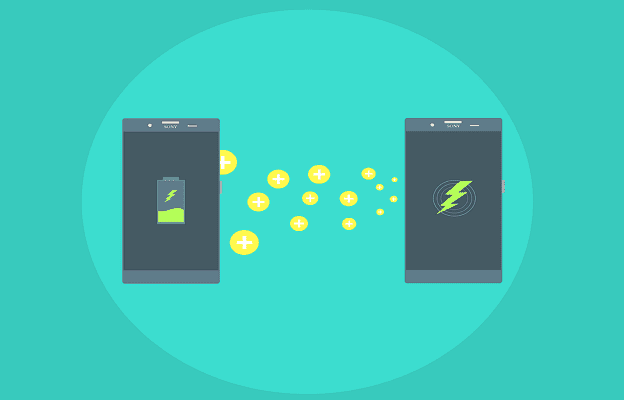
Many Android users complained their devices start reverse charging when they plug something into the micro-USB port. It really doesn’t matter if users plug in a pair of headphones, or a cable to connect their phones to a computer. The phone automatically selects Reverse Charging mode. If you’re experiencing similar issues, follow the steps below to solve the problem.
Contents
How to Turn Off Reverse Charging Mode on Android
Disable USB Audio Routing
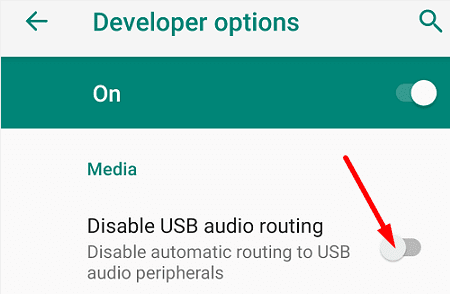
Many Android users solved this problem by disabling USB Audio Routing. To do that, you need to enable Developer Mode. Go to Settings, and use the search field to locate the “Disable USB audio routing” option. Then, simply toggle off the option.
Alternatively, you can also go to Settings, and select System, and then tap About Phone. Keep on tapping Build Number until the “You are now a Developer” message appears on the screen. Scroll down to Media, tap Disable USB Audio Routing, and turn off this feature.
Check Your Port and Cable
Check your phone port and make sure there’s no dirt or water in it. Use a dry tissue to clean the port. Visually inspect the USB cable and make sure it’s not frayed or damaged in any way. Use a different cable and check if you notice any improvements.
Update the OS and Hard Reset the Device
Make sure your device is running the latest Android OS version. Go to Settings, select System, and then tap System Update. Install the latest updates, restart your device and check if the issue persists. If this is the case, press the Power and Volume Up buttons at the same time to perform a hard reset.
Wipe Cache Partition
Start your phone in Recovery Mode and wipe the system cache partition. The cache partition is the place where your device stores temporary system files, such as old system updates.
- Turn your phone off.
- Boot into Recovery Mode.
- Note: Press and hold the Volume Down and Power buttons to enter Recovery Mode.
- Go to the Recovery Mode menu.
- Press the Power button to select Wipe Cache Partition.
- Wait until your device clears the system cache partition.
- Restart your phone.
Reset All Settings
Try resetting your phone settings and check if you notice any improvements. But first, don’t forget to back up your data in case anything goes wrong.
Navigate to Settings, tap System and Updates, and select Backup and restore to back up your data. Then go back to System and Updates, and select Reset settings. If you have multiple reset options, select the one that lets you keep your data (Reset all settings).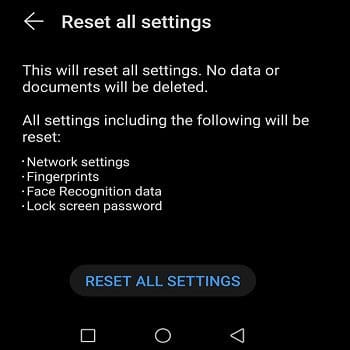
Restart your device and check the results. If the problem persists, go to an authorized repair center and have a specialist check your device.
Conclusion
If your Android device automatically starts reserve charging, disable USB Audio Routing. Then, clean your phone’s micro-USB port and use a different cable. Additionally, install the latest Android updates and perform a hard reset. If the issue persists, wipe the system cache partition, and reset all the settings making sure to keep your data.
Did you manage to solve the problem? Hit the comments below and let us know which solution worked for you.


actually the solution is so simple, you just need to change your battery, done
I also have this intermittently occurring, with nothing wrong with the charger or the cable. My solution is to use a portable charger (that is, one not connected into the mains electricity) to charge my phone. This works okay. Then use the mains charger to charge up the portable charger.
Tried all these, but issue not resolve for my s9, and it discharges battery twice as normal.
This didn’t work. My phone is brand new. I tried everything this article pointed out to the T! Don’t do it! Don’t waste your time!
Tried all of the above and this didn’t work. No idea why it started but it’s depleting the battery twice as fast as normal.