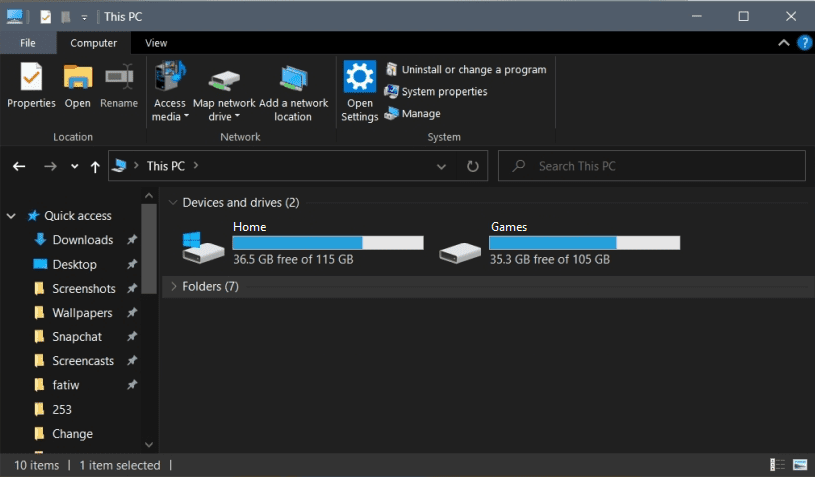
When browsing for files on your hard drive, Windows 10 shows the name and drive letter of your hard drives by default. Realistically though, to most users, the drive letters don’t mean anything and it’s much more helpful to prioritise showing the drive name.
For example, having your operating system drive named “Home (C:)” doesn’t really provide any benefit to the user over just calling it “Home”. Likewise, a backup drive, labelled “Backup (D:)” also doesn’t provide any more information to the user. When most users see labelled hard drives such as “Backup”, “Photos”, or “Games” they will be perfectly aware of what they use it for.
Tip: For users that are not particularly tech-savvy, hiding drive letters could potentially lead to some confusion. For example, if a user needs to follow a guide to find a file installed on the C: drive, and the drive letter has been hidden, this could confuse the user unnecessarily – consider this before hiding the letters, and make sure you remember which is which!
How to hide drive letters
For those users that want to hide the drive letters in Windows 10, the process is nice and simple. The first step is to open File Explorer, then to click on “Options” in the far right of the “View” tab in the top bar.

Tip: Alternatively, you can press the Windows key, type “File Explorer Options” and hit enter to open the same menu.
In the options menu, switch to the “View” tab, then scroll through the “Advanced settings”. You want to untick the checkbox for “Show drive letters” found roughly half-way down the list. Once you’ve unticked “Show drive letters” click “Apply”, then “OK” to save your change.