

Gmail notifications are really useful. They immediately let you know when a new email has landed in your inbox.
But if the notifications won’t disappear although you read all your messages, there’s clearly something wrong there. Especially if the Gmail app is always showing one unread notification.
This is really confusing. The worst part is that you may fail to notice you received new emails. You’ll probably think that’s just the glitchy notification that won’t go away.
Contents
How to Fix Gmail Notifications Not Going Away
Find All Unread Messages
Maybe you missed some of those emails, after all. To check if there any unread emails in your inbox, enter is:unread in the search bar and hit Enter. Gmail will list all the emails you haven’t opened yet.
To mark all of them as read, select them using the selection arrow (step 2 in the screenshot).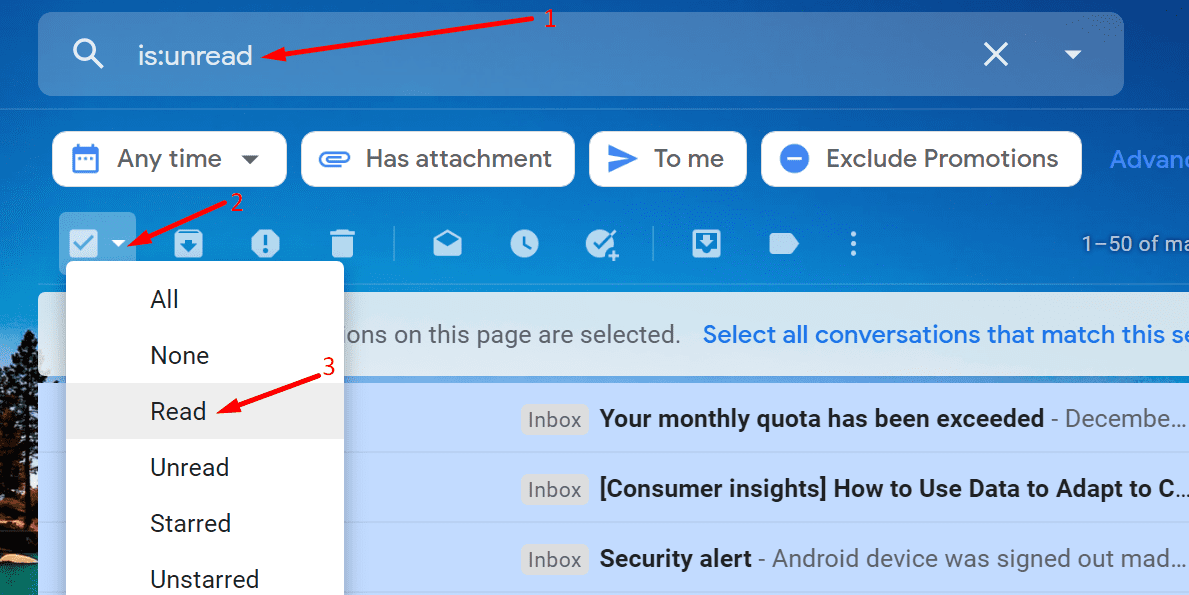
Then click on Read to mark all the messages as read. Check if the email notification is still there.
Don’t forget to empty your Trash and Spam folders as well.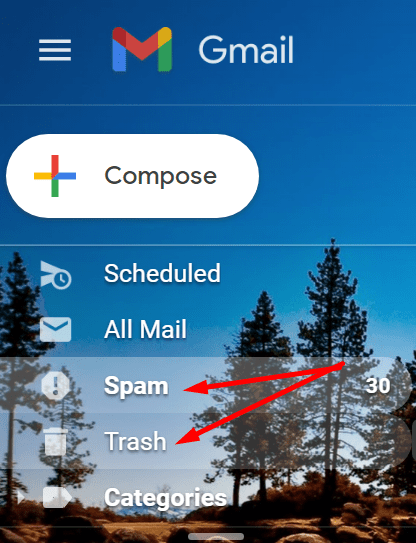
Delete all the emails stored in the respective folders. Some users reported that clearing the Trash folder solved the problem.
Disable Associated Email Accounts
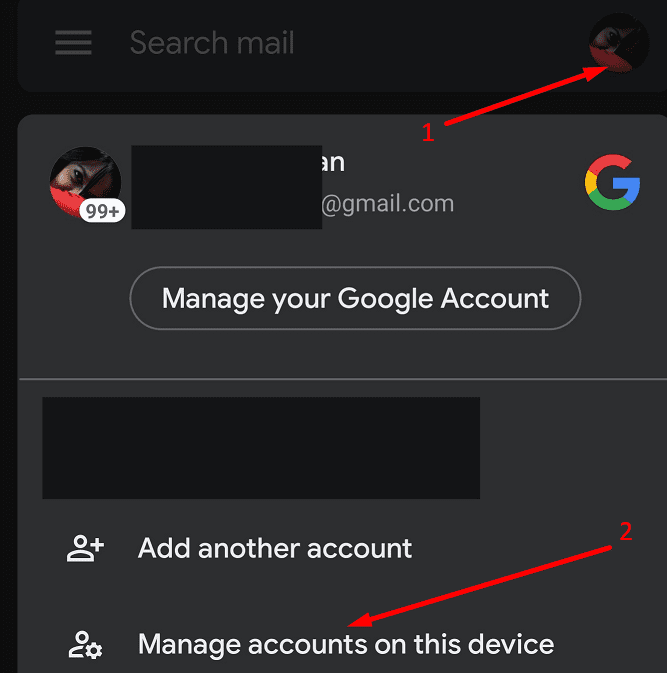
That stubborn notification may actually come from an email account associated with your account.
- On your mobile device, tap your profile picture. There an option called Manage accounts on this device.

- Turn off the blue switch associated with your Google account.
- There’s no need to remove that account at this stage, just disable it.
- Restart your device.
- Then re-enable the feature by bringing it again to a blue switch.
Check if the notification issue is gone. You can try to remove the secondary account is disabling it did not work. But if you really need the associated account, you can re-enable the option.
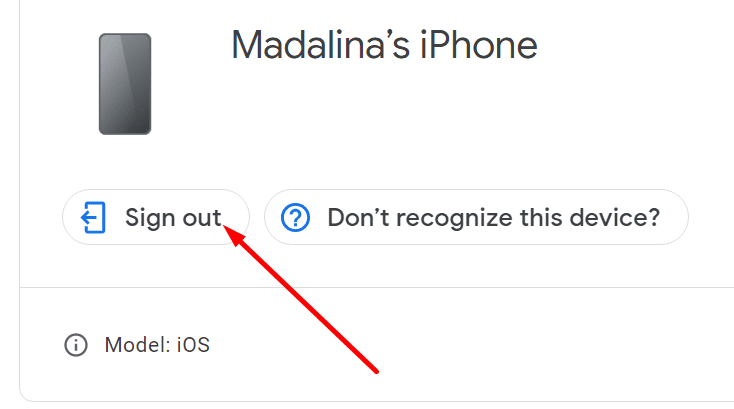
Remove Google Account From Other Devices
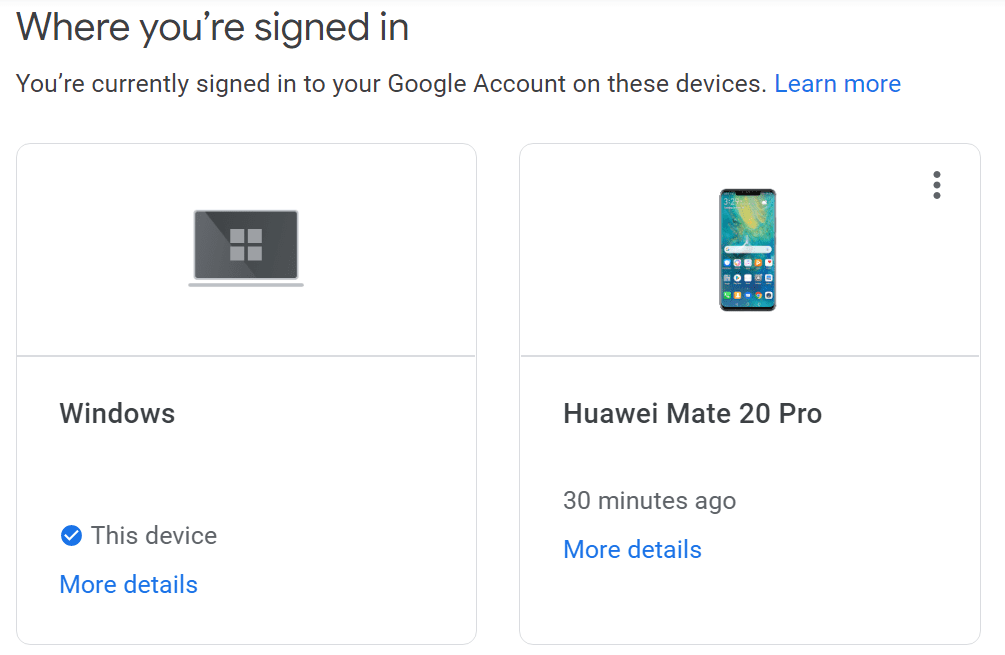
- Go to your Google account.
- Click on Security.
- Scroll down to Your devices.
- Then select Manage devices.
- You should now see the list of all the devices you’re using to sign in to your Google Account.

- Click on More details.
- Hit the Sign out button to sign out from all the other devices except for the device you’re currently on.

- Restart your device and check if the notification is still there.
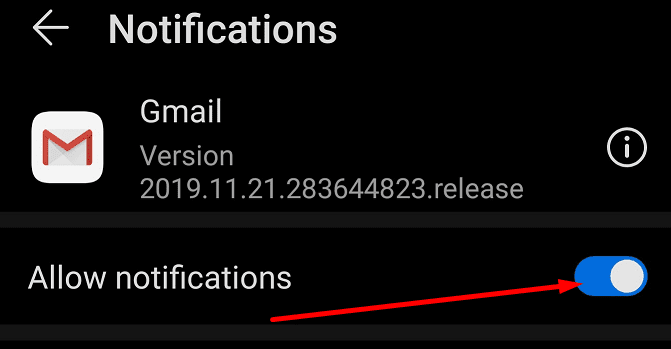
Disable and Re-Renable Gmail Notifications
Some users found a surprisingly simple solution to fix this issue. They simply turned off the notifications, only to re-enable them two minutes later.
- Go to Settings.
- Then select Apps and Notifications.
- Select Notifications.
- Next, locate and toggle Gmail off.

- Close Gmail. If your inbox is active on multiple devices, close Gmail on all those devices. Wait two minutes.
- Then launch Gmail again. The red dot should no longer be visible.
- Toggle Gmail back on in Notification settings. This unexpectedly simple workaround may work for some users.
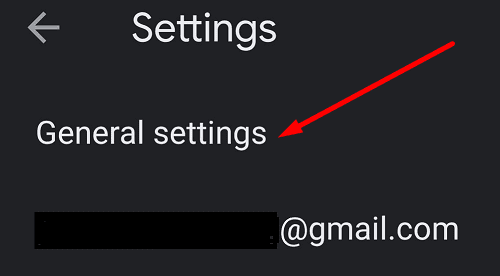
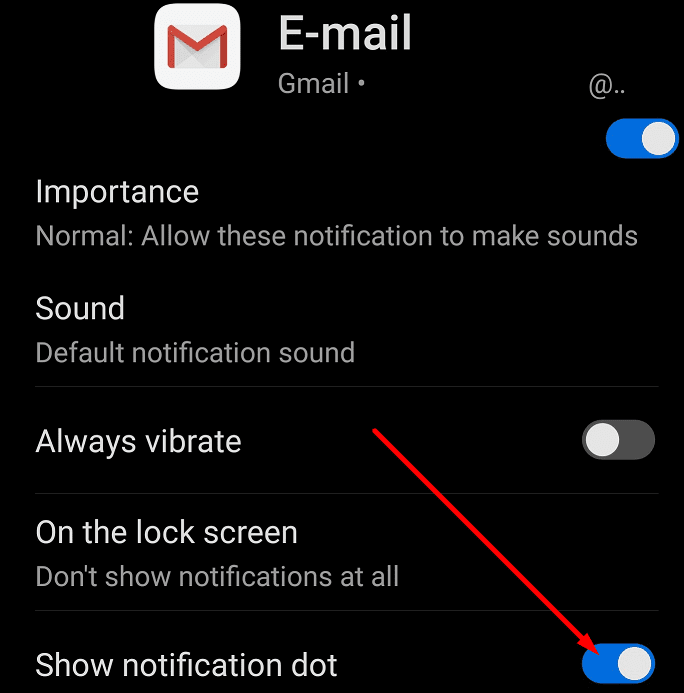
Disable the Notification Dot
- Launch the Gmail app.
- Tap the menu bar on the left.
- Scroll down to Settings.
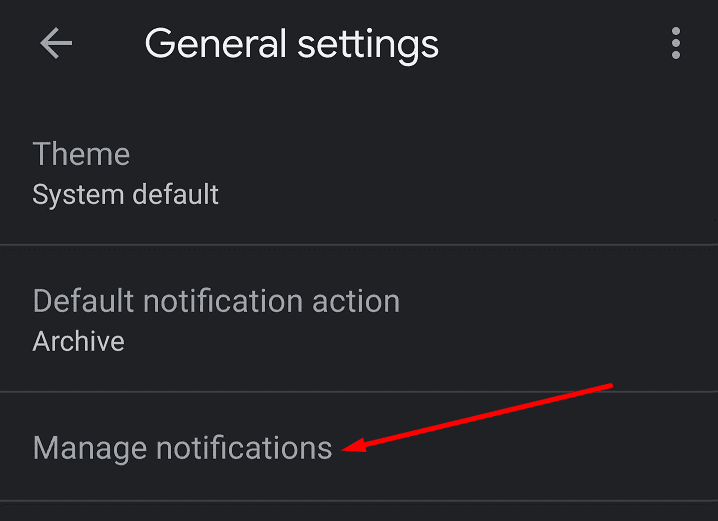
- Select General Settings.

- Then tap Manage notifications.

- Select your account.
- Select Email.
- Go to Advanced.

- Disable the Show notification dot option.

- Close the app. Restart your device.
- Open Gmail but keep the notification dot disabled for 10 or 15 minutes.
- You can then follow steps 1 – 19 again to re-enable the notification dot.

We hope one of these methods worked for you.


Technipages is Pro!
All valid info!
Thank You!????
I am not getting sound notifications from other Gmail emails only even though all sound notifications are on