You have so many emails in your inbox it’s not even funny. But the problem is that you can’t erase them because you know you’ll need them in the future. So unless you want to waste time looking through the sea of Emails in your inbox, you can try color-coding your emails, so they are easier to find.
To organize your email using colors, you’ll need to create labels, add filters, and add color. This may take a little of your time, but you’ll save even more time finding your emails when you’re done.
How to Create New Labels in Gmail
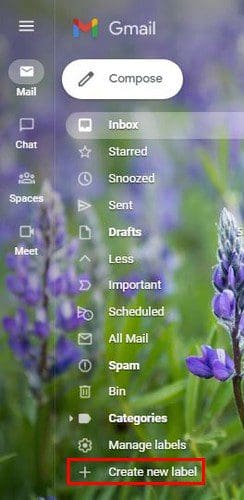
Gmail has gone through some changes over time. As a result, some options are not where they once were, while others are. For example, to create a label, you’ll need to go to the left of the inbox and click on the option that says Create a new label.
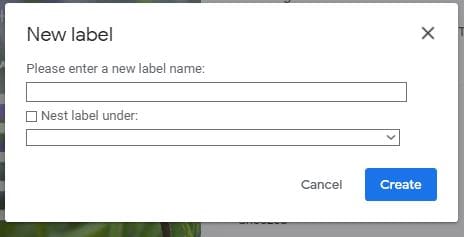
When the next box appears, you’ll need to give your label a name. Once you’re done, don’t forget to click on the blue Create button. Your new label will now be to the left of the inbox.
Once the labels are created, click on the Show search options icon. It’s the one at the end of the search bar. Add an email address in the From section when the new window appears. If you want to reduce the number of emails, even more, you can use the Has the words section. For example, if you want to add emails with the word screenshot, make sure to add it.
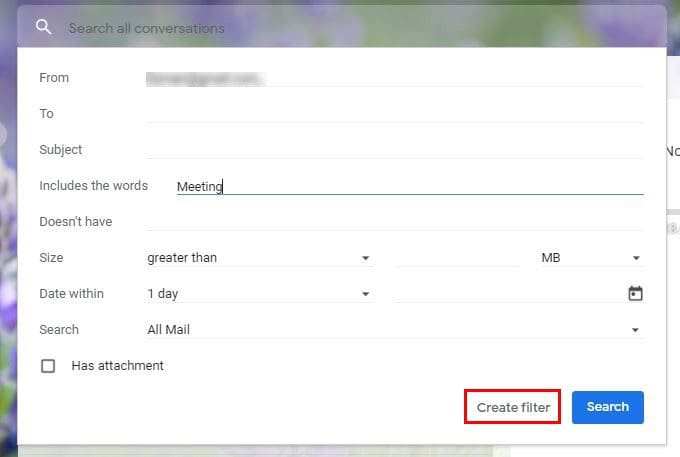
When all the information has been added, don’t forget to click on the Create Filter option and not the search button. You’ll see a new window with various options on the next page. Click on the dropdown menu for the Apply label option. Choose the label you recently created and finish by clicking on the blue create filter option at the bottom right.
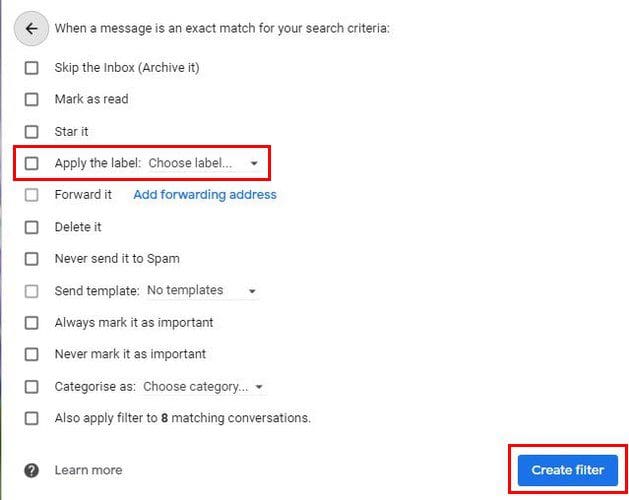
It’s also possible to add this filter to your already existing emails. The last option on the list gives you the option to apply the filter to the number of existing emails. Make sure you check the box for this if you think you’re going to need it.
Adding Some Color
Now, it’s time to add the color to easily identify your emails. Click on the dots to the right of the label of your interest. When the list of options appears, click on the Label Color option at the top. To the left of this option, you will see an A. After choosing your color, that A will show you the color you’ve chosen. By placing the cursor on this option, your choice of colors will appear.

If you ever want to change the color, simply follow these steps and choose your new color. The three dots will also show you other useful options such as removing the label, adding a sublabel, editing, or showing/hiding it from the message list.
If you choose to add a custom color, you can’t create your own color using any codes. You can only choose the options you see. As you choose your new color, you can see the changes applied in real-time. So, if you choose a color that wasn’t the right choice, you can immediately choose another color.

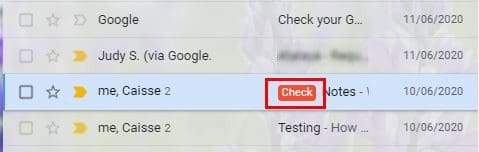
You have the option of choosing the background color and the text color. Click on the Apply button to save all your changes. That’s all there is to it. The next time you get an email from that sender with specific words, it will be labeled. If you chose to also apply the filter to already existing emails, they would have that specific label.
Conclusion
The process took some time, but you make up for the time in the end. The next time you get an email you want to be labeled, you won’t waste any time finding it. You can change the color at any time and even change the background and text color. The labels are also easy to erase if you ever stop needing them. How many labels do you think you’re going to need? Share your thoughts in the comments below, and don’t forget to share the article with others on social media.